Graceful Order

Organizing and Decorating the home.

  • Home
  • Organize
    • Kitchen
    • Laundry
    • Living Room
    • Bedrooms
    • Bathrooms
    • Closets
    • Office
    • Garage
    • Other
  • Decorate
    • Fall
    • Winter
    • Dining Room
    • Bedroom
    • Bathroom
    • Office
  • Clean
    • Kitchen
    • Bathrooms
  • Entertain
    • Christmas
    • Thanksgiving
    • Recipes
    • Reflect

Design Corner – Tray Chic

March 8, 2014 · by Maria · 3 Comments

I am starting a new section of the blog, titled: Decorate.

I am not a professional designer, but in my head, I totally am.  In that part of my head, I am also a skilled ballerina, so I don’t know if that tarnishes my credibility as a designer somewhat.

I love design books and design blogs, and I am constantly moving things around in my own home, until they are “just right”. I figured I would share some of the things that inspire me to not only organize my home, but decorate it.

Every couple of weeks, I will give a new decor suggestion. They will be easy to implement and hopefully will inspire you to continue adding touches to your home, so that your home feels like you.  So that your home makes you feel how you want to feel.

This week I will share one of my favorite decorating ideas…using trays to decorate, cradle, and anchor miscellaneous items.

Traditionally, trays are used for serving food items, coffee and tea.  I keep my nicer, sturdier trays for this purpose.

Decorating with trays

But I also use them all over the house.

Starting with the coffee table in our living room.

This is actually a cake platter from Ballard Designs, that I inverted to use as a tray.  It is perfect for this small table.

Decorating with trays

In the dining room, I have a gray, narrow ottoman (Target clearance…yay!) that is nice on its own, but needed some jazzing up.

Decorating with trays

This gold croco-embossed tray was perfect to anchor the plant that sits on the ottoman.

When you have a soft surface, such as an ottoman, adding a hard element, such as a tray or a stack of books can add structure and interest to an otherwise boring piece of furniture.

I also love the gray and gold contrast.

Decorating with trays

In the family room I have an enormous tray that I found at ZGallerie (also clearance).  It is also croco-embossed.

I should have named this post “The Clearance Crocodile”.  I see a running theme…

Trays are great for tables with miscellaneous items that may not go together.  Once they are on a tray, they look organized and somehow tied together.

This is a great idea if you collect perfumes or figurines.  If they are on a tray, they will look more like a cohesive collection, and more visually appealing.

Decorating with Trays

Lastly, on the kitchen table we have a tray that corrals our vitamins, napkins and ceramic trivets.  When I need to clear the table, I simply lift the tray, instead of all the items one-by-one.

Decorating with Trays

Trays can do more than carry a tea service, they can add beauty and function to a space.

So I encourage you to dust off the trays that you have tucked away in the garage, or in the very back of the china cabinet.

If you already use trays, please share with me how.  I love to hear from you!

I hope you enjoyed this new section of the blog!

In a few days, we will return to the Kitchen Organizing Series but for now, I hope that you enjoy your weekend, your family, your home.

– Maria

Filed Under: Decorate, Other · Tagged: Ballard Designs, Decorating, Trays

The Painted Smile

February 25, 2014 · by Maria · 9 Comments

I love the color green and had painted the boys bathroom a celery green about 7 years ago.  The paint held up well, but I was getting tired of the color and it started to look dull.  After years of cleaning the walls from little marks here and there, it was time to make a change.

Kid's Bathroom

I went into Sherwin Williams and took a whole bunch of their paint samples.  I brought them home and placed them side-by-side.  I then chose what I thought was the perfect shade of blue for my kids’ little bathroom.  I chose an appropriately named color, it’s called Watery.

Kid's Bathroom

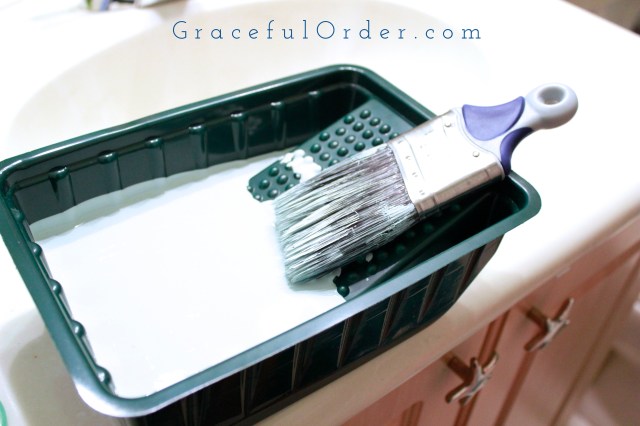
I also purchased some rollers, a tray and a paintbrush for edging.  I was excited to start!

As soon as I got home, I realized that I purchased the rollers thinking that we already had the roller frame (or poll) in our garage.  I couldn’t find it.

I was so anxious to start, that I decided to paint the bathroom with a paintbrush.  It seemed like an excellent idea at the time.  I would take advantage of my toddler’s nap time, and I would paint a room.  With only a small paintbrush.  Genius.  Interrupted.

Boy's Bathroom

I start painting the first wall and my arm starts to hurt.  I start losing steam ON THE FIRST WALL.  This isn’t good.  The small bathroom starts looking like Versailles from my vantage point.

Kid's Bathroom

I start convincing myself that the WHOLE bathroom didn’t actually need painting. I convince myself that only one wall should be painted.  I convince myself that the contrast between the blue and green is actually better than re-painting the whole bathroom. I convince myself that broccoli actually tastes better than cake.

But deep inside, I know the truth.  Cake tastes better than broccoli .  I must finish the project that I began.

Also, my husband was out-of-town and groveling for help, like with my Master Closet Remodel, wasn’t an option.  You can read about that “adventure” HERE.

Boy's Bathroom

So I kept going and positioned and re-positioned our ladder “cirque du soleil style” until I finished.  My paintbrush and I were done.  We did good.  We were rock stars.

I love the new color and I want to share some pictures with you.  What do you think?

Boys Bathroom

I did end up leaving a small nook at the very top, in the old green shade.  I added some blue pots to bring in some blue from the walls.  Not sure if I love the green nook yet.  Maybe I should go ahead and paint that too.  I have to wait and see.  Its a small area that I could paint it really fast, even with a paintbrush.

I hung up the towels and the shelves.  (The photograph does not accurately show the color. There is no natural light in this bathroom, making good photos a challenge.)

Kid's Bathroom

I purchased the towels from Frontgate and I love the quality.  They are holding up well and were a perfect match to the new color.

Kid's Bathroom

The shelf and a more accurate picture of the color.

Boy's Bathroom

Since my husband was out-of-town, he had no idea that I was doing this.

As soon as he got home, I proudly told him that I had painted the kids’ bathroom…using only a paintbrush.  No roller.

He smiled.

But I knew this smile.  I have given this smile before (Usually to my toddler, when he rushes in to tell me that he has “decorated” my bedroom.  I smile and excitedly say “YOU DID?!” and inside, I immediately start crying).

Boy's Bathroom

There is no joy in that smile.  Only fear.  My husband was afraid.

You see, according to him, he loves my decorating, but my DIY projects…

He says they either culminate in total success or…fear.  I think I have a pretty good batting ratio.  His opinion has no basis.  None that I would admit to.

Regardless, I was hopeful that he would love it as much as I did.  It would make the fact that I didn’t feel my right arm, almost worthwhile.

And…He loved it!  The smile was no longer forced.  He really liked it and so did the boys.

Even this boy.

By the way, that smile gets me every time.  Even when he uses toilet paper as streamers in my room.

Kid's Bathroom

Of course, I found the paint roller pole the next day.  God has a sense of humor.  I am sure of it.

– Maria

Filed Under: Bathroom, Bathrooms, Decorate, Top Navigation, Uncategorized · Tagged: Decorating bathrooms, Frontgate, Kids bathroom, Paint, Sherwin WIlliams

Baking Station Organization

February 20, 2014 · by Maria · 4 Comments

We are back in the kitchen!  This week we will focus on creating or organizing a baking station.

Designate an area in your kitchen to hold all of your baking supplies.  It is so much more fun to bake when everything is within reach!

You may remember that last year, I organized my baking drawer.  You can find that post HERE.

Baking Organization

Today, I want to show you more of my baking station.  I can’t keep everything in that one drawer, so I keep all of my dry baking supplies in the cabinet above the refrigerator.

Although I can reach this cabinet, it isn’t easy for me to do so.  Therefore, it is the perfect spot for large, clear containers, that allow me to see their contents from where I stand.

Here is a picture of the cabinet.  This cabinet is not always used to its fullest potential in some kitchens, but it is a great space and probably one of your widest cabinets.  Let’s put it to work!

Baking Organization

The containers that hold the flour and sugar are from a brand called Lock & Lock.  The ones that rest above them, are disposable Ziploc containers that I use to put away cookie cutters and baking chocolate.    Right next to them, is a bin full of more cookie cutters.

Baking Organization

On the other side, I have Tupperware brand containers that hold items such as, coconut, powdered sugar, sprinkles and brown sugar.

Baking Organization

My baking drawer, which I shared with you last year, holds smaller items that I use for cake and cupcake decorating.

Baking Organization

And measuring cups and spoons.  I have multiple sets of those, considering most recipes call for dry and wet ingredients (and because I like collecting them).

Baking Organization

I like these containers because the lid stays open and I can easily fit up to a 1 Cup measuring cup inside.  I also use the top of the opening to level the cup.  Love that!

I purchased them about 5 years ago on QVC but you can still find them HERE.

Baking Organization

Lastly, in the cabinet right below the baking cabinet, next to the refrigerator, I have a small turntable full of baking spices.

Towards the back, I keep tea that is not used on a daily basis.  They are also on a turntable.

Baking Organization

Since I cannot keep all my baking supplies in one drawer, or cabinet, I do keep them all in the same area of the kitchen.  Everything is within hands reach.

Baking Organization

Above the baking spices is a ceramic box, full of my favorite teas.

Tea Station

Lastly, when you are done, wake up a little kid on a saturday morning and get them to help you in the kitchen, before they even have time to comb their hair.

Baking Organization

Everyone looks better with a little flour in their hair.  But that’s just my opinion.

Until Next Time,

Maria 

Filed Under: Kitchen, Top Navigation · Tagged: Baking, Kitchen, Organization

Organizing Spices

February 13, 2014 · by Maria · 1 Comment

A new week of kitchen organization is here!

This week, we peek inside the kitchen cabinets and reveal the spices.  I think most of us have 30 spice jars and only regularly use about 5 of them.  It’s ok.  No one wants to drive to the grocery store just to pick up “old bay seasoning” for a special recipe.

The problem is having 3 jars of old bay seasoning because you keep buying it – since you can’t see the other 2 that you already purchased last year.  Unless, you have seafood boils on a weekly basis.  In that case, it’s ok.  It is also ok to invite me.  (I will organize your cabinets if you let me, as a trade-off).

I love the idea of having spices in the kitchen drawer, but I have such a limited amount of drawers in my kitchen, that I choose to keep my spices in my pantry cabinet.

My cabinets are really deep and narrow.  Initially, I purchased tiered spice shelves and placed them the traditional way.  That didn’t work since the cabinet was so narrow and I could only fit one set.  There were always spices behind the tier organizer that were not visible.  I tried placing the larger jars towards the back and labeling the very top of the lid since I could see the label and that helped.

Ultimately, I found the best way to organize my spices is by placing the tiers side-by-side against the cabinet wall.  I added a similar tiered divider to the amazon store and you can find it ” HERE “.  Of course, you can also find these almost anywhere else…Target, Walmart…

Organizing Spices

I try to buy the same brand of spices, not only because I like the brand, but it adds more of a uniform look.

I also organized the spices alphabetically.  It seems like a crazy thing to do at first and it will take you a little while the first time you do it, but it is worth it – I promise.

Finding spices is so much easier this way, especially when you lose a bit of the visibility of the spices towards the back of the cabinet.  On the other side of the tiers, I place larger, frequently used items like salt and pepper shakers.

I also left enough room for my hand to be able to reach back, without knocking things over.

Organizing Spices

On the wall of the cabinet, I placed an adhesive acrylic box for all the seasoning packets.  I usually only use a sprinkle or two, and then I’m wondering where to put the open packet.  This solves that problem.  I think I purchased it at Walmart.

Organizing Spices


I do recognize that this method will not work for everyone, but I wanted to share this space with all of you just in case you had a similar-sized cabinet.

We still have a couple of things to touch on before we are done with the kitchen – so until next time,

Spice up your organizing!  (I had to!),

Maria  

Filed Under: Kitchen, Top Navigation, Uncategorized · Tagged: cabinets, Kitchen, Organizing, spices

Organizing Pots and Pans

February 6, 2014 · by Maria · 4 Comments

Pots and pans…how many do you have?  How many do you need?

Organizing all your pots and pans

Well, I need a lot of them.  I cook almost everyday and I enjoy it.  I enjoy it even more when I have the right tools.

In this cabinet (albeit small) I have:

– 8 Skillets

– 4 Small Pots

– 2 Stock Pots

– 2 Medium Pots

– 1 Steamer Pot

That’s a total of 17 pots and pans!  Not including, 3 enamel dutch ovens (probably my favorite), that I store inside my oven.  One of the enamel pots sits on the stove at all times, since I use it often.  I also have cast iron pans which are my husband’s favorite, since they can go directly on the grill.

I am not a fan of purchasing full sets of pots and pans sold in a box, although it is a good way to figure out what you use most.  The box is usually a better value, but I end up giving away the pots that I don’t use…this negates the whole “better” value concept.  I prefer selecting quality pieces that I will use often and will last for many years.

This also means that I haven’t been able to buy all these pieces at once.  I purchase maybe one piece a year or my husband will give me one for my birthday or mother’s day.  I am one of those women that is REALLY excited to receive a stockpot as a gift.  Truly, it’s what I like.  Why should I ask for pearls when I really want something for the kitchen?

Not all of my cookware is expensive or that high of a quality.  I have yet to splurge on really good non-stick, so I have pans that do the job but won’t last for many years.  A good non-stick 12-14 inch pan is on my list though (honey, I know you don’t read all my posts, but I really hope you are reading this one!).  I get points for subtlety.

Back to how I organize the pans.  I get points for segues too.

I found a metal rack that could be used to store files or bakeware, and I placed it on its side.  It fit perfectly snug inside my cabinet, so each skillet rests safely in separate slots.

Organizing all your pots and pans

Next to the skillets, I have smaller sauce pots since the skillets take up a lot of room.  Behind the sauce pots, I have a large stockpot and a steamer pot.

Items that are rarely used are always towards the back.  The most used items get the best real estate.

Organizing all your pots and pans

In the top shelf, I place medium-sized pots.  I stack the ones that are alike.  Towards the back, I keep larger, less used deep skillets and pots.

Organizing all your pots and pans

This is the largest cabinet in my kitchen and that’s why I chose it for this purpose.  In some of the smaller corner cabinets, I keep specialty pots like pressure cookers, rice cookers and slow cookers.  I label the shelf to remind me of the item behind the front pot, since it’s not visible.

Organizing all your pots and pans

The labeled shelf…

Organizing all your pots and pans

I do suggest that before organizing all your pots, you take them out of your cabinets and make sure they deserve the space that they are taking up.  Obviously, I am not a minimalist when it comes to the kitchen, but I don’t keep things that I don’t use.

At this point, if I did get another non-stick skillet, I would have to get rid of a skillet.  Otherwise, this cabinet would turn into stainless steel mess.  It already does when I don’t put things back where they go.  And by “I”, I totally mean my husband.  Sorry Babe.

Do you enjoy cooking too?  Do you also get excited when kitchen catalogs arrive in the email?  Tell me that I’m not alone!

Filed Under: Kitchen, Top Navigation · Tagged: Kitchen, Kitchen and Dining, Kitchen Organization, Organization

The Graceful Refrigerator

January 28, 2014 · by Maria · 12 Comments

Let us begin our 2014 organizing series with the kitchen.  More specifically, the refrigerator.

Refrigerator Organization

I don’t know about you, but after the holidays my refrigerator is a mess.  During the holidays, I purchase food items that are either for Thanksgiving, Christmas breakfast and other holiday get togethers.  All these items, in addition to our regular shopping list, culminate in a messy refrigerator.

January is the perfect time to completely empty the refrigerator and start fresh!

The first thing you want to do is remove all sauces and dressings and place them on the counter.  This is a good opportunity to look at all the dates and toss out all the expired items.  Also, you may have opened a container of ricotta or sour cream, but you only needed half a cup…throw out what has since spoiled.

Refrigerator Organization

Once you have the bottles that you are keeping, wipe them clean and set aside.

Next, let’s remove the refrigerator shelves and bins (if they are removable) and soak them in a mixture of 2 tablespoons of baking soda and 1 quart of warm water.  You can use the same solution to wipe down the rest of the refrigerator.  Clean, dry and put all the bins back in place.

I use refrigerator coasters from “Fridge Coaster” and I had not changed them out in almost a year.  I used this opportunity to pick out a new set.  I love the pop of color that they add to the fridge!

Refrigerator Organization

This is also a good time to reposition your shelves to better suit your needs.  I adjust them fairly often to fit the products I buy.

Start placing all the items back in the refrigerator.  Designate a spot for everything.

Refrigerator Organization

And the side bins…

Refrigerator Organization

I keep clear OXO containers (without the lids) inside the pull out bins so that all the garlic and onion skins that collect at the bottom, can be easily cleaned up.  Also, any vegetable that has gone bad doesn’t seep all over my clean bin.

Refrigerator Organization

Lastly, the deli drawer.  My kids favorite and the only one that my toddler can reach.

I have clear bins in here as well to keep like-items in place.  Also, I have a bin for oily items like pesto and other spreads, that would otherwise leave oily circles inside the refrigerator.  I keep a larger clear bin in the top shelf for defrosting items.

You can find some bins in my amazon shop under “Refrigerator Bin” and Fridge Bin.  You can also find them at Bed Bath and Beyond.  Sometimes, even Homegoods will have a few.  Just make sure that you purchase bins that are refrigerator safe so that they don’t crack.

Refrigerator Organization

Having a clean and organized refrigerator has more advantages than just being visually appealing.  If you always put your butter in the same spot, then you know when you are out.  Even grocery shopping gets easier.

Stay tuned next week as we move on to the rest of the kitchen, and eventually the whole house!

Happy Organizing!

Maria 

Filed Under: Kitchen, Top Navigation · Tagged: Fridge, Fridge Coasters, Kitchen Organization, Refrigerator

Enjoying the Better Part

January 17, 2014 · by Maria · 4 Comments

Let me be the first blogger to welcome you to 2014!  Ok, maybe I am the last.

I have a perfect excuse though.  My husband surprised me with an apple computer for Christmas.  I was so excited to use it, I disconnected my old computer and connected the new shiny silver one.  I sat down to start blogging and then…I had no idea how to even open the internet browser.

GracefulOrder.com

Of course, it took me 20 minutes 2 minutes to figure out how to open the browser but the rest was a new world for me.  Basically, I have spent the last week getting acquainted with this computer and I know that I will love it, once I know how to use it.

About the blog…

I want to do something different this year with the blog.  I want to go room by room, so that we can organize our entire home together.  I didn’t want it to be a “challenge” where you feel pressure to keep up.  We have enough pressure from other venues.  Not here.  Nothing “graceful” about pressure.  I just want you to go at your pace and be inspired to start somewhere.  In a few days, we will start with the kitchen and then move into the rest of the home.

Graceful Order

2014!  My biggest resolution this year is to be Present.  I don’t want to be in a hamster wheel that keeps me from one event to the next, because I want to enjoy today.

I have two boys that still want to share every aspect of their days with me and I want to cherish that.  I want to be more organized so that I can be more spontaneous.  I want an organized kitchen so that I can be inspired to bake cookies and get flour everywhere with the boys.  I want an organized closet so that I can put things away quickly and I can get back to the things that matter.  I want more order so that I can enjoy the disorder.  Does that make any sense?

Of course, this means that I have to say “no” a lot more than I am used to because I am, without a doubt, a people pleaser.  I want to be liked, loved.  Don’t we all want that?  But when we say “yes” to too many things, we indirectly say “no” to others.  I don’t want to say “no” to spending time with the boys, with my husband.  I don’t want to say no to spending time with the Lord and even having some alone time.

And of course, spending time with my apple computer.  I seriously need to YouTube some tutorials (as soon as I find the YouTube icon).

So my resolution is simple but difficult for me to execute.  I want my focus to be on what I am saying “yes” to.  I intend to make memories.  I intend to take less pictures.  Is that a shocker?  It’s kind of crazy because I really see the importance of pictures, but I feel that I stay behind the camera way too much.  I want to create the moments and not worry as much about documenting them.  Here is one moment I had to document last week.  The boys playing at the park and my little one, who insisted on wearing his dino pajamas at 4 o’clock in the afternoon.

At the park

I want to let go of guilt.  I always feel like I am not doing enough.  For example, I scrapbook and I am always behind…like years behind.  Will the kids not know how much I love them if I don’t have pictures of every missing tooth and a journal entry about it?  Think about it.  I have like 1 album for my entire childhood…zero journaling…and I feel loved.

We always notice people who seem to do more than us.  I recently shared with a friend something that I read and impacted me.  “We compare our behind-the-scenes with others’ highlight reel”.  No one has it all.  We all fall short somewhere.  So you didn’t bake cookies with your kids this past Christmas.  So what?  There were lots of things that you did do.  So you didn’t work out as much as you would have liked last year.  Don’t let that disappointment keep you from believing in yourself this year.

One of my favorite bible stories is about Martha and Mary.  Jesus and his disciples stay at Martha’s home and she is consumed by working on being a good hostess while Mary (her sister) sits at Jesus feet listening to what he was saying.  Martha eventually complains that Mary is not helping her by saying “Lord, don’t you care that my sister has left me to do the work by myself? Tell her to help me!” and Jesus replies…“Martha, Martha,” the Lord answered, “you are worried and upset about many things, but few things are needed—or indeed only one.  Mary has chosen what is better, and it will not be taken away from her.”

When I first read that scripture I didn’t understand because I tend to be such a doer.  I used to think that her sister should help her and that way she wouldn’t be so stressed out.  But I was wrong.  This is not a story about how being busy is bad.  This is a story about priorities.  Martha is not wrong for serving food, she is not wrong for being a good hostess, she is wrong for being worried and upset over trivial things.  Her priority at that moment was incorrect.

If you have a choice between listening to words that feed your soul and arranging food perfectly on a platter….well…Mary certainly chose the better part.

So I want to remind myself to be more like Mary.

I will not eliminate taking pictures, or journaling, scrapbooking, cooking big meals or any other thoughtful thing that I do for my family and friends to show love.  I do want to eliminate the guilt.  The little voice that always says that I am not doing enough.  I will never be able to do it all, all the time.

I want to put the serving platter down and sit down and listen.  I want to be present.  I want to choose the better part.

And I wish the same for you!

Maria

Filed Under: Family, Reflect, Uncategorized · Tagged: New Year, Resolution

A New Year

December 30, 2013 · by Maria · 4 Comments

Almost 2014.  Wow!

The older we get, the faster time seems to pass.  Or maybe we are just more aware of the value of time?

Either way, it’s a new year.  New goals, dreams and opportunities to make memories.

In our family we start the year by eating together.  We end the year the same way…

I see a trend.

January 1st we always make the same meal.  Lentil soup and Spanish omelets.  They don’t seem to go together but somehow they work.  Spanish omelets are hearty and can stand alone.  Sometimes we serve it with a salad.  Lentil soup can also stand alone or you can serve white rice as a side.

A New Year

Since we purchase a Ham for Christmas Morning, I freeze the bone with some of the ham and I use it for my soup days later.  Here is the lentil soup.  Enough to feed the entire neighborhood that I live in.

Or just enough for my family.

A New Year

I usually make some sort of white cake as a dessert.  Either coconut cake or carrot cake.  This year it’s carrot cake.

As a refreshment, we serve white sangria.

A New Year

Basically, this is just another excuse to get everyone together.  We are all so busy that if we don’t schedule time for family, we don’t see each other.  It is important to make an effort, make traditions, make memories…

Start the year with family.

This year let’s spend more time with family.  Let’s extend more grace to others.  Let’s add that to the resolution list.

Happy 2014!

Maria

Filed Under: Christmas, Family, Other, Reflect, Uncategorized · Tagged: Home, Home Menu, Lentil, New Year, Soup, Tradition

Breakfast Scones

December 24, 2013 · by Maria · 2 Comments

I wanted to take the time to thank you all for your support of Graceful Order and for your comments, emails, suggestions…all of your time!

This blog has been so much more fun than I ever imagined and I look forward to a new year with new ideas to share with all of you!

Merry Christmas and I hope you enjoy this recipe for Cranberry Scones.  The recipe is from Ina Garten and I have modified it very little by adding extra sugar.  These scones are not super sweet, just sweet enough.

I usually make the dough ahead of time, I cut the scones and then freeze them in a single layer with instructions on the bag on how to bake them.  I make the drizzle right before I bake them.

Enjoy!

Chirstmas Scones

  • 4 cups plus 1/4 cup all-purpose flour
  • 1/2 cup sugar, plus additional for sprinkling
  • 2 tablespoons baking powder
  • 2 teaspoons kosher salt
  • 1 tablespoon grated orange zest
  • 3/4 pound cold unsalted butter, diced
  • 4 extra-large eggs, lightly beaten
  • 1 cup cold heavy cream
  • 1 cup dried cranberries
  • 1 egg beaten with 2 tablespoons water or milk, for egg wash
  • 1/2 cup confectioners’ sugar, plus 2 tablespoons
  • 4 teaspoons freshly squeezed orange juice

Preheat oven to 400 degrees.

In the bowl of an electric mixer fitted with a paddle attachment, mix 4 cups of flour, 1/2 cup sugar, the baking powder, salt and orange zest. Add the cold butter and mix at the lowest speed until the butter is the size of peas. Combine the eggs and heavy cream and, with the mixer on low speed, slowly pour into the flour and butter mixture. Mix until just blended. The dough will look lumpy! Combine the dried cranberries and 1/4 cup of flour, add to the dough, and mix on low speed until blended.

Dump the dough onto a well-floured surface and knead it into a ball. Flour your hands and a rolling pin and roll the dough 3/4-inch thick. You should see small bits of butter in the dough. Keep moving the dough on the floured board so it doesn’t stick. Flour a 3-inch round plain or fluted cutter and cut circles of dough. Place the scones on a baking pan lined with parchment paper. Collect the scraps neatly, roll them out, and cut more circles (or triangles).

Brush the tops of the scones with egg wash, sprinkle with sugar, and bake for 20 to 25 minutes, until the tops are browned and the insides are fully baked. The scones will be firm to the touch. Allow the scones to cool for 15 minutes and then whisk together the confectioners’ sugar and orange juice, and drizzle over the scones.  Enjoy!

Love you all!

Maria

Filed Under: Family, Recipes, Reflect · Tagged: Christmas, Christmas Breakfast, Cranberry Scones, Scone

Organizing Christmas Gifts

December 19, 2013 · by Maria · 3 Comments

I love everything about the holidays.

Except the long lines at the market, in the department stores and the post office.

I don’t know what it is about me and waiting in line.  I realize that no one likes waiting in line but…I could have a shopping cart full to the brim and when I see that there is a long line for checkout…I start to ask myself if I really need anything in the cart (besides my toddler).  🙂  Does this ever happen to you?

Now back to what I love.  Back to the merriness of Christmas.  Back to the beauty of giving.

Organizing Christmas Gifts

Back to how to avoid lines.  I avoid the lines by shopping way ahead of time and also shopping online.

I never shop during black Friday unless it is online.  With my fear of lines and crazy mobs at the mall, there is no way that I am leaving the house that day.  Visions of not finding a parking space and women fighting over the last special edition Barbie doll for their little girls, keep me home, with my doors locked.

I am all about saving money but I find that the deals online match most of the deals at the store and even if I get an extra 5% off on black Friday, it’s just not worth it to me.  I need a cup of lavender chamomile just thinking about it.

Whether you are courageous enough to shop black Friday or just shop another time…have you noticed that there is always that ONE gift that drives you back to the mall during Christmas week?

To avoid forgetting that one gift, I started keeping a Christmas list years ago that keeps me on track for purchases and holiday spending.  I created a similar list for all of you to use.

I do realize that I should have thought of this a couple of weeks ago but I have been wrapping gifts like a madwoman and I figured it would still be useful.  You can either use it to check off the gifts that you already purchased and/or see what you still need to buy.

Here is the list:

” Graceful Order Christmas Gift List Copy ”

I hope the list will be helpful!

I am excited about our Christmas breakfast and in a couple of days I will share with you my recipe for Cranberry Scones, so stay tuned!

Until then…Happy Wrapping!

Maria

Filed Under: Christmas, Decorate, Family, Other, Top Navigation, Uncategorized · Tagged: Christmas, Christmas and holiday season, Online shopping

Christmas Morning Breakfast

December 10, 2013 · by Maria · 14 Comments

Every Christmas morning we host a pajama breakfast at the house.  Our whole family knows that they are invited to swing by, eat and hang out.  They also know that they are welcome to come in their pajamas.  I really look forward to this day and so do the boys!

Christmas Breakfast

The menu is plentiful but the cooking is really simple because most of all, I want to enjoy my boys opening their gifts.

The night before, I prepare a couple of casseroles and I place them in the fridge.  These casseroles are supposed to be refrigerated so that the flavors can marry.  One is sweet and the other is savory.  As soon as I wake up, I turn on the oven, get the casseroles in there and turn on the timer.

My husband buys a ham the day before.  I prepare a fruit platter the night before.  I bake some cookies with the boys the day before and also bring them out to the table.

Christmas Baking

I prefer to buy or make everything myself because that way I know that all the food is laid out on the table and I don’t have to fuss with it again.  If I delegate the dishes, then I constantly have to come back to the table to re-arrange once the guests arrive, I have to re-heat dishes…you get the point.  It may sound easier to delegate but if your goal is to spend time with little kids…consider an easy menu that you can execute yourself.

My husband gets up really early and starts making the hot cocoa and grinding the coffee beans.

Christmas Cocoa

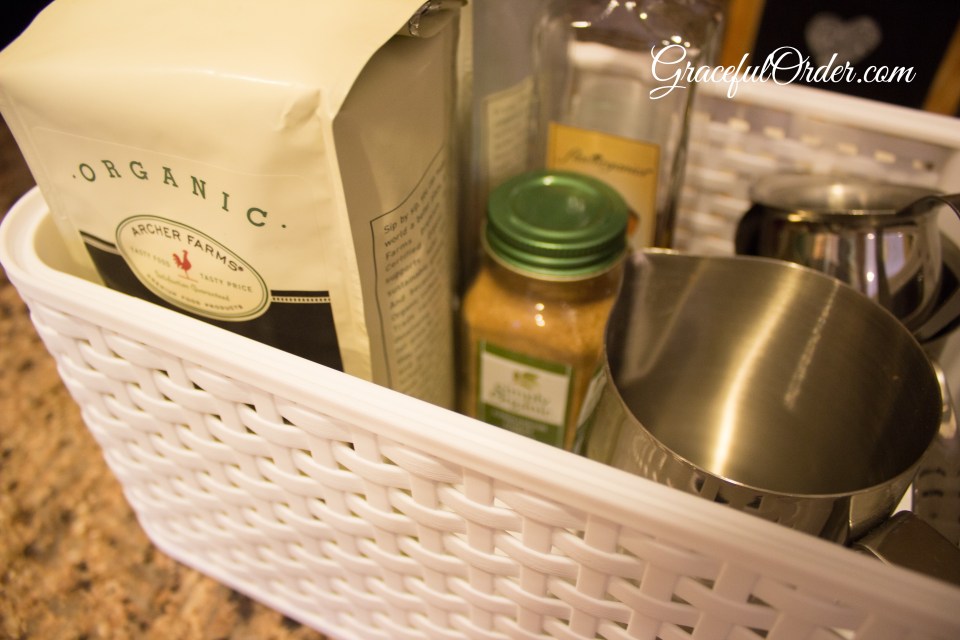
We put both the coffee and the hot cocoa in carafes so that they will stay hot for the duration of the breakfast.  Thermal carafes are a great investment because you wont have to re-heat or make more coffee.  These are pretty inexpensive and you can find them “here“.

I set up this coffee/cocoa station the night before.  Hence the dark cell phone picture!

Christmas Drinks

I sometimes make scones and freeze them in zipper bags with instructions for baking.  If I have any left in the freezer come Christmas morning, then I will bake them but only if I have extra time.  They are delish!  The ones below are cranberry scones.

Chirstmas Scones

Whatever you do, keep it simple.  Do as much as you can ahead of time.  Buy some of your items, they don’t all have to be homemade.  Have a checklist.  Have fun!  Whatever you do…don’t miss this!

These are my boys opening their gifts…this is my favorite part.  There is no scone that is yummier than this moment.

Christmas Gifts

I love you all!  Remember to give.  Remember to live.

Maria

“For to us a child is born, to us a son is given, and the government will be on his shoulders. And he will be called Wonderful Counselor, Mighty God, Everlasting Father, Prince of Peace, Isaiah 9:6”

Filed Under: Christmas, Decorate, Family, Other, Reflect, Top Navigation · Tagged: Casserole, Christmas, Christmas Breakfast, Food, Home, Home Menu

Organizing Thanksgiving

November 26, 2013 · by Maria · 4 Comments

Yes!  Even the holidays can and should be organized.

There is definitely an art to hosting a dinner party and my goal is to share some of my tips with you so that you can avoid some of the mistakes that I have made in the past.  These are general dinner party tips but you can definitely use them for Thanksgiving.

Our Thanksgiving table last year.  I buy items right after the holiday is over so that I can decorate the following year to my heart and wallets content!

Our Thanksgiving table last year. I buy items right after the holiday is over so that I can decorate the following year to my heart and wallets content!

Have you ever had a dinner party that 30 minutes before your guests arrive you are still running around like a chicken turkey with your head cut off?  The moment they arrive everything is done and you think to yourself…”if you only knew how crazy my day has been in order to pull this off!”  Basically, they are ready to start having fun and you are ready for a nap!

Situations like this make us want to avoid having people over.  It’s a shame to avoid dinner parties altogether considering that when we move into a home, when we buy new dishes…we think of entertaining.  We think of well orchestrated dinner parties.

In my case, I love to entertain and have dinner parties.  I have had great and not-so-great dinner parties and I can tell you that planning makes the difference!  The ones that were not so great had nothing to do with the people I invited.  I was just simply too exhausted to enjoy what I had worked hard to put together.  Nowadays, although I have small kids and I can’t entertain as often as I would like, I still have dinner parties.  And….

I plan.  I plan EVERYTHING.

I have a timeline of when things need to get done.  I even write down when to turn on the candles, when to start playing the music…those are the little things that you can easily forget to do until after the guests arrive.  Those are the things that really set the ambiance for your party.

Whether you like to be really fancy or really laid back, a list will make all your gatherings more enjoyable.  Whether its paper plates or fine china, a list will keep you on track and relaxed.

These little pumpkins were about 1.00 each on clearance.  I had to wait a whole year to use them but I loved the result!

These little ceramic pumpkins were about 1.00 each on clearance. I had to wait a whole year to use them but I loved the result!

The point of the to-do list is not to stress you out or to try to impress anyone with “the perfect dinner party”.  The point of the list is to help you relax and know that everything is on schedule and that you don’t need to be anxious about anything that you may be forgetting because everything is written down and accounted for.

The point of a dinner party is to have fun and to entertain but that is impossible if by the time that guests arrive you are so tired that you are counting the minutes until they leave and you can take off your shoes.

The truth is that even with a schedule, things happen.  Food can burn, overcook, things can spill.  However, these events are much less overwhelming when you have a schedule.

So with Thanksgiving around the corner, I wanted to share some printables with you to help make this dinner party go as smoothly as possible.

Let’s face it, Thanksgiving is the mother of all dinner parties!  There are so many dishes to keep track of that without a schedule I would not be able to pull it off AND have fun.

Even if you decide not to do a list for all your dinner parties, consider doing one for thanksgiving.

Some of the things that I suggest adding to your list are:

  • Setting the table one to two days before a dinner party.
  • Make ahead anything that can be so that you can check it off your list.
  • If a dish cannot be made ahead then perhaps do the chopping and prep-work ahead of time.
  • Take out all your servewear so that you can have all the platters handy on the day of the dinner party.
  • Print out or make copies of all the recipes you are using so that you can staple them together and have them handy on the day of the event.
  • Set up your coffee maker ahead of time so that you don’t have to fuss with it when your guests are there.  Just press a button and you can join your party once more.
  • Set up a coffee station or a platter with coffee cups, sugar, creamer and stirrers so that you can just bring the pot to the table along with all the necessities.
  • Have a couple of music playlists that you can play during parties.  A more soothing one for the dinner portion and a livelier one for later.
  • Try to wash dishes as you go to lessen the clean up later.
  • Empty your dishwasher so that you can fill it up after your dinner party is over.

The most important TIP is that you have fun.  I love lists but the list goes out the window the moment that my guests arrive.  It’s all about them at that point and about enjoying myself with them.

Your guests will feel it if you are stressed out, so relax.  If you are relaxed then they are relaxed.  If something burns, just move on…laugh about it.  No one really ever remembers what they ate or the table linen that was used…they remember how they felt.  People remember having fun, good conversation.  In the end, the list was never to assure that they had fun.  It was to assure that you could have fun with them.

Here you can find the lists that I made on JPEG format.  I hope they make your holiday a more enjoyable one!

THANKSGIVING MEAL PLANNER

THANKSGIVING MEAL PLANNER

THANKSGIVING GUEST LIST

THANKSGIVING GUEST LIST

THANKSGIVING COOKING SCHEDULE

THANKSGIVING COOKING SCHEDULE

Below you can find them in PDF Format :

THANKSGIVING MEAL PLANNER

THANKSGIVING GUEST LIST

THANKSGIVING COOKING SCHEDULE

Remember: Do as much as you can before your guests arrive but when they do (regardless of what still hasn’t been crossed off your list) throw this list away and just have fun!

With that being said, Have a Happy Thanksgiving and count all your blessings.  There are many.  You can make a list about that too!

Happy Organizing,

Maria

Filed Under: Decorate, Family, Other, Reflect, Thanksgiving, Top Navigation · Tagged: holiday, Home Menu, Organizing Thanksgiving, Thanksgiving, Time management

Organizing Little Girls’ Drawers

November 12, 2013 · by Maria · 5 Comments

Little Girls Drawers

You already know I had to ask a friend for help to pull this one off considering…I don’t have girls.

Yup, I live in a land of denim, fishing lures and camouflage.

I was so excited to organize this beautiful dresser that was full of color and cuteness.  So girlie!

So let’s see the dresser.

Little Girls Drawers

Inside the dresser you find the expected 525 hair clips and ribbons…

Little Girls Drawers

This is a great time to sort through the items and toss the ones that are broken and give away what is not used.

Little Girls Drawers

I decided to use clear acrylic organizers because I wanted to showcase all the color.  I also grouped the items by color to make it easy to find and to put away the bows.

Little Girls Drawers

Little Girls Drawers

I forgot to take before pictures of the rest of the drawers.  I get excited and forget to document things.

At least, here are the after pictures…

Little Girls Drawers

I used plastic spring-loaded dividers to keep all the clothing in it’s place.

You can find the OXO dividers HERE or at The Container Store.  I have also seen them at Bed Bath and Beyond.

Little Girls Drawers

Little Girls Drawers

Little Girls Drawers

This post is for all of you that asked me for organization tips for your princesses!

I hope you enjoyed the pictures and thank you all for your comments!

Until next time,

Happy Organizing!

Maria

Filed Under: Bedrooms, Closets, Top Navigation · Tagged: Children, Girls Organization, Organizing drawers

Makeup Drawer – Before and After

October 28, 2013 · by Maria · 4 Comments

Organizing your makeup

Anyone up for some before and after pictures??

A while back I shared where and how I store my makeup.  You can find that post “HERE“.

A friend of mine has a huge bathroom…with a huge vanity…with a huge drawer to store all her glam!  Is green the color of envy?  I forget.

Well, she was nice enough to let me photograph her space and share with all of you.

Here you will see the before and after of the drawer.  It’s really not a bad before picture and most of us would consider it an after shot.  Here it is:

Make-up Before and After

All we did was purchase some clear containers that had more customized dividers.  That way everything has a home!

Doesn’t it look better already?

Make-up Before and After

And the makeup lived happily ever after…THE END.

Make-up Before and After

Well not really…not until I say goodbye and ask you how you store your makeup.

Please share and as always,

Happy Organizing!

Maria

Filed Under: Bathrooms, Other, Top Navigation · Tagged: Cosmetics, drawer organization, Makeup, Organization

Organizing the Car Glove Box

October 16, 2013 · by Maria · 2 Comments

We all want a neat car.  That’s established.

I will be sharing tips during the next couple of days on how to keep your car free from clutter.

A good tip is to try to empty your car when you are pumping gas.  This is the best time to throw away all the little receipts that you accumulate during the week.

Another tip is to always take something with you (besides your purse) that needs to be thrown out or put away when you leave your car.  We shouldn’t have the attitude that if we can’t clean the whole thing we won’t do anything at all.  However little you do adds up and you have less to clean later on.

There are things that need to stay in the car.  There are certain papers that we need and I like having them all in one spot.  I do this with an accordion organizer.

Car Organization

I’m sure you already have one of these files lying around and you can put it to use right away!

I created the following tabs on mine:

All of our bank accounts  /  Roadside assistance info  /  Car Registration  /   Maps  /  Repairs  /  Car Insurance Info  /  Note pad

Glove Box Organization

In the bank account tabs I only file deposit slips that have no account information.  This way when I need to make a drive thru deposit (the only sensible way to deposit with kids) I have the slips ready to go.  I just grabbed a stack from each of our banks.

The car insurance cards I have in my wallet but I photocopy them and place the copy behind the “Insurance” tab.

In the “Repairs” tab I only keep receipts such as car battery purchases and the latest trip to the mechanic.

All the other tabs are self-explanatory.  I hope you liked this quick tip on organizing your car.  You can personalize this further by filing other items that you use often.

More to come later this week!

Happy Organzing!

Maria

Filed Under: Garage, Other, Top Navigation · Tagged: Automobile, Car Organization, Glove Box, Minivan

Organizing your Car

October 9, 2013 · by Maria · 3 Comments

The day you get your minivan.  The day that elation and depression collide.  A mixture of excitement and resignation.  Your chances of coolness have fled forever.

The thing is…they are SO darn practical that you knew it was a matter of time before you caved in.  You are a minivan owner.

So here she is…look at those clean lines…those curves…that exquisite paint job that screams…P-R-A-C-T-I-C-A-L-!!!!

Organizing Your Car

The truth is that I LOVE IT.  The storage that a minivan offers is unmatched.

How to keep it clean:  I try my very best to avoid eating in the car.  If we are in a time crunch or going on a longer trip we do it but we (we means only me) try to avoid it.  You have to be flexible with kids but I find that if I set the standard that we don’t eat in the car I end up having to clean up so much less.  Even with “the standard” I end up picking up a bowl of Cheerios from the backseat every two weeks.

Here is the interior.

Car Organization

I keep a box of wipes and an umbrella in the front.  The box of wipes fits on the floor in the very center and doesn’t move about because the umbrella keeps it put.

I basically don’t know what I did before baby wipes.  I don’t recall my life before them.  I am pretty sure I was miserable.

Car Organization

I put these hooks on the passenger seat to hold my purse while I drive.  I flip them towards the back when I need them to hold groceries.

I have spilled the contents of my bag so many times after breaking hard.  No more.  You can find the hook HERE if you want to try it out.

Organization

Here is my favorite feature of this minivan (Chrysler Town & Country).  The latch on the floor of the second row opens up and there is a world of storage under there.

Car Organization

On one side I keep a TON of grocery bags and a beach towel.   In the next picture you can see the full size of this storage space because here it is only half-open.

Car Organization

Here is the other side fully open.  Isn’t this space huge?!

There is a wagon full of toys, rain coats for the whole family, and large first aid kit under the tool kit (just in case I have to fully assemble my car roadside although I have AAA and a number of other roadside assistance programs).

Car Organization

Now the trunk.  I only keep a small stroller in there since my 2-year old rarely uses a stroller when we are out.

Car Organization

I line the bottom of the trunk with a blanket that I can wash if it gets dirty from a spill or dirt from when I buy plants.  If you ever need a blanket for the park, it’s there too.

Car Organization

On the side of the trunk I keep a roll of paper towel, cups, sunscreen and a bottle of water.  I realize that you shouldn’t drink water that has been sitting in a car getting hot but I like having one there just in case someone starts choking while they are assembling the car roadside.  Am I the only one that thinks of these things?

Don’t answer that.

Car Organization

So you have a minivan.  You now make a new commitment to yourself.  “I will never wear mom jeans.  The minivan is as low as I will go”

This gives you hope for the future.  You may still have a chance at being cool…when you are not driving, of course.

Share with me what else you store in your car.  Do you have a minivan?  Do you love it too?

Happy Organizing,

Maria

Filed Under: Garage, Other, Top Navigation · Tagged: Car Organization, Minivan, Organization, Vehicle

How to Fold T-shirts

September 26, 2013 · by Maria · 6 Comments

We are continuing the “how-to-fold” series and today we are folding t-shirts.

How to fold t-shirts

I fold all of our t-shirts in the way I am about to show you.  Today we will be focusing on men’s t-shirts.

Do drawers like this look familiar to you?

_MG_8802BLOG

I used to fold t-shirts this way and when my husband needed a shirt from the middle or bottom of the stack…the drawer looked like a category 5 storm had paid a visit.

The solution (and it really was a solution because its been years since I started the new folding method) was folding the t-shirts in fourths so that they all stand up in the drawer.

Here is how I fold a t-shirt.  I picked the most wrinkled one for the pictures.  I am smart like that.

_MG_8808BLOG

Then the other side.

_MG_8810BLOG

Then the bottom half.

_MG_8811BLOG

Up to this point we all pretty much fold the same.

The next step is what made all the difference.  Fold ONE more time.

_MG_8812BLOG

In this case we are folding a white t-shirt with no design.  If there were a design it would usually be visible after this last fold.  This helps if you have a lot of t-shirts and end up pulling out the wrong one.

Now here is a folding tool that I started using this year.  I.LOVE.IT.

_MG_8807BLOG

The one that I have is from the Container Store so you can find it there as well.  Right after I purchased it I found it for half the price on Amazon.  Apparently, I am smart like that too.

You can find it HERE.

It’s basically the same steps but the tool makes it go much faster and the lines are cleaner.  It helps to create a crisp fold like in the stores.  Minus the wrinkles.  No tool can help the wrinkles on this shirt.  Except an iron.  And I avoid those.

_MG_8814BLOG

Next side.

_MG_8815BLOG

Bottom.

_MG_8816BLOG

Not quite done.

_MG_8818BLOG

And then the last fold by hand so that you end up with fourths.

_MG_8819BLOG

And then do it another 127 times and fill up your drawers!

_MG_8826BLOG

Do the same for the under-shirts.

_MG_8827BLOG

I use the dividers above for some of my drawers.  You can find them HERE.

Some drawers I use no dividers at all like in the picture below.  My son benefits from the dividers but my husbands drawers do fine without them.

_MG_8736BLOG

This is one of my favorite organizing tips because it made such a difference in my home!  I also find that I can fit more shirts per drawer.

Just make sure that the shirts are not jammed in the drawer.  They should come out without much hassle.

Please share with me if you already do this or will you be re-doing some drawers this weekend?

Happy Organizing!

Maria

Filed Under: Closets, Other, Top Navigation · Tagged: Closet, Clothing, Folding, Organization, Shirt, T-shirt

Organizing Your Purse

September 19, 2013 · by Maria · 16 Comments

Here is my purse.  One of them.  Same story with you I’m sure.

Organize Your PURSE

Now inside my purse.

You will notice that I place all the items vertically.  I can easily see what is in there and easily pull out my wallet (not sure if that’s a good thing).

_MG_8790BLOG

Most women have more than one purse.  We usually rotate them and we do have a couple that are on the top of the rotation list.

I like this little purse.  However, it doesn’t have as many pockets as I would like.  Basically, no purse ever does.

So I purchased an inexpensive (as in under $5) little insert on Amazon.  You can find different colors HERE.

_MG_8798BLOG

Inside the insert I keep a diaper, a small wipes container, tissue, my wallet, a small bag that contains my sons epi-pen along with band-aids.

When I change purses I simply move the insert to the next purse.

Other contents in my purse are…

_MG_8795BLOG

A small bag that contains some makeup, breath mints (because I do care), a set of earrings and a bracelet.

I am notorious for leaving my home without jewelry on.  Then I freak out when I am already in the car but it’s too late to run back and accessorize.

I usually remember my earrings but you never know.  It’s good to know they are there just in case.

Makeup Bag

This is the BEST. IDEA. EVER.  I did this years ago and I absolutely love it.

My wallet used to be so thick with store reward cards.  I am a sucker for anything that gives me points and rewards.  It somehow eases the guilt of spending.  Knowing that after paying for 100 coffees at $5.00 a piece but I get a free muffin at the ends feels redemptive.  Go figure.

I hole-punched every single reward card and I put them into a key ring.  Voila!  No more cards stuffed in my wallet.  They are now easier to find too!

Reward Card Holder

Another clever product that I found at the container store was this key ring holder that grabs on to the side of your purse.

No more fishing for the keys in the bottom of the purse.

Key Holder

By the end of the week my purse gets a little messy with receipts but it is easy to tidy up with this system.

I try to throw away receipts as soon as I get home and place the ones that need to be filed in the office.  I also have a separate area of the purse insert where I keep current receipts that I may need for returns.

It also helps when changing purses that you empty the one you are storing.  Have you ever lost a receipt and had to pull out 4 purses and violently empty them onto your bed?  Be honest.  I have.

I hope you enjoyed this purse and that it inspires you to clean up your purse.  It’s an easy thing to do and you get immediate satisfaction!

Happy Organizing and please share with me your thoughts on organizing your purses!

Maria

Filed Under: Other, Top Navigation · Tagged: Accessories, Organization, Purse, Purse Organization, Wallet

Organizing Perfume and Cologne

September 16, 2013 · by Maria · 4 Comments

Perfume Organization

You already know that many of my organization ideas revolve around turntables.  Revolve…haha!

I need to learn to focus.

Well, this is no exception.  You may recall that I used turntables HERE in my linen closet and I use them in my kitchen as well.  I usually purchase white ones.  I added this stainless steel turntable to the Amazon store because I thought it was nicer for fancier items like perfumes.

{You can find the turntable HERE or in any home store that you frequent}

Here is the before picture.

_MG_8652BLOG

I love how the perfumes look on the turntable!  They are accessible and contained at the same time!

_MG_8656BLOG

Don’t leave the hubby out in the cold.  Lets work on his too!

_MG_8658BLOG

And here is the after.

_MG_8659BLOG

Simple idea but it really makes a difference!

Share with me where you store your perfume.  In the bathroom, closet or bedroom?

🙂

Maria

Filed Under: Bathrooms, Closets, Other, Top Navigation · Tagged: Cologne, Organization, Perfume, Turntable

Breaking out the Spray Paint

September 12, 2013 · by Maria · 5 Comments

Spray Paint Mirror4

This isn’t really a tutorial.  Its more like an idea that you can apply to many things in your home.

Before I was introduced to how easy it is to spray paint an object, I would purchase gold picture frames when I was tired of the silver.  I would want to replace weathered doorknobs instead of just repainting them and so on…

When you get into spray painting you start walking through your home (with a scary look in your eye) looking to see what’s next.  What will you transform next?

I think everyone should have basic colors like an Silver, Gold, Antique Bronze, White, Heirloom White and Black in their spray paint arsenal.

In this case I found the perfect mirror for my master closet but the color was wrong.

Spray Paint Mirror

So I took it outside with a can of Rust-Oleum Silver Metallic and lots of paper to cover the mirror.

Spray Paint Mirror2

And I went to TOWN!

Spray Paint Mirror3

As soon as it dried I put it up in my closet and it was perfect!

_MG_8643BLOG

So look around your home.  Is there a patio set that you have been wanting to replace but didn’t want to spend the money?  It is a lot less expensive to buy 3 cans of spray paint than a patio set.  Maybe you have grown tired of some picture frames; give them a refresher coat!

Door knobs also get lots of use and the finish starts to wear quickly.  I need to touch up mine real soon.

So that’s it!  Just an idea to break out the spray paint.  As you read this is there anything you have in mind to tackle next?

Until next time,

Maria

By the way, always spray paint in a well-ventilated area! 

Filed Under: Decorate, Other, Uncategorized · Tagged: Mirror, Paint, Picture frame

Master Closet Organization

September 9, 2013 · by Maria · 33 Comments

Master Closet Organization

Getting shelving installed in the master closets has been on the “honey-do-list” since we moved in 9 years ago.

In the meantime, I had a mix-matched “system” of shelves that were on clearance at some point and I tried to do the best with what I had.

Earlier this month, we finally gave ourselves the green light to move forward with my closet.  My husbands closet will wait a bit.

Here is a before picture.

Master Closet Organization

The shelves were dark and made the space look smaller and as you can see I didn’t have enough shelves for my things.  It was organized chaos.  Nothing “Graceful” going on in there!

Master Closet Organization

I got everything out of the closet.  The perfect opportunity to get rid of items that needed to be tossed or donated.  Needless to say my room was a mess for days.

Master Closet Organization

I knew I wanted to paint the closet walls since I had chosen white cabinetry.  My husband tried to “sell” me on the idea that we should leave it white.  He is smart and avoids having to pull out the big ladder.

I told him not to worry for one minute.  I would paint the closet all by myself.  ALL. BY. MYSELF.

So he helped me by patching up the holes in the closet, which were many.

Master Closet Organization

As soon as that dried, I happily embarked on my painting project!

The color that I chose was Behr’s Graceful Gray.  It really was my favorite gray and the name was a total coincidence!

Master Closet Organization

I have painted walls on my own before so I wasn’t at all intimidated.  I painted the bottom of the wall and then pulled out the ladder and started on the trim.

And then…I ran out of steam with two walls left.

So I did what any sensible woman with a good amount of self-respect does.   I walked into the kitchen and sighed (really loudly) for my husband to hear and he immediately turned around and said “are you done already?!”

And that’s when I whined…ALOT.  I am not above whining.

Master Closet Organization

And it worked.  He loves me.  That man loves me.

Master Closet Organization

I kept doing the trim but he helped me with the roller which was great because my arms were hurting so much!  So we were done in no time.

We just waited until the next morning when the cabinetry was scheduled to be installed.  I couldn’t wait!

Master Closet Organization

I was so happy to see it come together!

Master Closet Organization

I left a big space on top of the small dresser (from IKEA that we had previously to the install) so that I could add a big mirror and bring a little charm to the closet!

The dresser looked like part of the cabinetry that had just been installed.  I was so happy that it was a perfect match!

Master Closet Organization

I found this little tray for rings and I thought it was perfect.

Master Closet Organization

And it looked great alongside the little plant from IKEA.

Master Closet Organization

Time to add the clothing!

Master Closet Organization

I added them in a color coordinated manner which is how I had the closet before.  It takes a while to do initially but it makes the closet look so much better and its easier to find what you need.

All my hangers are from Crate and Barrel.  I am not a fan of felt hangers.  I prefer smooth hangers so that clothing slides off easily.  These are slim, plastic and really inexpensive.

Master Closet Organization

Shoes that were rarely worn I placed in these boxes from Target.  They are from the Threshold line.

Master Closet Organization

The rest of my shoes are in the very center of the closet.

Master Closet Organization

I did have to get rid of some of my shoes in order for them to fit but it pushed me to purge items that had been taking up space in my closet for years!

Am I the only one whose feet have grown after having kids?  I used to be a size 7 and now I am a 7 1/2.

Master Closet Organization

I wanted a chair or a bench to sit on while I put on my shoes and this one was large and small enough for the space.  Also, it is extremely light-weight and easy to move about.

Master Closet Organization

In the top I have a couple of bins.  I labeled the shelf instead of the bin.

Master Closet Organization

One has belts.

Master Closet Organization

Small scarves or fabric belts.

Master Closet Organization

My purses also have their own spot.

Master Closet Organization

I folded over some of them in order to fit more per shelf.

Master Closet Organization

I now have a belt rack attached to the cabinet.

Master Closet Organization

This frame was definitely the finishing touch.  I had it for years tucked away behind a couch and I spray painted the frame to match the rest of the closet.

The quote says “One shoe can change your life” by Cinderella.  Shakespeare didn’t have any shoe quotes.

Master Closet Organization

In the other end of the closet, I put away boots, chunky scarves…and other things that Miamians buy just for looks.  🙂

Master Closet Organization

That’s the closet!  I am so happy with it!  I waited to have it for so long and now I am that much more appreciative for it!

My husbands closet is next.

I think he should leave it white.

So what do you all think?  Share with me your thoughts on the master closet…

Happy Organizing,

Maria

Filed Under: Bedrooms, Closets, Top Navigation · Tagged: Closet, Clothing, Home, ikea, master bedroom, master closet, Organization, Paint, Shoes

Narrow Linen Closet Organization

September 2, 2013 · by Maria · 3 Comments

Can you handle one more linen closet?  It’s my third post on linen closets and I probably won’t be doing one for a while.  I will define “while” at a later date.

_MG_8391BLOGCOVER

I really love to look at organized linen closets.  You can find the other two posts on linen closets {here} and {here} if you missed them.

Remember a while back I shared with you all that I was working on organizing a beautiful home and will be working on that home for quite a while.  I also will have to define “while” at a later date.  This home is huge!  Probably 3 times the size of mine so I will be working on it for a long time.

Well, I already shared with you the finished pantry at this home.  You can find it {here} if you missed it.  Last week I worked on a narrow but very tall linen closet that is adjacent to their laundry room.

Here is the before picture.  Actually, I had already removed many things before I realized I didn’t take a picture.

_MG_8332BLOG

I used two types of baskets to organize this closet.  This is one of the baskets.  It is from the Threshold brand at Target and I love almost everything that brand puts on the shelf!  These baskets come in different sizes.  Aren’t they beautiful?

_MG_8333BLOG

The other baskets are the BENTO boxes which you know I use quite a bit in my home as well.  They are great for corralling smaller items.

_MG_8335BLOG

In the baskets without dividers I placed light bulbs.

_MG_8341BLOG

Surge protectors, flashlights and extra outlets.

_MG_8340BLOG

In the baskets with the built-in dividers I  placed batteries.

_MG_8339BLOG

Medicines.  One for children’s and one for adults.

_MG_8363BLOG

In the very top I put the largest size baskets.  One is full of rain coats and the other travel gear for the kids.

_MG_8390BLOG

Here are all the smaller baskets back in the closet.

_MG_8389BLOG

And the rest of the other boxes that hold band-aids and sunscreen.

_MG_8391BLOG

Here is the after shot!

_MG_8387BLOG

Side to side for drama.  I’m all about the drama!

_MG_8332BLOG      _MG_8387BLOG

I like sharing different ideas of items that you can store inside linen closets besides the obvious.

As always, I look forward to hearing from you so please share your ideas as well!

Happy Organizing!

Maria

Filed Under: Closets, Top Navigation · Tagged: Basket, Closet, Linen, Linen Closet Organization, Organization

How to Fold Towels

August 29, 2013 · by Maria · 1 Comment

That sounds kinda silly right?  I mean we all know how to fold a towel quickly and put it away but don’t you love the way they fold them in the department stores?  Beautiful white towels with no seams visible…Sigh…

_MG_8377BLOGCOVER

It’s actually pretty easy to fold them like they do in the stores and they look so nice that its worth the extra step.

First, you lay out the towel.  I actually just hold the towel under my chin while I fold but that series of pictures was not flattering AT ALL.  I opted for the couch approach.

I always have your best interest at heart.

_MG_8373BLOG

Then fold one side towards the middle.

_MG_8374BLOG

Then the other side towards the middle.

_MG_8375BLOG

Then fold in half.

_MG_8376BLOG

If it’s a small towel then you are done.  If it’s a bath towel, give it one more fold.

_MG_8377BLOG

You are done!  The department stores have nothing on you.  Except a full staff to keep things tidy of course…

_MG_8371BLOG

I want to start doing some mid-week short posts on simple ideas that you can implement right away.  Last week I did the one on “how to fold your sheets” which you can find here.

What do think about that idea?  Are you enjoying these shorter posts as well?

Until next week!  Happy Folding!

Maria 

Filed Under: Bathrooms, Decorate, Top Navigation · Tagged: Bathroom, Folding, Laundry, Towel, Towels

Organizing under the Kitchen Sink

August 26, 2013 · by Maria · 11 Comments

Everything but the kitchen sink.  That’s my motto for organizing under the kitchen sink.  As you already know, I do not keep any cleaning products under the sinks to avoid my curious toddler from spraying his face with a cleaner.  Although I am purchasing green cleaners, they aren’t exactly supposed to be gargled so I still try to keep them away from his reach.

So this is what my cabinet looks like.  In order to photograph the items that were tucked away, I took them out of the cabinet to give you a closer look.

_MG_8438BLOG

I am using every inch of space.  In the very back I have a ceramic crock that holds all my sieves and giant spatulas.  They used to be in my drawers taking up premium space but they were seldom used and so cumbersome!

I use all those sieves for different purposes, some for straining stock and others for sifting flour.  The point is, I need them all.  I just don’t need them often.  The crock was a good solution.

_MG_8453BLOG

All my cutting boards are placed inside a tiered file holder that is meant for office use.  I love how I can see them all and they are easy to pull out since they are separated by the built-in dividers.

You probably already have one of these that you are not using lying around the house.

_MG_8451BLOG

I tuck the boards into the very edge of the cabinet.

_MG_8458BLOG

On one side of the cabinet I have a pull-out plastic drawer that is full of kitchen towels, aprons, garbage bags and small zipper bags.

_MG_8454BLOG

On the other side of the cabinet (right under the garbage disposal) is a wire divider that I use to place all my glass food containers.  I switched to glass years ago to avoid having to worry about all the chemicals that were possibly inside some of the plastic ones.  I still don’t mind plastic for food items that don’t get heated up.

In the very back are really large bowls which I rarely use and in the front are all the frequently used containers.  The dishwasher is right next to this cabinet so they are easy to put away.

_MG_8460BLOG

On one door I have extra grocery bags.  I have 4 reusable grocery bags in the car.  I sometimes remember that I have them when I am in the store with a full cart on my way to checkout.  I’m pretty good about it but I still need to work on that habit.

_MG_8455BLOG

On the other door I have an organizer that holds foil, parchment, plastic wrap and large zipper bags.

_MG_8439BLOG

That’s it!  I couldn’t fit anything else under there!  I hope I gave you some ideas.

I look forward to you sharing with me what items are under your kitchen sink…

Until next time,

Happy Organizing! 

Filed Under: Kitchen, Top Navigation · Tagged: Garbage disposal unit, Home and Garden, Kitchen, Kitchen Organization, Organization, Sieve, under the sink

How to fold your sheets

August 21, 2013 · by Maria · 8 Comments

If you are one of those people who can perfectly fold a fitted sheet then you are worthy of my admiration.  I stand in awe.  I simply cannot.  I have tried.  I technically know how to do it but it still comes out looking weird.

Last weekend I released a post on {linen closet organization} and I wanted to share with you how I get the bedding to look neat in there.  Here is a picture of the sheets in my linen closet.

_MG_8203BLOG

Its pretty easy.  First, I fold all the sheets except for one pillowcase.

_MG_8092BLOG

Then I insert all the sheets into the remaining pillow case.

_MG_8091BLOG

I then fold the remaining flap over and I have one lovely bundle.

Before using this method, I was always looking for the one pillowcase that had fallen in the back of the closet.  We have 4 pillowcases per sheet set so this would happen often.  Not a real problem but it was easily solved with this method.

_MG_8088BLOG

How you fold sheets is not a big deal as long as you fold them.  I do this extra step because I like the way they look inside the linen closet and its practical for me to grab the one bundle instead of separate bedding.

I hope you find this tip helpful…unless of course you are one of “those” who already knew how to perfectly fold the sheets.  I admire you.

Until next week fellow lovers of organization!

Maria

Filed Under: Bedrooms, Top Navigation · Tagged: Bed sheet, Bedding, Bedroom, Folding, Pillow

Linen Closet Organization

August 17, 2013 · by Maria · 9 Comments

You may remember that I recently released a post on the { linen closet } that I have in my master bathroom.  You may also remember that there are no linens in that closet.  The irony.

I also have another linen closet that is extremely narrow and is bookended between my sons room and the boys bathroom.  I need every bit of space in that closet to store not only linens but also items that don’t fit under the bathroom sinks.  Here is the closet.

_MG_8248BLOG

Since the closet is narrow I pulled out all the baskets so that I can share with you the contents.  Also, the lighting in this corner of the house is horrible so I took most of the pictures in my bathroom.  My bathroom has 3 windows so the lighting is amazing for photography AND for seeing every single hair that falls on the floor.  Every strand of hair that falls on that floor looks like a garter snake…perfect lighting will do that!  Since I love well-lit rooms, I have a broom nearby!

Here are the baskets that I use for corralling the items the linen closet.  They are Rubbermaid Bento boxes and can be found at Target.  I like that they have pop out dividers so small items don’t move about.  I chose to mix the khaki pattern with the solid Khaki.  These are the medium and large sizes.  There is also an extra-large size but it was too large for my closet; maybe it would work in yours.

_MG_8094BLOG

I used one of the boxes to put all of our band aids.

_MG_8067BLOG

In the smaller pop-out dividers I placed the ointments and smaller items.  In doing so I realized that I will never run out of Neosporin.

_MG_8069BLOG

I used the larger box for other first aid items such as bottles of peroxide, rubbing alcohol, sprays and gauze.

_MG_8068BLOG

Here it is full.

_MG_8072BLOG

One box holds all the sunscreen and insect repellant.

_MG_8108BLOG

I chose a plastic container for bubbles and sidewalk chalk.  These items would make a mess inside a fabric box.  These are the ITSO bins from Target.

_MG_8103BLOG

_MG_8106BLOG

In the very top of the closet I store water toys that I use in the backyard.  The other water toys I keep with the {beach bag}.

_MG_8111BLOG

In every closet that is nearby a bathroom I like to have a cleaning caddy.  This one holds some of my favorite cleaners and favorite brands.

_MG_8085BLOG

Here are the items back inside the closet.

LINEN CLOSET ORGANIZATION

Linens, of course.

_MG_8203BLOG

I added cute labels to the baskets and I secured them with square clips.  I am attaching this free printable in pdf format for all of you.  Click HERE for the printable.  I left the labels blank so you can either write on the labels or use a label maker to print the tag.  I had my labels laminated to make them sturdier.

_MG_8230BLOG

In the very bottom of the closet I used a large bento box for my son’s school supplies.  The only thing that would make it more perfect would be adding small wheels to the bottom of the basket.  That would make cleaning the floor underneath easier.  I will add that to the honey-do list.

_MG_8102BLOG

Please share with me what you currently have inside your linen closet.  Do you only store linens in there or a bunch of stuff like me?

Happy Organizing!

Maria

Filed Under: Closets, Top Navigation · Tagged: Bandaids, First Aid, Linen Closet, Organization, Organizing, School Supplies, Sunscreen

Toddler Room Organization

August 10, 2013 · by Maria · 10 Comments

Toddlers.  We fear them with good reason.  They are bundles of never-ending cuteness and never-ending energy.  Their little smiles make them get away with almost anything.  It’s like a spell.  I am convinced!

As I was working on the blog yesterday there was a pause…silence.  All mothers know that toddlers and silence equal trouble.  I quickly went to check on my toddler and he was standing on a swivel chair in his brother’s room while feeding the fish in the tank….a WHOLE bottle of fish food.  He just smiled at me as I walked in.  Help me Jesus!

So we have now established that toddlers are not easy to keep in line and neither are their rooms.  We also know that despite the magical “Clean-up” song…we end up doing most of the work.  Cleanup needs to be easy for both parent and child.

Here is my toddlers room.  All the furniture was his brothers and that means that the furniture is 9 years old.  Math is my thing.

_MG_7989BLOG

_MG_7987BLOG

_MG_7975BLOG

This is the smallest room in the house so we built out his closet before anyone else’s to help with storing all his items.  Here is his closet.

_MG_7985BLOG

There is so much in this closet but it usually stays organized since everything has its place.  His room does get messy fast but it is quickly picked up thanks to all the systems in the closet.

You will notice a hamper in the bottom left; it is full of stuffed animals.  The hamper makes it easy to just throw them in there.  Above it is a basket that is full of balls.  Open baskets and containers are great for quickly putting away large items.

_MG_7983BLOG

The closet is fully adjustable so as he grows I will adjust the shelves and rods.  I am a believer in having all hangers look the same because it instantly makes closets look so much neater.  Ours are inexpensive Wal-Mart hangers.

_MG_8000BLOG

Legos.  We also fear them with good reason.  You don’t know pain until you have stepped on one of those colorful blocks.  Ouch!

I keep all his legos and small toys in these green containers.  In order to have my toddler help with the clean-up I added labels with pictures.  I suggest that you laminate the labels so that they last longer.

_MG_8056BLOG

_MG_8059ORDER

I store his DVD’s in the closet (most of them were also my 9 year olds).  I keep them up high because otherwise, they would all be all over the floor EVERY DAY and no one has time fo dat!

_MG_7994ORDER

I have these little ceramic containers in this closet as well.  I keep little notes for the boys and sometimes I write down funny things that they might say.  I probably write down .001% of the funny things they say because I end up forgetting to write it down but I still hope they appreciate it when they are older.  I am so sappy…

_MG_7996BLOG

I love hats on little boys and I am blessed with a son that keeps them on!  I put all his hats and caps in this flexible bin.  I also use these bins to store his swim trunks and water shoes.

_MG_7972BLOG

_MG_7974BLOG

I keep all his small books inside a bin because it is the only way to contain them in one spot.  I nest that bin next to his larger books.

_MG_7981BLOG

On the floor I keep these three bins.  The bottom two are the next 2 sizes that he will be wearing.  Any size larger than that is stored at the very top of the closet.  The top bin (without a lid) is where I place clothing that no longer fits him.  It fills up fast!

_MG_8003BLOG

So that’s the closet!  We purchased a toddler bed (at Wal-Mart) that has two thin drawers at the bottom.  In one drawer I place his small stuffed animals and in the other the small toys that would otherwise fall into the bottom of a toy chest.

_MG_7991BLOG

Done!  That’s how I organize my toddlers room.

Just in case you were wondering, the fish lived.  They are now full.  They love my toddler.  And so do I!

Please share with me your ideas to keep your toddlers organized and out of trouble!

Happy Organizing!

Maria 

Filed Under: Bedrooms, Closets, Top Navigation · Tagged: Closet, Clothing, Kid's Room, Lego, Toddler, Toddler's Room

Kitchen Organizing – Before and After Photos

August 3, 2013 · by Maria · 16 Comments

This is not my kitchen.  Unless I am sleeping and dreaming.  In that case, this is my kitchen.

_MG_8156BLOGPHOTO

I have missed you all this week and I wanted to share what I have been up to.  A friend of mine recently moved into the home of her dreams (and everyone else’s dream for that matter) and she quickly unpacked like we all do.  She was yearning for some real organization in the home to make her life easier.  The home is beautifully decorated and completely uncluttered but she never got around to fixing the drawers, cabinets and pantry.  She has three little kids…you understand.

She recruited me for the job.  I concentrate on the blog but since my passion is organizing I decided it was a good opportunity for me to do what I love while taking pictures to later share with you…my fellow order seekers!

Don’t you love a good “before and after”?  I used to record the show Hoarders and I would completely fast forward through the middle just to see the after photos.  All the drama is in the middle and that stresses me out.  No matter how bad you think your house looks, you feel like a domestic goddess after watching the show.  Am I right?

Well this home is nothing like Hoarders, its more like a home featured on Better Homes and Garden.  It just needed a couple of baskets and some turntables and the results follow.

_MG_8143BLOG

The pantry is HUGE and from this picture you can’t even see the side shelves or the drawers on either side.  My friend is blessed.  Yes she is.

We emptied the pantry and made the kitchen look really bad before making it look really good.  We discarded anything that had expired and set aside items that they didn’t like or use.

I created stations for everything so that she could quickly find what she needed.  The items that were kid related I placed at the very bottom and without lids so the kids could easily access snacks and juice boxes.  The kids love cereal and they all have their favorite so we purchased matching cereal containers.  They serve a dual purpose since the cereal stays fresh and it looks so much better.  Here is the after {music please!}

_MG_8156BLOG

Many of the OXO containers pictured above she already had but wasn’t using them.  You can find the containers {here} in the amazon store and sometimes you can get lucky and find them at Homegoods and Marshalls.  OXO containers are awesome but undoubtedly expensive so if you can’t go out and purchase them, any other matching container will do.  If you don’t have matching containers you can make them look cohesive by adding the same label to all of them.  In this case we used chalkboard labels and the label maker (which at this point I wear around my neck).

They have a ton of nutritional smoothie ingredients so we purchased a very large turntable to make it easy to find what they need.  If you have the cabinet space to put such a large turntable (which I don’t), you can find it {here}.  Here is the before and after:

_MG_8131BLOG

_MG_8163BLOG

I did the same thing for the oil and vinegar but in much smaller turntables.

_MG_8130BLOG

_MG_8144BLOG

The sodas, the kids juices and snacks are at the very bottom where they can easily access them.  I purchased my favorite Target baskets for this.  I also wear them around my neck.

_MG_8155BLOG

Lunch Snacks:

_MG_8148BLOG

There were already built-in drawers in the pantry but I added some small baskets to corral items such as bars and packets.  All the small white baskets are from the big red circle as well (I get tired of writing the “T” word).

_MG_8160BLOG

_MG_8150BLOG

I placed the cans in tiered shelves and by the end of the project, even the paper towel looked decorative!

_MG_8158BLOG

Here are a couple more shots of other areas in the kitchen that we tackled.  I forgot the before shot of the other drawer.

_MG_8117BLOG

After.  This is the first time I use this drawer organizer kit. L-O-V-E-D it!  I added it to the Amazon store and I am ordering one for myself.  You can find it {here} or possibly at a The Container Store (perhaps even Bed Bath and Beyond?).  I don’t recommend it for every drawer if you have a lot of utensils (like me) but I like having one drawer in which items are perfectly organized and accessible.

_MG_8119BLOG

_MG_8121BLOG

Then we organized under the sink.  We took everything out, cleaned the cabinet and placed a pretty liner before placing any items back.

_MG_8166BLOG

On one side I placed a baking rack to hold all the cutting boards upright.  On the other side a cleaning caddy with essentials.  In the center dishwashing items.

_MG_8169BLOG

Then the spices:

_MG_8112BLOG

Using a tiered shelf and two turntables gave everything a home.  If you don’t do this you will end up with 5 bottles of pumpkin pie spice because you will buy one every year around thanksgiving when you can’t find it.  Here is the after:

_MG_8115BLOG

I will continue working on her home and I will keep posting pictures to keep you all updated on the progress.

When your pantry is organized you will find that so many things are easier.  It is easier to grocery shop because at-a-glance you can see what you are missing.  It is easier to put the groceries away because everything has it’s place.  It is easier to cook when you are not rummaging around trying to find an ingredient.  Mostly, it is visually pleasing to open a cabinet that looks so nice.  Organizing is definitely work but very gratifying.

Thank you for being patient with me this week and if anyone needs pumpkin pie spice, I have 4 bottles that I can part with!

Let me know what is the next project you are going to tackle.

Until next time,

Maria

Filed Under: Kitchen, Top Navigation · Tagged: Cereal, Kitchen, Pantry, spices, turntables, under the sink

Organizing your Vitamins

July 27, 2013 · by Maria · 1 Comment

This is a quick post about organizing your vitamins.  Not much to say about it and not much to do but you will be glad you did it.

We used to store our vitamins out of sight to make the counters look cleaner.  We quickly realized that if we didn’t see the vitamins, we didn’t take the vitamins.  We needed to either completely change that system or supplement it with a more practical one.

{Did you catch the cheesy vitamin humor in the last line?  I couldn’t bring myself to edit it out.  My name is Maria…I’ll be here all night!}

_MG_7869BLOG

We found this plastic container that was tall enough to hide the bottles so that we could keep it on the countertop without being an eye sore.  It was perfect.

As you can see we have lots of supplements and vitamins.  We don’t take all of them daily; instead we alternate them.

Most of our vitamins are from the same company and of course the bottles are similar.  The problem is that we couldn’t distinguish one vitamin from the other.  We would pull out 4 different bottles before reaching for the right one.

I then labeled each one with either the name of the vitamin or its function.  Voila!  Problem solved.

_MG_7864BLOG

I use my label maker so often and I have no idea why it took me years to think of this.  Now it’s so easy in the morning to find what we need.

I tell ya…its always the little things!

_MG_7862BLOG

I hope you enjoyed this tip!  Please share with me if you will also be labeling your vitamins or am I the only person that has this “problem”?

Happy Organizing!

Maria


<a href=”http://www.bloglovin.com/blog/10014443/?claim=s99erju99ea”>Follow my blog with Bloglovin</a>

Filed Under: Kitchen, Other, Top Navigation · Tagged: Health, Kitchen, Nutrients, Vitamin, Vitamin Organization, Vitamins and Minerals

Kid’s Bathroom Organization

July 25, 2013 · by Maria · 9 Comments

I have two boys and they share a bathroom.  ‘Nuff said.  You feel my pain.  It is the bathroom that gets cleaned most often and doesn’t seem to stay clean for long.  I decided that I needed to de-clutter the bathroom to make cleaning easier.  I used to have all of the boys toiletries right on the bathroom counter which made it more of a chore to clean.

I found two solutions to clear out the clutter.  The first was purchasing this curtain from amazon which you can purchase {here} or you can find at most Targets.  The picture below is not my boys bathroom because we covered it with another curtain which you will see in the next picture.  I don’t recommend that you put really heavy items in the pockets such as large shampoo bottles but I did put hairspray, cologne, a hairbrush and water play toys in our curtain and it holds them just fine.

Amazon photo of the Maytex pocket curtain.

Amazon photo of the Maytex pocket curtain.

This is the boys bathroom.  Like the curtain?  60’s psychedelic right?  Well here is my bathroom conundrum:  I have a toddler who would love to have a Mickey-themed bathroom and a 9-year-old who would threaten to run away if he had a Mickey-themed bathroom.  He is apparently too cool for the big mouse or any cartoon for that matter.

Keeping that in mind, I decided that I wanted to make the bathroom fun and colorful but not include a theme.  We found the curtain and mat at Target.

_MG_7782BLOG

Since the counters need to be wiped down so often I just placed the essentials.  I chose this little container (also from Target) because it has a divider and the boys can share it.

_MG_7772BLOG

I also purchased three small plants from IKEA and I spray painted a plastic plant holder that I had in the garage.  That’s as crafty as I get.  No joke.

_MG_7758BLOG

The second storage solution was under the sink.   If my boys were both older I would definitely have a cleaning caddy under here but for now I like to keep those in higher cabinets.  Instead, I stored in these two baskets all the items that didn’t fit in the shower curtain pockets.  They hold one extra set of bath towels, hand towels and shampoo.  You have seen me use these baskets in the past because I love them so.  Also from Target.  I feel like I say “also from Target” after every sentence.  I guess I am drawn to that red circle!

The baskets are stackable so I purchased a large and a small one so that I can push the small one back when I need something from the larger.  I am so happy that the baskets fit despite the plumbing pipe.  That is always something to consider when purchasing containers for under-the-sink organization.

IMG_5547BLOG

I love having the area cleared out and it is so much easier to keep the bathroom clean and tidy.  Peace to all {keeping the 60’s theme in full effect}.

What ideas do you have for keeping kids bathrooms organized?

Maria

Filed Under: Bathrooms, Top Navigation · Tagged: Bathroom, Kids bathroom, Shower, Target

Laundry Room Organization

July 23, 2013 · by Maria · 37 Comments

_MG_7927BLOG COVER

I love looking at organized laundry rooms in magazines and commercials.  I’m not sure if it’s the fresh white towels, the clean scented sheets, or the little girl running through the wheat field with her hair flowing.  In those adds, all that is stored in the laundry room is a lonely bottle of detergent and two perfectly folded white towels.  As organized as I am, I can never get my laundry closet to look that neat and if that little girl saw all the stuff I pack in my closet…she would surely keep running…in the opposite direction.

My excuse: I don’t have a laundry room, I have a laundry closet.  My goal is to make it look good so that doing laundry doesn’t feel like such a chore, but the closet is definitely packed!  I have so many things in there and it can be a challenge to make it look uber neat.  So here is my laundry closet…

_MG_7938BLOG

Here it is open.  The other door leads to the garage.

_MG_7946BLOG

Since its a closet in a small hallway, I had to take pictures in segments so that I can share with you what I keep in there.  Here is one side.

_MG_7947BLOG

And the other.

_MG_7950BLOG

Now a little more detail…

I like to leave some room on top of the washer and dryer to fold items right as they come out of the dryer.  On top of the dryer I have stain removal powder, a Martha Stewart book that shows you how to clean anything and everything, a white tin that contains towels, and a little IKEA plant for no purpose other than cuteness. 🙂

_MG_7884BLOG

I purchased the little mint jar from WorldMarket.com and it holds oxy powder.  I use a “green” version of the powder.  The jar is intended for kitchen use but I love how it looks in here and it adds charm to the space.  I added the chalkboard label to the outside and wrote the contents in chalk.

_MG_7881BLOG

Next to it is the LAUNDRY tin, which actually hides all those ugly looking floor rags that we all have.  They seem to get uglier with every wash so I wanted them hidden, yet easily accessible since they get used daily.

_MG_7927BLOG

Right above is a small shelf that holds my detergent and fabric softener.  Shaklee and Method products are my favorite since my goal is to slowly-but-surely go green in terms of nutrition and home care.

_MG_7936BLOG

In the first shelf I have these containers that I purchased at Walmart and they hold all the cleaning rags.  Again, I want them handy but hidden.

_MG_7919BLOG _MG_7920BLOG

Next to the small bins, I have all my cleaning products separated by brand or function.  I like that these bins are long and I can just pull them out and easily get what is in the very back.

_MG_7932BLOG

On the other side of the laundry room I have two large wire baskets (from Target).  One holds miscellaneous laundry related products…

_MG_7894BLOG

The other one holds cleaning products.  TIP:  Since the second basket is not at eye-level, I decided to label the spray nozzles with the contents of the bottle.  That way I know what bottle I am pulling out.  Since I always purchase the same brand of cleaners I can just keep using the same labeled nozzle.

_MG_7898BLOG

I hooked this little basket to the back of the wire rack and I keep all my new sponges in there.  I really don’t have a place for them in the kitchen and my laundry closet is close to the kitchen, so it works for me.

_MG_7934BLOG

In the very side, up against the wall (where it’s hardly visible because it is below the washing machine) I have a tiny garbage can where I throw all the dryer lint.  Above it I have a little pail that I throw pocket change into.  I also have a hook that holds a basket full of “clean-and-single-and-looking-for-a-mate” socks.

_MG_7911BLOG  _MG_7908BLOG

At the very top I have three large laundry baskets.  The area above is large but not easy to access so these baskets hold: gallons of water for hurricane preparedness, empty containers that I have for future projects (blame Pinterest), and one of them is empty just in case I need it for something around the house.

_MG_7916BLOG

I use foldable laundry baskets and I just place them in between the washer and dryer.  The machines are so close together that the baskets stay in place.

_MG_7960BLOG

I promise I am almost done but I have one more tip!  I place a valet hook on the outside of the door.  I use it to hang-dry items or to hang shirts while I fold the rest of the laundry so that they don’t wrinkle.  I like this hook because it is long enough to keep moisture away from the door if I hang dry a shirt.

I purchased it on Amazon and you can find it “here”.

_MG_7966BLOG

That’s it!  Lots of items in a very small space can make it challenging to keep tidy, but its not impossible with the use of containers.  Of course, its not the laundry room in the commercials but this is real life and we need to be realistic with our expectations.  However, by mixing practicality and a dash of decor and you will create a laundry closet that you are proud of.  And now the little girl can run through the wheat field once more!

So now its your turn.  Will you be implementing some of these ideas in your laundry room or can you share with me some of your own?

Happy Organizing!

Maria   

Filed Under: Laundry, Top Navigation · Tagged: Laundry, Laundry Closet, Laundry Organization, Laundry room, Organization, Shaklee

Makeup Organization

July 17, 2013 · by Maria · 12 Comments

I don’t wear a lot of makeup.  I just don’t have the patience for it.  However, I can alphabetize 200 CD’s no matter how long it takes.  I guess we are all built differently!  I do appreciate seeing my friends who know how to apply a perfect amount of makeup and still look natural.

Don’t you hate it when you look amazing in your bathroom mirror and then you get in the car and you look like Bozo in the car mirror?  What is it with the car mirror?!  Or is it the bathroom mirror?!  Who is the real culprit?

Like I said, I don’t always put on a full face of makeup but I like having the right tools when I do.  I like to see my makeup.

_MG_7829BLOG

I purchased this large acrylic organizer at Target about five years ago.  They still have it in the section where they have all the cosmetic bags.  I place all the single shadows here so that I can see all the colors without shuffling through a bag.  In the large vertical spaces I store lip glosses and eye pencils.  I like that I can see them all at a quick glance.

_MG_7813BLOG

The eye shadow sets are stored together and vertically.  It makes it easier to pull them out, use them and put them back in their spot.

_MG_7816BLOG

Foundations and primers have their own zip code as well.  I picked up that little clear container at the Target dollar section.  Sometimes I cant find anything in that little section and sometimes its full of gems.

_MG_7850BLOG

Lastly, the brushes.  I love those beads that they use at the top cosmetic stores so I decided to house my brushes in a similar way.  It turns out they sell those beads in most craft stores.  I used an acrylic pencil cup to contain the larger brushes.

_MG_7853BLOG

The smaller brushes along with other makeup essentials are in this slim container.  I also used the beads in the larger compartment.

_MG_7851BLOG

So that’s it!  I once read that it is better to arrive late than to arrive ugly.  It was a funny statement.  It still doesn’t keep me from sometimes leaving the house looking like one of the people who appear in the “People from WalMart” photo stream.  Have you seen those?  They are pretty funny.  On the rare occasion that I go out looking that rough, I pray that I don’t run into someone who I haven’t seen in years.  What are you supposed to say them?  “I assure you that I normally look human.  I just had to run out of the house to get milk!”

So ladies, let’s put on a little rouge, a little color on our face and go out into the world (or in my case, WalMart) with confidence.

Happy Organizing!

Maria 

Filed Under: Bathrooms, Closets, Other, Top Navigation · Tagged: Beauty, Brush, Consumer Goods and Services, Cosmetic, Eye shadow, Makeup, Makeup brushes, Organization

Bathroom Linen Closet Organization

July 15, 2013 · by Maria · 8 Comments

The space that I lack in my sink…

_MG_7826BLOG

I have in the linen closet that is right next to my sink.

_MG_7794BLOG

My husbands sink is on the other side of the bath tub and it is equally as small.  If I had a larger sink counter or drawers under my sink I would probably store my makeup in that space.  Since I don’t, I use the closet to hold a LOT more than towels.  I have (maybe) 4 towels in the closet.  The rest is makeup, hair care, nail supplies, lotions and bathroom cleaning products.  Here it is…

_MG_7825BLOG

In the very top, as in “I need a ladder” I have towels.  These are towels that are designated for guests.  I have another area in the bathroom that I store our daily use towels.

_MG_7840BLOG

In the top shelf I also have 2 turntables that hold extra shampoo, conditioners and lotions.  Turntables are one of my favorite organizing tools.  They allow me to put items in areas that I otherwise would lack the visibility to see what is in the back of the shelf.  I just turn the tables and get what I need.  You can find these here: Amazon.com

_MG_7830BLOG

Next to the turntables I store my travel toiletry bag.  It is not used often so I don’t need it to be right in front of me.  I will be doing a post on what is in the bag sometime next week.

_MG_7833BLOG

In the next shelf I have my cleaning caddy.  I think every bathroom should have a cleaning caddy.  If you have to walk to another room to grab cleaning supplies you are less likely to wipe up simple messes.  Having this here helps me keep the bathroom cleaner in between deep cleanings.  I keep this caddy in the higher shelf to keep it away from the kids.

_MG_7805BLOG

If your grooming items look pretty you will use them more.  That being said, fifty percent of the times my nails are not done.  Clearly it’s not because of lack of polish, just lack of time.  I think if this display didn’t look so pretty my nails would never get done.  I purchased the polish display years ago on Amazon but you can still find it here.  They have different vendors and different size displays that you can choose from.

_MG_7807BLOG

In the next shelf I have my makeup.  Same story as the polish.  I use very little makeup on a daily basis.  My daily makeup routine consists of no more than tinted moisturizer, mascara and lip gloss.  The rest only gets used when we go out on the weekends.  I like to display my makeup so that I can “see” what I have and hopefully get inspired.  I know that if I threw my makeup in a bag I would never use it.  I will be doing a post on makeup organization later this week.

_MG_7800BLOG

I have these baskets and bins to hold extra makeup and samples that I use to refill my travel bag.  I also have a sewing box.  I only know how to replace buttons and maybe a quick hem but even for simple things like that you need a system to hold all the different color threads and buttons.  This is also where I put all the extra buttons that come along with outfits. Otherwise you end up with 50 baggies of weird buttons swimming throughout your home.

_MG_7821BLOG

Underneath are four white plastic baskets that hold items that I like to throw in without much thought.

_MG_7797BLOG

Such as hair care.

_MG_7841BLOG

Extra lotions that have been gifted to me or nice hotel samples.

_MG_7847BLOG

In the very bottom is a large basket with all my rollers.  You like the pink ones?  Be honest.  I know you do.

_MG_7784-2BLOG

A place for everything and everything in its place.

_MG_7795BLOG

Lots and lots of things that have nothing to do with each other but you can still manage to make them look organized if you dedicate a shelf to a certain task, use organizers and label your items.  I hope I gave you some ideas of other uses for linen closets.  What else do you store in your linen closet?

Happy Organizing!

Maria

Filed Under: Bathrooms, Closets, Top Navigation · Tagged: Bathroom, Caddy, Closet, Cosmetics, Linen Closet, Lotion, Makeup

Coffee Station Organization

July 9, 2013 · by Maria · 8 Comments

We are coffee people.  Our days start with my husband doing a zombie-like walk to the coffee grinder that releases not only a noise that will jolt you out of REM sleep but also a delicious sweet coffee aroma.  It is this aroma that wakes me up everyday.  That or my toddlers foot in my face.  That is a different aroma.  Lucky for you, not part of today’s post.

Having coffee with my husband before the house gets “hectic” is one of life’s simple pleasures for me.  I like to sit next to him, enjoy his company and chat with him while we sip away.  It’s usually me doing most of the chatting and him grinning at me while he listens.  He physically wakes up earlier than I do but the rest of him catches up a little later.  I’m sure he wonders how I can have so much to say so early in the morning.  I think he is listens so attentively because he loves me so much (and because he feels bad that for the rest of my day my conversations will only involve Elmo and Barney :-)). I took a picture of him this morning as he prepared the coffee.  He looked at me kinda strange…

Coffee Station Organization

Back to the coffee.  Like with everything else in the house, I look to “containerize” my coffee.  I like having a coffee station where all-things-coffee can be found.  The coffee station is behind these doors because the coffee maker sits on this counter.

Coffee Station Organization

We have a cappuccino maker, a cuban coffee maker and the regular american coffee machine.  The american coffee maker stays out.  It has earned its place on our counter.  In our lives.  In our hearts.  The rest go in the cabinet.  Normally large appliances are stored in cabinets under the counter but space is at such a premium around here that I just store the espresso maker with the rest of the coffee supplies.  Here is the cabinet opened up.

Coffee Station Organization

I don’t store our coffee cups in this cabinet because there are too many of them and they don’t fit nicely.  I have them in the slender cabinet right next to this one.  I use any of the coffee cups in the cabinet but pictured below is my favorite coffee mug.  It is a substantial mug with a thin but not-too-thin rim.  Coffee tastes better in it.  Only a coffee lover could understand such madness.  I bought it in PINK because I thought that it would surely scare my husband into using one of the other 14 Starbucks coffee cups that we have in there.  It turns out my husband is one of those secure men that isn’t bothered by pink in the very least.  Needless to say, my ingenious plan failed miserably.  There are mornings that I walk into the kitchen and there he is sipping away in my pink mug.  Then he smiles at me and I smile back with a smile that says “you have just sucked the joy out of my morning BUT I love you and I am grateful for you anyway!”  Then I grab another “less-perfect” mug.  Kinda melodramatic but what can I say?  I like the pink mug.

Coffee Station Organization

Back to the coffee station.  I use these OXO containers for the coffee beans and for the Cuban coffee.  They are the perfect size to hold a full bag of coffee.

Coffee Station Organization

I purchased this placemat at Target as well and I use it to line the area with the coffee.  It’s cute and it keeps the cabinet free from coffee granules.

Coffee Station Organization

Behind the coffee containers is this white basket that holds extra coffee, frothing pitchers and coffee syrups.  It’s a nice, deep basket so that the cabinet still appears organized.

Coffee Station Organization

I added a mug full of spoons for stirring the coffee.  We used to have to walk to the utensil drawer every morning to get a spoon.  I finally purchased a set of spoons just for the coffee cabinet.

Coffee Station Organization

Since my husband prepares the coffee, I wanted to make it as easy as possible for him so I placed the sugar/stevia in a wide bowl instead of another container with a lid.  I like that it’s large enough not to require frequent re-filling.

Coffee Station Organization

On the side are the cappuccino cups, tiny Cuban coffee cups and disposable travel cups.

Coffee Station Organization

Lastly, next to the espresso machine is a set of dishes that we sometimes use for breakfast.

Coffee Station Organization

So that’s it.  Having a coffee station avoids having to touch every corner of your kitchen just to make a simple cup of coffee.  Now I will head off to the kitchen to join my husband for breakfast.  Pray that he isn’t using my pink mug!

Happy Organizing!

Maria

Filed Under: Kitchen, Top Navigation · Tagged: Beverage, Coffee, Coffee Bar, Coffee station, Coffeemaker, Cuisinart, Kitchen, Starbucks

Guest Bathroom Organization

July 5, 2013 · by Maria · 2 Comments

The guest bathroom in our home is pretty small but considering that my first home didn’t have one,  I am grateful.  It was even hard to photograph due to the size.  I looked like Spiderwoman trying to get a good picture.  Minus the latex suit of course.

IMG_5277BLOG-2

The guest bathroom is adjacent to the laundry closet and close to the kitchen.  In theory it would be a good place to store cleaning supplies.  However, since I have little ones I never keep cleaning supplies under sinks.  Instead, I use this space to store all of our beach towels.  I roll them up so that I can circumvent that annoying pipe.  I really dislike that pipe. :-/

IMG_5270BLOG-2

On the other side I have small plastic drawers that hold items that a guest may need:  Toothpaste, toothbrushes, floss, shaving cream, small cologne bottles, karaoke equipment (just checking to see if you are paying attention!).   In the other drawer I have a first aid kit and Q-tips.  On top of this I put extra toilet paper.

IMG_5246BLOG-2

Sometimes we forget to use the cabinet doors for extra storage and its the perfect place to put a small caddy.  Here I place extra lotions, soaps, essential oils and a roll of garbage bags.  I have these caddies in almost every bathroom.  They are narrow so you can still have the items inside the cabinet uninterrupted.  I love them!

IMG_5236BLOG-2

On the other cabinet door I use a command hook to hang my cleaning gloves.  I placed a clip that is meant to be used to close chip bags onto the command hook and it is the perfect clip to hold the gloves.  It’s a good idea to hang the cleaning gloves so that they can fully dry after using them.

IMG_5249BLOG-2

A little closer…

IMG_5251BLOG-2

Here is a picture of the whole bathroom cabinet.

IMG_5275BLOG-3

There are systems meant for under the sink that circumvent the dreaded plumbing but sometimes by using a little creativity you can find an inexpensive way to use every inch of space.  Here is the other side of the bathroom just in case you were wondering (ok maybe you weren’t but for the sake of symmetry I will end it with this picture).

IMG_5278BLOG-2

I hope you got some ideas and if you have any ideas for me just post them below.

P.S.  My husband just told me “you realize there is no Spiderwoman?”  Clearly he hasn’t seen me in action cleaning the house when he leaves…

Happy Organizing!

Maria

Filed Under: Bathrooms, Top Navigation · Tagged: Bathroom, Bathroom cabinet, Caddy, command hook, Gloves, Home and Garden, Shopping, Towel

  • « Previous Page
  • 1
  • …
  • 4
  • 5
  • 6
  • 7
  • Next Page »

Welcome! I'm Maria, the blogger behind Graceful Order. I hope to share with you helpful ideas about organizing, cleaning and entertaining. I am passionate about living a healthy, balanced life with my husband and two boys. A life where I am in charge of my home and not the other way around. A life with a little bit of order, and a whole lot of grace!

  • Email
  • Facebook
  • Instagram
  • Pinterest
  • Twitter

Tips for Organizing Laundry Closets

Popular Posts from 2014

Posts of 2014

Blog Archives

Search by Month

Copyright © 2025 | Disclaimer

Copyright © 2025 · Innovative Child Theme on Genesis Framework · WordPress · Log in