Graceful Order

Organizing and Decorating the home.

  • Home
  • Organize
    • Kitchen
    • Laundry
    • Living Room
    • Bedrooms
    • Bathrooms
    • Closets
    • Office
    • Garage
    • Other
  • Decorate
    • Fall
    • Winter
    • Dining Room
    • Bedroom
    • Bathroom
    • Office
  • Clean
    • Kitchen
    • Bathrooms
  • Entertain
    • Christmas
    • Thanksgiving
    • Recipes
    • Reflect

Leftover Paint Storage

September 18, 2014 · by Maria · 4 Comments

Leftover Paint Storage

You know that feeling when you are sitting on the couch, relaxing, feet up, and getting a neck massage?  And then the person massaging your neck won’t stop asking if they can also massage your feet?  Well, neither do I.  But let us subtract the massage for a minute and continue with the rest of the visual.  So you are sitting on the couch and you look at the wall and notice that there is a scratch on the wall.  Well you actually didn’t just notice it, you have been looking at it for 8 months and every time you sit down and see it, you tell yourself ” I have to paint that little spot on the wall.  I will bring in the paint can from the garage when I get a chance.”  Sound familiar?

Every home gets nicks here and there from moving furniture, kids playing, and even cleaning.  Which is why you shouldn’t clean.  Did I just write that?  I meant, which is why you should have a different system for leftover paint storage, other than the paint cans in the garage.

Leftover Paint Storage

I have mentioned before that we haven’t painted the interior of our home for almost 10 years.  Recently, I painted the boys bathroom, our master bathroom and the dining room but all the existing paint was in pretty good condition, we just wanted to update the colors.  I was able to push off painting for as long as I did, thanks to this system (and good quality paint, of course).

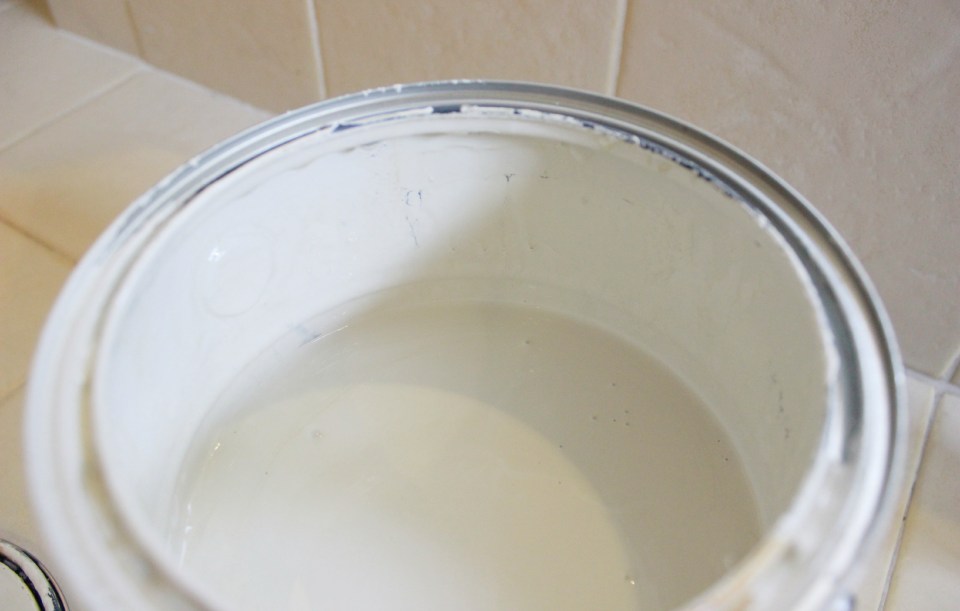
My tip:  I always store a little bit of the paint from each room, in these small Rubbermaid containers.  Any airtight container will do, so the paint doesn’t dry out.

Leftover Paint Storage


I take the leftover paint can and fill up the little tub.  The paint cans will go into the garage when I am done.  I won’t be using the cans unless I need to paint a whole wall.  Who wants to deal with opening up rusted cans of paint just to touch up a small area on a wall?  Not I.

Leftover Paint Storage

I label the container with the name of the paint color and the room it was used in.  When I am done I store them all inside a closet the house.

Leftover Paint Storage

If you have a playroom you know that it is not “if” the wall gets scratched, but “when” the wall gets scratched.  And when they do, have a “paint stash” and little brushes close by to fix the problem.  If it’s a really small nick, I have even used a cotton swab to paint over the area.

Leftover Paint Storage

So grab one of these tubs and fix that little annoying scratch so that you can finally relax on the couch.  It will be one less pain in the neck.  And then you won’t need the massage.

Am I alone here, or do these little things annoy you too?

-Maria

Filed Under: Clean, Uncategorized · Tagged: Paint, paint storage, rubbermaid

Basic Housekeeping – Morning Routine

September 15, 2014 · by Maria · 12 Comments

The Morning Routine

Mornings are hectic.  No routine will completely do away with that, but with a basic housekeeping morning routine, the first part of the day will be smoother, setting the tone for the rest of the day.  Part of an organized morning is an organized evening, which we discussed earlier this week with the night time routine.  If you have a night time routine, the mornings are smoother.  If the mornings are smoother, you will be less stressed.  If you are less stressed, the kids will behave like angels.  Well…sometimes I take things a bit far to drive a point home.

Kids are kids.  I ask my 10-year-old if he is ready for school and he says “yes” and then as we walk out, I realize that his hair looks like a birds nest, or he is missing his belt, the toddler starts doing the I-gotta-go-potty-dance, even though 2 minutes ago he said he was fine…Not exactly a Zen moment!

Because of the things that I can’t control, I try to do the ones that I can.  Of course, I don’t always follow the routine.  If we have guests, I want to enjoy their company more than sticking to some cleaning routine, so I ignore the dishes.  That’s ok and that’s the way it’s supposed to be, I think.    So lets leave it at, this is what I do MOST mornings:

  • Make the bed.  The room can be disorganized but if the bed it made, it looks peaceful.  On the flip side, if the room is organized but the bed is not made, it looks like a mess.  It’s just the largest piece in the room and the bed only takes 2 minutes to make.  Even if you don’t want to add a bunch of pillows, just smoothing out the covers makes a big difference.  At night, I love pulling away the comforter on a bed that has been made.

Morning Routine


  • Make coffee.  My husband is the designated barista in this house, but maybe you make the coffee in your home.  No to-do list has to remind any of us to make the coffee.  We usually make it while we are still sleeping, right?  Check out our coffee station if you have a chance.

Morning Routine

  •  Empty the dishwasher.  Since it is part of my night routine to load the dishwasher, I unload it in the morning and start filling it up after breakfast.

Morning Routine


  • Place a load of laundry in the washer.  I believe in a-load-a-day keeping the piles away!  I know some prefer having a designated laundry day or days, but I can’t seem to manage that without getting overwhelmed with all the laundry.  I prefer knowing that one full load will get done (almost) everyday.  See more details about my laundry closet here.

Morning Routine


  • Defrost whatever you will be making for dinner.  This way you don’t have to worry in the late afternoon about what to make.  I place the meat that is defrosting inside a refrigerator bin, so that juices don’t spill in the refrigerator shelf.  You know this is a big time saver if you have ever had to clean up one of those messes!  You can see the rest of the refrigerator here.

Morning Routine

Everyone has a different morning with different tasks, such as preparing lunches for the kids if they take their lunch to school, and your morning is different if you work outside the home.  The steps will vary but the need for the routine won’t.  When I take the time to implement this routine, I feel so productive!

Gotta go comb someones crazy hair (can’t specifically say who, but it’s not the 10-year-old and she likes to blog)!

Have a great morning!

Maria

Filed Under: Clean, Kitchen, Uncategorized · Tagged: Cleaning, housekeeping, Morning, Routines

Basic Housekeeping – Night Routine

September 12, 2014 · by Maria · 17 Comments

The word “routine” already sounds a little daunting.  I mean, do you really need to commit to another to-do list, another task?  I have worked inside and outside the home and I know that creating a routine is challenging and getting the family onboard is even more so.  However, if I commit to completing simple tasks in the morning and in the evening, my day goes by so much smoother and I accomplish more.  Of course, there are checklists that point out to clean doorknobs and behind the stove (and I am all about that too) but that isn’t feasible to do all the time.  However, I can commit to a basic housekeeping night routine to make my days at home smooth, or at the very least, manageable.

The Night Routine

Do I do this routine daily?  Ah…NO!  I certainly try to, but there are days that I have to leave the house and the beds are not made, the sink isn’t clear, it’s life.  I just notice that on the days that I have or make the time to complete these tasks, I am so grateful that I did.

  • Arrange the couch pillows.  This is a pet peeve of mine.  These couches are 10 years old and let me tell ya, they have not been babied!  In the weekends, we may take naps on these couches, we lie down to watch tv, my boys jump on these couches, they are USED.  Basically, the pillows are usually a mess or they fall on the floor.  I am always picking them up and threatening that I am going to get rid of them FOREVER.  I quickly learned that this threat doesn’t evoke any reactions when you live with men.  They are like “cool, more room to play”.

I feel like when the pillows are a mess, the whole room looks messy.  So at night I like to prop them up again and I wake up to a neat couch and pretend I live in a world where people care about couch pillows.

Night Routine

  • Load the dishwasher.  Throughout the day, I load the dishwasher without running it until I get in all the dinner dishes.  I set it to run at night and I unload it in the morning and start again.  You are more likely to load the dishes at night if there is space for them in the dishwasher.  If you are already exhausted (and we usually are at night) and you have to unload the dishwasher before re-loading it, you may just skip it all together and leave it for the morning.

Basic Housekeeping - Night Routine

  • Wipe down the sink and stainless steel fridge.  I LOVE waking up to a welcoming kitchen!  After putting away the dishes in the the dishwasher, clean and wipe down the sink.  Also, stainless steel refrigerators are great but they are also a magnet for little hands.  Go ahead and wipe it down with your kitchen towel before your throw it in the hamper.  A little bit of extra work but you will be thankful you did this in the morning.

Night Routine

  • Set out a new kitchen towel.  We rarely use paper towels, so our kitchen towels get dirty fast.  Every night, I place the used one in the hamper.

Night routine

  • Wipe down counters and kitchen table.  Sitting down in a clean, cleared-out table is more enjoyable for the whole family.

Basic Housekeeping - Night Routine

My husband makes our coffee every morning, but you may also want to grind the coffee ahead of time, or set some time aside to go over your agenda for the next day.  You can certainly add items to this list, but the point is to make your home a place that welcomes you, in a manageable way that isn’t overwhelming.  If I add too many things to my daily routines, I fall behind and get overwhelmed.  I like to keep it simple.

House is looking good, so I will go to bed and enjoy a good book…which I will end up falling asleep reading.  A day with toddlers will do that to you.

Night Night,

Maria


Filed Under: Clean, Kitchen, Uncategorized · Tagged: Cleaning, cleaning kitchen, Night routine

Decorating a China Cabinet / Hutch

September 9, 2014 · by Maria · 5 Comments

Decorating a China Cabinet / Hutch

Decorating a china cabinet.  You start with good intentions, a couple of pretty pieces you want to display, then a bowl that you can’t fit inside the kitchen, then pieces that have been passed down, then one day you don’t even know what’s in there and if you do know, it is way too much trouble to access it.  Sound familiar?  Well, I’m guilty too.  My favorite way to decorate a china cabinet is sparingly, only 2 to 3 pieces per shelf.  But you wouldn’t know that looking at the pictures I am sharing with you today.  A while back, I emptied the china cabinet and started from scratch.  I tried decorating with a few pieces, but I really needed the storage that the hutch provided.  My goal was to do away with the visual clutter.

Here is my china cabinet.  We bought it along with the dining room set ten years ago and I still love the style.  Sure, I would probably choose something more approachable and kid friendly now but I still love it.  My favorite thing about it is the profile.  My dining room is a square room and I wanted a piece that tapered so that it wouldn’t take over the space.

Decorating a China Cabinet / Hutch

These pictures were hard to take because the cabinet is mirrored so every piece looks doubled, but in reality it doesn’t look cluttered.  And I have…30 PIECES in that hutch (not counting the plate sets)!

So what’s the secret in storing so much without making it look cluttered?  Choosing a color and sticking to it.  I chose white since I have so many white pieces.  I pulled many of them from the hidden storage in the kitchen and displayed them here.  In turn, I used the closed cabinets to store what no longer fit in the hutch.

Here is a peek at what’s inside:

I collect cake plates.  Maybe not “collect” but I have quite a few.  White ones are my favorite.  Towards the back is a soup tureen that has a beautiful shape and added some height.

Decorating a China Cabinet / Hutch


Add a little bit of green.  It’s the finishing touch in most decorating projects!  Isn’t the little birdie cute?

Decorating a China Cabinet / Hutch

Above it, I have a silver cake stand and some pretty platters.  The silver pieces are a nice accent to the white pieces.  The lady taking pictures in her pajamas is not a nice accent to the hutch.

Decorating a China Cabinet / Hutch


On the other side, more cake platters, stacked on each other.  Next to it is a ballerina, which is a gift my husband gave me about 15 years ago and it must stay here if it doesn’t want to get hit with a nerf gun!

Above it more silver pieces.

Decorating a China Cabinet / Hutch


More silver platters.  You would think I bake all the time and I don’t!  Like the people that have lots of pots and rarely cook.

Decorating a China Cabinet / Hutch


In the very top I have a fine china place-setting.  The thing is, I don’t own the whole set.  Years ago I saw the two sets on clearance and I purchased them to decorate the hutch, not intending to ever use them for entertaining.  I prefer using simple white plates that I can buy 10-12 of, and not worry about them breaking.

Decorating a China Cabinet / Hutch

Talking about white plates.  Here they are!  These are not used daily, so they don’t need to be in the kitchen.  The bottom shelf is the busiest but it also not as visible when the hutch it closed.

Decorating a China Cabinet / Hutch


This cow creamer pitcher adds a little charm! It looks pretty scary funny pouring out cream, I must say!

Decorating a China Cabinet / Hutch


Here it is all lit up!  Picture doesn’t capture how pretty and simple it looks, but I tried my best.

Decorating a China Cabinet / Hutch

One last look!

Decorating a China Cabinet / Hutch


Hope this inspires you to move things around in your china hutch and make it look pretty without loosing the storage we all love!

Decorating a China Cabinet / Hutch

Until next time!

Maria

Filed Under: Decorate, Dining Room · Tagged: China Cabinet, China Hutch, Decorating

IKEA Plant Hack

September 5, 2014 · by Maria · 4 Comments

IKEA Plant Hack

I love grass centerpieces, especially the ones that look like fresh greenery.  The finishing touch to any decorating project, is usually a little bit of green.  IKEA plants are some of my favorite because they are inexpensive and they look “real”.  I usually display them as-is inside a vase or small pot, but this time I needed to do a little IKEA plant hack if I was going to get it to work inside this gold geometric vase.

IKEA Plant Hack

I purchased the vase at Target a year ago, it is from the Nate Berkus collection.  I really love the vase and because of it’s interesting shape, it doesn’t need anything inside.  Except, after pairing it with other gold vases and in a gold tray (also from Target), it did need a pop of color to bring it all together.

IKEA Plant Hack

Everytime I go to the store, I buy milk (whether I need it or not) because I know that we will use it.  Everytime I go to IKEA, I buy one of these plants for the same reason.  Eventually there will be a project that needs a little green touch and it’s nice to have these inexpensive little plants at hand.

I had two extra IKEA plants  from the Fejka collection and two ended up being perfect for the vase.

IKEA Plant Hack


I knew I needed foam to fill the vase but I didn’t have that much foam.  I placed a few crumpled sheets of paper in the bottom of the vase as a filler.

IKEA Plant Hack


I had a small piece of foam left over from another project.  I cut this piece in half.

IKEA Plant Hack

And I arranged it inside the vase so that it was snug.  You can also use a glue gun to secure it further, but I didn’t need it.

IKEA Plant Hack

I started with the plant by pulling apart the leaves and then discarding the pot.

IKEA Plant Hack

The really big one in the middle came out in a larger bunch and it was perfect to fill the center or an empty corner of the new arrangement.

IKEA Plant Hack


The smaller stems were set aside as filler for empty spots, once I was done placing the rest.

IKEA Plant Hack


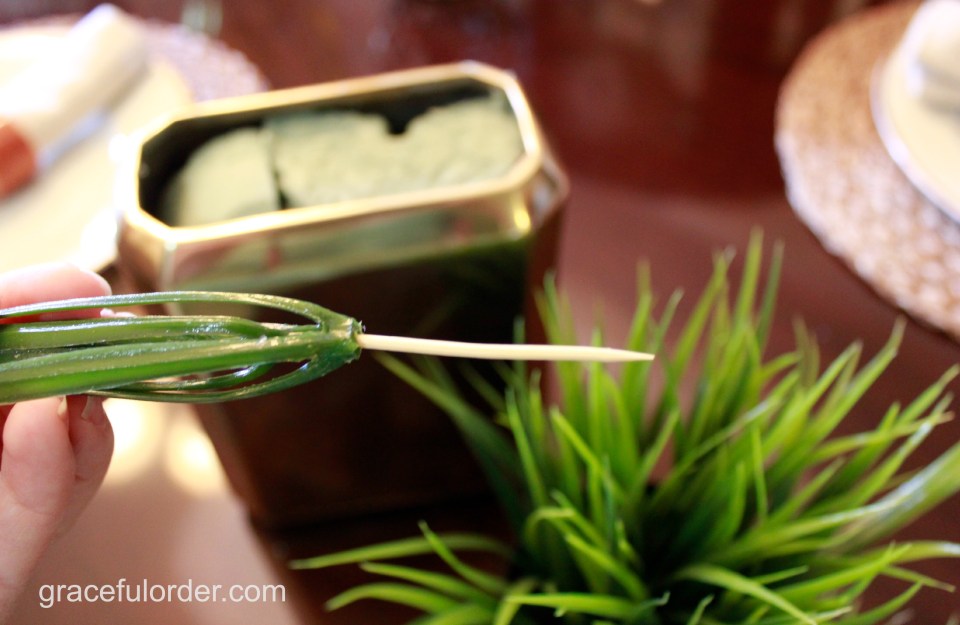
I placed a toothpick inside each stem so that it would glide into the foam and stay there.  You can also use a glue gun and skip this step.

IKEA Plant Hack


I started filling the corner of the vase and just kept going…

IKEA Plant Hack


Here is the finished product!  I think it looks pretty high-end and it was so inexpensive and easy to put together!

IKEA Plant Hack


One more shot of the before and after.  What do you think?  Big difference with a plant that currently sells for $3.99 !

IKEA Plant Hack

Do you also have these plants around the house?  Maybe you can add one to a vase and create a new, fresh look!

Till next time,

Maria


Filed Under: Decorate · Tagged: Centerpiece, ikea, Plant

Making Curtains Longer Without Sewing

September 1, 2014 · by Maria · 7 Comments

Making Curtains Longer Without Sewing

Most department store curtains are not long enough to reach the floor.  In my boys rooms, I  don’t want them dragging on the floor, because it just makes it harder to clean.  That being said, my 10 year old’s curtains were waaay too short.  Like high-water pants on the wall.  The moment that I put them up, I knew I would have to lengthen them.  Lengthening meant sewing, because it’s not like I was going to use tape…hahaha….that’s crazy…  Ok, I used tape.  They actually have a product for people like me that can’t/won’t/shouldn’t sew.  I found that making curtains longer without sewing was possible with heat and bond adhesive tape.

Here are the high-water curtains before.  Too short, right?

Making Curtains Longer Without Sewing

My son’s room is decorated mostly with grays, with pops of yellow and I found this solid yellow curtain, which was a good match.

I took the existing curtains down and gathered my supplies.  The heat and bond adhesive, a yellow curtain I found on clearance, scissors and a small iron.

And Rocky Balboa training music, which is the soundtrack for all my projects.

Making Curtains Longer Without Sewing

I cut a yellow piece of the curtain for both panels.  Be sure to measure.  In my case, I didn’t want it too long, but you may want yours kissing the floor, if it’s for a more formal area of the home.

Making Curtains Longer Without Sewing

I placed the iron-on tape where I wanted to adhere the new cut piece to.

Making Curtains Longer Without Sewing

Then I ironed over it, which is what makes one side adhere to the existing curtain.

Making Curtains Longer Without Sewing


Once it cooled, I pulled the film off and placed the new yellow piece over the tape.  Making Curtains Longer Without Sewing


I ironed once more to make sure that the other side of the tape adhered to the new fabric I was adding.

Making Curtains Longer Without Sewing

I did the same thing to the second panel and I was done!  It was so easy and I wondered why I didn’t do it sooner.  I seriously had this tape in my closet for months because I thought the process was somehow more difficult.

Making Curtains Longer Without Sewing

Maybe I will add another thin piece later on…maybe a black or gray but for now, this length is good.

Making Curtains Longer Without Sewing

Here is the before and after.

Making Curtains Longer Without Sewing

So I thought I would share this with you just in case you have a pair of curtains that you love, but are a tad short.  Adding another color band at the bottom, not only adds length, but a bit more style, and in kids rooms it’s another opportunity to add a pop of color.  Which is something Rocky Balboa would care about.  Not really, but he would totally avoid sewing if he could.  I am sure of it.

If you have curtains that you love, but it bugs you that they are so short, give this a try.

Maria

Filed Under: Bedroom, Decorate · Tagged: Curtains, No sew curtains

Updating the Dining Room

August 25, 2014 · by Maria · 7 Comments

Updating the Dining Room

Earlier this week, I shared how I updated my old curtains and I promised pictures of how I was updating the rest of the dining room.  When we moved in 10 years ago, I was nine months pregnant and we were in a hurry to get the house ready before the baby.  We painted the house in a rush and didn’t worry about most of the furnishings until after I had the baby.  I eventually realized that some of the colors we chose didn’t compliment the furniture, as well as I would have liked.  But we spent so much money on paint, and it was so much work to paint the whole house again, that I figured I would change the colors sometime down the line.  Well, it’s now sometime down the line.  The paint has lasted over 10 years and I can’t ask for more.  The colors that I wanted to change asap were the ones in my kitchen and the color in my dining room.

Although there is a french door in the dining room, there isn’t much natural light that comes in through the adjacent room.  The wall color was dark, the furniture is dark, the curtains are dark…I’m depressed just writing this…  Overall, the room needed to be brighter!  We weren’t about to change the furniture, so I went off to the paint store to find the right color.  I knew I wanted a white shade but finding the right shade of white was harder than expected.  Some whites are cool and others warm, the cool tones were my favorite.  However, cool tones didn’t match the existing decor, so I had to go with a warmer white.  But I didn’t want it too warm, too yellow.  I know…your head is spinning.  Mine was too.

After looking at so many swatches of color, I chose one from Sherwin Williams called “White Duck”.

Updating the Dining Room

Like many of my paint projects, I started at night.  After all, the kids were in bed and I didn’t have to worry about them running around while I tried to paint.  Here is the before picture of the room.

Updating the Dining Room


Look at the difference in the colors.  At first I wondered if the new color was too light.

Updating the Dining Room


But after finishing one wall, the room was already looking brighter.  Although outside it was getting a lot darker.  I needed sleep.

Updating the Dining Room


The next morning, I moved the china hutch and painted behind that last wall.

Updating the Dining Room


And here is the finished product, with the curtains and art back up on the wall.

Updating the Dining Room


Here is the other side.  So much brighter!  The ceiling was already painted and I wasn’t about to mess with that.  Painting ceilings is for people far braver than I.

Updating the Dining Room

I did paint the molding as well to make the room look fresh and complete.

Updating the Dining Room


One last look at the table and another angle of the room.

Updating the Dining Room

All I did to update this room was change the curtains, and change the paint color.  The room feels so airy with the lighter tone and we all love it!

What’s the next room in your home that you will probably paint?  For me, it will probably be the kitchen.

Maria

Filed Under: Decorate, Dining Room, Uncategorized · Tagged: Dining Room, Dining Room Decoration, painting, Sherwin WIlliams

Easiest Way to Update Curtains

August 20, 2014 · by Maria · 1 Comment

Easiest Way to Update Curtains

After sharing my master bedroom and my master bathroom update, I started thinking of ways that I could update other rooms in my home.  One area that I have wanted to change for years, is my dining room.  I wanted to change the color and the curtains.  I looked for different options for curtains and they were all either too expensive, or too casual for my formal dining room and existing furniture.  Of course, another option was making my own curtains, except I can’t sew.  I tried to figure out the easiest way to update curtains without sewing or replacing.

My curtains consisted of two panels and a swag.  I decided that if I removed the swag and kept the panels, the room would instantly look more updated.  The thing is that the swag was stapled to the rod and the panels hung from a separate rod that held the sheer.  Here is the BEFORE of the dining room.  The lighting is horrible but I started this project at night.

Easiest Way to Update Curtains

I removed the rod and ripped out the swag and the 90 (or so) staples that held it.  This was the most tedious part of the whole process.

Easiest Way to Update Curtains

I wanted the panels to hang from rings, except I had no rings.  I started looking for matching ones online and they were so expensive!  Especially the size and quantity I needed (20).  I eventually, found these unfinished curtain rings on amazon and I purchased 2 sets of 10.  Since they were untreated, I decided to spray paint them once they arrived.

Easiest Way to Update Curtains

Once I painted them and added them to the rod, I removed the sheer and the panels.

Easiest Way to Update Curtains

Here is my husband removing the hardware, while telling me “When you told me you were updating the curtains, I didn’t think you meant tonight”.  Does this man not know me by now??  I had already waited 2 days for amazon to ship the rings!  How much longer was I supposed to wait?!

Easiest Way to Update Curtains

Then I placed the pinch-pleat curtains on each one of the new rings and VOILA!

Easiest Way to Update Curtains

I won’t show a full picture of the AFTER yet, because my next post will be about the new color I chose for this room (not the one in the pic…stay tuned).

I haven’t decided if I should add another sheer, or some other option.  For now, I left it open.  What do you think?

Maria

Filed Under: Decorate, Uncategorized · Tagged: Curtains, Decorating, Dining Room, No sew curtains

Reading Nook for Toddlers

August 14, 2014 · by Maria · Leave a Comment

If your toddler has a small bedroom, but you still want to create a little “reading area”, check out my contributor post over at A Bowl Full of Lemons blog. 

Here is a sneak peek…

Reading Nook for Toddlers

Click on over to read more about the reading nook and to check out one of my favorite blogs!  I look forward to your comments!

Maria

Filed Under: Bedrooms, Decorate · Tagged: Reading Nook, Toddler room

Transform your Closet

August 12, 2014 · by Maria · 51 Comments

Transform your closet

I shared the before-and-after of my master bedroom closet last year, but I have added some features that I wanted to share with you.  You can transform your closet by learning how to best use the space you have.  Organizing your closet will also simplify your morning routine.

I am a stay-at-home mom, and I am not very adventurous with my wardrobe.  I basically wear jeans and a t-shirt everyday (not the same one!)  with minimal accessories, except for the weekend when I put forth more effort.  I like dressing down and I like dressing up.

When I do dress up, I like options!  I like my closet to look like a mini-boutique.  Because I am girlie, I am just not fussy.

Transform your Closet

  1. Start by sorting your pieces.  Sort your items and get rid of things that you know you will never wear again.  Items, even expensive, good quality ones get faded, they pill, they eventually look dated.  Donate them or toss them if they are in bad shape.  That way you can make room in your closet for the items that you wear and love.  There is no sense in having a crowded closet, when you can get rid of items that you don’t like or use.  Having space between your clothing even makes putting away laundry easier.Transform your Closet
  2. Display your favorite pieces.  Most of my jewelry is costume jewelry and I have a lot of it.   I have a stand alone jewelry armoire in my bedroom, but nothing compares to actually seeing my options when I am getting dolled-up.  One of my favorite buys is this jewelry display.  I find that I use my bracelets and watches so much more after I added it to my closet, and doesn’t it look like a store display?  Love that.
    Transform your Closet

I added an earring display (I do wish it had more room though).

Transform your Closet

And a ring display, actually I bought two.  These are all faux pieces.  If they weren’t, I would be blogging from my private jet.  🙂  I would still be blogging though…I love it that much!

Transform your Closet

3.  Add a garment valet rod.  This one fit right into the pre-drilled holes in my closet system, so that I can put outfits together (when I take the time to do that) or even when I am putting away laundry, and I just want to get shirts on a hanger before the wrinkles set in.


Transform your Closet

It tucks right in, when not in use.

Transform your Closet

4. Color-code your wardrobe….Game Changer!  This takes a while the first time you do it, but you will save so much time when you are getting dressed. Also, putting away laundry is faster when you know where everything belongs.

Transform your Closet

5. Laundry Folding Board for perfectly folded shirts.  Honestly, I don’t use this board for my clothing since I hang up most items.  I do use a laundry folding board for my husband, because he has so many t-shirts.  It keeps all his shirts looking great in his closet.  If you fold your shirts, it’s a must for the department-store-perfect-fold look.  I found mine in The Container Store but I couldn’t find it there now, so here is a similar folding board on Amazon.

Transform your Closet

6. Invest in thin hangers (whether plastic or flocked).  This will give you so much more room!  Wood hangers are beautiful and they are great for suits, but they are also bulky.  If you are looking to make space, thin hangers are the way to go.


7. Use a tie rack to display necklaces.  Bulky necklaces are really fashionable right now and tie racks are perfect for holding larger jewelry pieces.  It also keeps them from getting tangled.

Transform your Closet

8. Bring a dresser into your closet.  When I shared about our master bedroom, I mentioned that we opted for a sitting area as opposed to a dresser.  Adding a small dresser inside the closet definitely made up for the storage we lost in the bedroom.  This dresser is from IKEA and it is topped with glass (sold separately at IKEA) so I don’t have to worry about it getting scratched.  Plus, I think it looks nicer with the glass topper.

The rest of the cabinetry was built around that dresser.

Transform your Closet

9. Add a mirror to your closet.  I could have added more cabinetry above the dresser, but I am so glad that I didn’t.  Even a small mirror can make your closet look larger.  I didn’t have space for a full-length mirror, but even this little one did the trick.  I can also try on my accessories in the closet, which wasn’t possible before.

Transform your Closet

10. Use kid hangers for your pants to save space.  I used to use regular sized hangers for my pants, and they would take up so much space.  One day I tried using hangers from my son’s closet and they were a perfect fit!  I bought a couple of sets for myself.  I will be honest, I am not a fan of felt hangers.  I don’t like how they cling to clothes (which I get, is the point) but for pants I did prefer the felt, it keeps the pants from sliding.

Transform your Closet

These are my favorite tips and products for transforming a closet!  The key in organizing your closet is to capitalize on using all the space available, but the key to transforming it, involves a little bling.

I hope you all enjoyed this tour of my closet and I would love to hear from you.  What are your favorite closet organizing tips?

♥

Maria

~ This posts contains links, a few are affiliate links.  As always, thank you for your support of Graceful Order!


Here is an updated master closet post : Organizing the Master Closet


Filed Under: Closets, Top Navigation, Uncategorized · Tagged: Closet Organization, master closet, Organization

Cleaning with Lemons

August 8, 2014 · by Maria · 5 Comments

Cleaning with Lemons

Got lemons?  A week ago I shared how I clean my microwave using lemons, and I thought I would also share some of the many ways of cleaning with lemons. Going green has been a priority for me, and it has also been a process. I have slowly replaced my old cleaners with more natural store-bought ones or even homemade cleaners. I think we are all second guessing our cleaning supplies and we want to get away from anything potentially toxic. Of course, we need to replace them with alternatives that are natural and effective. Lemons are both.

Since lemons are acidic, they have antibacterial and also antiseptic properties that can help clean our homes, the natural way.


I use lemons to clean:

The Sink

Surprisingly, sinks can be one of the dirtiest places in the home. You can clean the sink by sprinkling some baking soda and scrubbing it clean. Once you clean and dry it, you can use a lemon half to scrub the sink some more. Squeeze as you clean and use both sides of the lemon and even the pulp. If you have any rust stains in the sink, you can try a mixture of salt and lemon (paste consistency) to scrub that area.

Cleaning with Lemons

Cutting Boards

I recently shared in detail how I clean my cutting boards. I use a mixture of salt and lemon to scrub the board, before oiling it.  You can also remove food stains from plastic cutting boards by using half a lemon, squeezing it into the board and letting it sit a while. Then rinse.

Cleaning with Lemons

Garbage Disposal

To get rid of odors in the garbage disposal, you can cut up a lemon, throw it in and grind it up.  I usually do this after I have already used the lemon to deodorize my microwave. If its just a drain, pouring a little hot water with some lemon juice will help to deodorize the drain!

Cleaning with Lemons

Microwaves

For details on how I clean the microwave, you can read about it here.  You can use a microwave-safe bowl and fill it up halfway with water and a couple tablespoons of vinegar and add a lemon half to the mix. Microwave this for 5 minutes and let stand for a couple of minutes.  (Don’t stand in front of the microwave while it’s heating up the water, just in case your microwave is super strong and 5 minutes is too much.) Wipe down the microwave. Squeaky-clean!

Cleaning with lemons

Kitchen Odors

To get rid of lingering smells, fill a pot with water and add slices of lemon rind and bring to a boil. This will not only do the trick in the kitchen but your home will smell so fresh!  You can also add a cinnamon stick to the mix if you like the scent.

Stovetops and Ovens

I have a glass stovetop and anytime that food splatters, or worse, boils over, a simple wiping down of the stove won’t do. You can make a paste of lemon juice, water, and baking soda and spread on the food spill. Let this paste sit for about 20 minutes and then scrub the area as much as needed before rinsing.  The same will work for cleaning the oven.

Cleaning with lemons

We know that lemons have great properties for our bodies, but they are also great for maintaining the home!

Let’s remove toxins from our homes and let’s clean the natural way. It’s like cleaning with a “twist” 🙂 .  Are you also trying to go “greener” with your cleaners?  Do you already use lemon as an alternative?

Maria

Filed Under: Clean, Kitchen, Uncategorized · Tagged: Cleaning, cleaning kitchen, lemons, Natural Cleaning

Organizing Cookbooks

August 4, 2014 · by Maria · 8 Comments

All my friends know that I love to organize, But I am equally known for my love of eating cooking.  I read cookbooks like one would read novels.  When a favorite chef of mine has a new cookbook coming out, the release date is written on my planner (right next to my cardio gym class suggestions reminders…the irony).  I take this stuff seriously.

Over the years, I have collected so many cookbooks that they were spilling out of my office.  I needed a solution for organizing cookbooks. I knew that I had enough to fill up a bookshelf, so that’s what I did.  There was a little corner in our home, that was perfect for my books.  This spot was close to the kitchen, which made it even better.

Organizing Cookbooks


I found this bookshelf at Target.  I wanted something sturdy but inexpensive.  It’s not like I have kids that jump on furniture!  Scratch that.  I don’t have kids that jump on bookshelves.

Organizing Cookbooks


I started to place all the cookbooks in the bookshelf and I thought that I would have enough room to accessorize the bookshelf and leave some empty space…but nope.  The books took up the whole space.  If you have a ton of books to put away in a bookshelf, try to alternate the placing.  Standing some books, leaning others, and so on…  Break it up so that it is more interesting to look at and not so orderly.  If you do have space, add a picture frame, a book-end, or an accessory on top of a stack of books.

Organizing Cookbooks


I left enough space on top of the bookshelf to look through the books when searching for a recipe.

Organizing Cookbooks


I added some accessories and voila!  My little cookbook corner!

Organizing Cookbooks


Do you also collect cookbooks?  Where do you store them?

Until next time!  I will be cooking up a storm (at the very least, reading about people that do!)

Maria


Filed Under: Living Room, Other, Recipes, Top Navigation · Tagged: Bookshelf, Cookbooks, Kitchen, Organization

Using Ottomans to Store Books

August 1, 2014 · by Maria · 4 Comments

I recently shared pictures of our master bedroom and the master bedroom sitting area.  But do you know what used to keep my room cluttered?  Books!  They were everywhere.  I read a couple of  books at a time, and if I really love the book, I won’t get rid of it.  It becomes like a reference book, or I may even want to re-read it.  Using ottomans to store books in the bedroom is a great way to keep books close, but out of sight.

Using Ottomans to Store Books

Sure, I like pretty books displayed throughout the house.  I like to surround myself with books.  If you are a book lover, I think you understand.  I just don’t want them in piles all over my bedroom, which is a space that I like to relax in.

I found this ottoman at Target earlier this year and I was able to store almost 100 books!  I actually need to go through these and give some away, but I wanted to test the ottoman’s capacity.

Using Ottomans to Store Books


There are different kinds of ottomans, but storage ottomans are my favorite since they perform double-duty!

Using Ottomans to Store Books

I still keep a few books on my nightstand, but now I can see my nightstand.  🙂

Do you have ottomans in your home?  What do you store in them?  Books, Blankets, Games or are they a catch-all when the mother-in-law is on her way (‘cuz that’s a good idea too)?

Until next time!

Maria

Filed Under: Decorate, Uncategorized · Tagged: book organization, ottomans

Master Bedroom Sitting Area

July 28, 2014 · by Maria · 3 Comments

Master Bedroom Sitting Area

Many newer construction homes have large master bedrooms.  So large, that there is plenty of space for a sitting area.  When we purchased our home, I was happy with the size of the master bedroom, but I knew that it wasn’t large enough for a master bedroom sitting area.  There was only space for a dresser and a television, in addition to the bed and night stands.  I thought that if I could find large enough night stands, I could forego the dresser.  That’s exactly what we did, when we found these…

Master Bedroom Sitting Area

It still did not replace a dresser, but it made it possible to do without it.  I also needed to find a small couch.  I didn’t want to crowd the room or make it look like we were stuffing a piece of furniture in a space that clearly did not call for it.  I found this couch and chair and I loved that they were armless.  Armless furniture creates less visual bulk, and allows for furniture to be placed close together.

Master Bedroom Sitting Area

We purchased the chair in a print so that it wouldn’t look too “matchy” but honestly, I wouldn’t do that again because it did tie me into a color scheme.  If I had purchased it in a neutral tone, like the couch, I could have simply changed the pillows for a new look.  Don’t get me wrong, these pieces are more than 10 years old and I still like them very much!

The bedroom is decorated in neutral tones, with pops of coral.

Master Bedroom Sitting Area

This lamps and shades are from Target.  I purchased two of these shades (that were on clearance, bonus!) so that I could tie together the floor lamp with the one on the side-table.  This floor lamp used to be black and it was in my son’s room.  I spray painted it gold, and now it works in my room.  (You can’t see the gold stripe going through the floor lamp shade, due to the light.)

If you have mix-matched lamp bases, you can still tie the look together with matching shades.

Master Bedroom Sitting Area

Do I miss the dresser?  At times.  It was always our goal to customize our closets so that we would have extra space and so far my closet is done and my husband’s is next.  Having drawers in my closet really helped!

I do love having a little sitting area to read, chat with my husband, or simply tie my shoes.

Is there an area in your home that was initially too small for your “vision” but you still made it work?

See you soon!

Maria

Filed Under: Bedroom, Decorate, Uncategorized · Tagged: master bedroom, master bedroom decorating, sitting area

Creating a Master Bedroom Retreat

July 25, 2014 · by Maria · 11 Comments

The last two weeks we have talked about the master bathroom, and shared ideas about creating storage in small bathrooms, I also painted my laminate cabinets and organized under the sink.  But now, let’s step into the master bedroom.  Creating a master bedroom retreat is our project this week, and I want to share with you some decorating ideas.

Creating a Master Bedroom Retreat

The master bedroom should feel like a hug.  Creating a master bedroom retreat is so rewarding because after a hectic day, you want to go into a space that says “peace”.  My favorite bedding is all white because it has a casual, welcoming feel.  I never try to make my bed perfect, I even like the wrinkles.  I don’t think I have ever said those words before, but I do.  They add to the casual, inviting feel.  And it works because my boys always seem to feel that they are “invited” into our bed.

I purchased this bedding from Ballard Designs and I LOVE the large monogram.  The sheets are not fussy-looking but they feel luxurious.  Monogramming has a bad rap for being stuffy, but when paired with cotton, it’s just an elegant touch.

The “Graceful Order” wasn’t monogrammed into the sheet, that was editing. 😉

Creating a Master Bedroom Retreat


On the foot of the bed, I place a throw.  Honestly, we rarely use it but I think it warms up the room.

Creating a Master Bedroom Retreat


Our bedside tables are large and thanks to that, we opted for a sitting area instead of a dresser.

Creating a Master Bedroom Retreat


I love this lamp and shade, both from Target.  In this picture the lamp was off, but the sunlight was flooding in.

Creating a Master Bedroom Retreat


My husbands nightstand has a valet box where I store all the little papers and receipts that he brings home.  Otherwise, the nightstand would be covered with receipts and business cards.

Creating a Master Bedroom Retreat


I love having an Oil Diffuser in the bedroom to disperse lavender and eucalyptus.  Bring the spa-feel home!

Creating a Master Bedroom Retreat


Right now, the Oil Diffuser is resting on my jewelry cabinet.

Creating a Master Bedroom Retreat

There are a few steps in creating a master bedroom retreat.

  1. Clear the clutter from the night stands.  They become the “catch-all” in the bedroom and get messy fast.

  2.  Clear items from under the bed.  I used to store stuff under the bed and I have to admit, it was just a big dust magnet.  Most of the stuff I had under the bed, I should’ve either thrown away or made space for it in my closet. If you can, clear out this area and it will be so much easier to keep the room clean.  I am glad I did this years ago.

  3.  Decide what “look” you are going for and get rid of decorations that don’t match the “look”.  Sometimes you need to shop-your-house and bring in items that you already own and love into your new space.

  4.  The biggest investment (besides furniture) and the one that will make the biggest difference, is the bedding.  Splurge on nice sheets.  They last longer and therefore more economical in the long run.  I look for a comforter that is washable since the boys love to jump on our bed.  White comforters are my favorite because I can always add color pillows if I want to add a pop of color.  For now, all white is my favorite.

  5.  Have the books that you are currently reading out on your nightstand, but not an entire set of encyclopedia next to your bed (do you still have those by the way?  I do).

  6. If you are going to go all out and paint the walls, choose a color that is relaxing.  Skip “Peacock Green” and “Magenta Madness” for this project.

  7.  The next thing on my list (which we still don’t have) is purchasing a nice rug for under the bed.  We have wood floors and I would prefer stepping onto a plush rug when I get out of bed.  I know it will be a finishing touch to our bedroom and also add an added layer of comfiness.

Soon we will talk about creating a seating area and how to use ottomans in bedrooms.

Until then, please share with me your favorite color scheme for the master bedroom.  Is your bedroom decorated in warm neutral colors, do you prefer cool tones, or just pops of vibrant color?  I look forward to reading your comments!

Maria

Filed Under: Bedroom, Decorate · Tagged: Ballard Designs, Decorating, master bedroom, master bedroom decorating, master bedroom organizing, Organizing

How to Clean a Microwave

July 22, 2014 · by Maria · 5 Comments

How to Clean a Microwave


Last month, we cleaned our wooden cutting boards, and we are here to tackle another forgotten kitchen workhorse.  The kitchen is clean and picked up, but there is a little forgotten area in the kitchen that waits patiently amongst splatters of tomato sauce…the microwave.  And it’s actually really easy to clean, without using any harmful chemicals.  Here is my step-by-step suggestion on how to clean a microwave.

This is my microwave BEFORE cleaning.  It really wasn’t that bad this time, but it could use a little cleaning and deodorizing.

How to Clean a Microwave


There were splatters along the walls and under the turntable.

How to Clean a Microwave


There are a couple of different ways to clean or deodorize the microwave.  Sometimes the microwave doesn’t need a big cleaning, but it’s smelling a little “funky”.  I hate heating up coffee in a microwave that smells like “food”.  You know what I mean?  Like I feel the flavors will jump into my cup-o-joe.  Eww.

My favorite way to deodorize the microwave, is to place half a lemon on a plate with a tablespoon of water.  Then microwave for 60 seconds.  (In this case, I placed the lemon right on the turntable because I was going to wash it afterwards.)

How to Clean a Microwave


Then the lemon will be super soft and the microwave will be steamy enough to wipe down and it will smell pretty darn good.

How to Clean a Microwave


Don’t waste that squishy lemon!  I cut it in half and throw in the garbage disposal to deodorize that as well.

How to Clean a Microwave


If your microwave needs more than just deodorizing, a steam bath is in order.  Place a couple of tablespoons of vinegar into a microwave-safe bowl and fill the bowl halfway with water.

How to Clean a Microwave


Microwave this for 5 minutes and let stand for a couple of minutes.  Don’t stand in front of the microwave while it’s heating up the water, just in case your microwave is super strong and 5 minutes is too much.  

Then carefully remove the bowl and wipe down the walls of the microwave with a super cute argyle-patterned sponge in a oblong shape.

How to Clean a Microwave


Then remove the glass turntable and give it a good wash or place in the dishwasher.

Microwave 4

Check out the AFTER!  So clean and no nasty chemicals.

How to Clean a Microwave


Other Options:  If you don’t have vinegar, you can also put a halved lemon in the bowl of water before microwaving it, and if you have neither – a bowl of water alone will suffice.  It’s basically the steam that will help to clean the microwave, the other additives are a plus.  Also, don’t stay away from vinegar because of the smell, it will quickly dissipate once it dries.

How to Clean a Microwave


Of course, the best way to keep up a clean microwave, is too quickly wipe up spills before they stick AND convince your family members to use a lid over the food.

How to Clean a Microwave

Now that you have steam cleaned your microwave, don’t forget to wipe down the outside.  There are so many ways to keep cleaning easy and natural and this is just one of them.

Do you already clean your microwave using one of these methods?  Do you have another method that I didn’t mention?  Share it with me…

Happy Cleaning!

Maria

Keep in mind that super-heated liquid can cause an explosion and all microwaves heat up at different rates and intensities.  You can almost always prevent this from happening, by simply leaving a wooden spoon in the cup or bowl when you boil liquid in your microwave. I have never had an explosion, but this suggestion won’t hurt. 


Filed Under: Clean, Kitchen, Uncategorized · Tagged: Cleaning microwaves, Kitchen, Microwave, Natural Cleaning

Adding Storage to Bathrooms

July 17, 2014 · by Maria · 1 Comment

My last post on my master bathroom’s before and after  was kinda lengthy, so I left out the details of this new cabinet.  I already have a small closet that holds a ton of stuff in my bathroom, but I really needed a bit more storage for my little towels and miscellaneous items that get “lost” in that other closet.  Purchasing an over-the-toilet etagere (fancy schmancy word and yes, I would like a croque madame with my etagere) is the perfect way of adding storage to bathrooms.

Adding Storage to Bathrooms


I started building this puppy at night, because I am patient like that.  Hence the bad lighting.


Adding Storage to Bathrooms


It was pretty easy to put together and I didn’t need an assistant.  Although my toddler kept saying “mommy, I’m a great helper” the whole time.  He even brought over his toy drill.  🙂

The last step was anchoring it to the wall.


Adding Storage to Bathrooms


I really love the fact that it has doors, because let’s face it, it won’t always look this perfect!  I will eventually add more stuff.  I haven’t decided what I will store here and what will stay in the closet.

Adding Storage to Bathrooms


I found these little baskets at Target, on clearance.  I am putting new travel-sized items in this one.  Not toothbrushes and stuff, because this is on top of a toilet, and because that is gross, and because…well.  Ya know.


Adding Storage to Bathrooms


The one on top has empty cosmetic bags, brushes…not quite everyday stuff but it can still be handy on top of the etagere ( I will now have a mimosa with my croque madame with my etagere).

Here is the side view.

Adding Storage to Bathrooms

This is a little idea that made a big difference in our bathroom.

Au revoir, et a la prochaine!  (It means, goodbye, until next time, in french.  I know this to be true because I just looked it up.  Merci Wikipedia!)

Maria

Filed Under: Bathrooms, Bathrooms, Top Navigation, Uncategorized · Tagged: Bathroom, Bathroom cabinet, Bathroom Storage, Organization

Updating Master Bathrooms

July 14, 2014 · by Maria · 7 Comments

Updating master bathrooms

We have big ideas for the master bath, the kitchen…and the list goes on.  Our big ideas usually require some sort of demolition and re-building, so they also have a big price tag attached.  I noticed that I wasn’t updating anything in the house because we weren’t quite ready for “the big idea”.  After 10 years, I had grown tired of my yellow bathroom.  There wasn’t anything wrong with the paint, except I wanted a change.  A change that would not cost too much.  Updating master bathrooms could be as simple as buying some paint.  And that is what I did.

Here is the before picture.  Here it was a little messy because I had already started to patch things up and move things around.  I always forget to take a decent before picture, but this gives you an idea on the “before” color and look.

Updating master bathrooms


After looking at quite a few paint colors, I decided on one called Comfort Gray from Sherwin Williams.  It was a “comforting” gray-blue.  I also purchased a paint kit from there.  I have textured walls and sometimes I prefer painting with a brush and small roller to get into all the crevices.  I did use a large roller (not pictured) for the first coat.

Updating master bathrooms

Here is the “after” picture.  I kept most of the accessories that matched.  I changed the curtain rod, that was previously black, to this one from Target.  It was under 5.oo at the time!   I kept the little curtain.

Updating master bathrooms


The paint looks a little more green in this picture, but it was just the lighting.  These vintage-looking enamel pitchers are from IKEA and the little bird canisters are from World Market.


Updating master bathrooms


I had these towels already, but they looked so much nicer now.  These monogrammed towels are from Frontgate.

Updating master bathrooms


In the sink area, I added these green coral prints that I purchased on Etsy.

Updating master bathrooms

I added a shelf unit to go over the toilet which added a lot of storage.  I found this print at Homegoods and I instantly loved it.  It had a warm khaki background which could help to tie-in the remaining ivory items and tile, but was still airy enough to match the current look.

Updating master bathrooms


At the very top, I added a manzanita branch that used to reside in the family room.  I am not certain that I will leave it here (hence the pushpins…look closely).  It is right above the cabinet and print.  I don’t know if I love it or hate it.  What do you think?

Updating master bathrooms

Here is a picture from the opposite direction, where the shower and my husbands sink is.  I promise that I cleaned the shower door (cuz I knew you were comin’) but I think the glare made it look streaky.   On the very edge of the picture, you will see a dark piece which is my ironing board.  I keep it in the bathroom.

Updating master bathrooms


This is what you see when you step into the bathroom from our bedroom.  I also had to paint those columns because they were ivory and majorly clashing with everything.  They got a coat of white as well.  When I have a brush in my hand, no one and nothing is safe.  mwahahaha!!!

Did I scare ya?

My maniacal laugh never works.

Updating master bathrooms

I gotta tell you, I did all this while my husband was out-of-town and he was impressed when he finally saw it.  I didn’t even tell him that I was doing it and then when I went to pick him up at the airport, I told him.  I couldn’t wait any longer.  He laughed in disbelief.  He knows that I will take on a paint project, but a whole bathroom?  And paint cabinets?  I stared at him with my best serious face and then he said, “Oh wow, that’s great.  Can’t wait to see it.”   I have had a good batting ratio as of late but my DIY record has some tarnishes.  Then I went on to tell him that I used the same paint to paint over the ivory tile.  This time he wasn’t sure if I was serious, so he said “You wouldn’t have done that because you know that you can’t just paint over tile”.  Still, it was more of a question than a statement.  Then I laughed because the man had been working non-stop for days and doesn’t deserve to think that I painted our bathroom tile with water-based paint.  It wasn’t right.


Updating master bathrooms

So that’s all!  Tell me, do you have big dreams for your master bathroom, but your budget doesn’t allow to start breaking walls?  How about just a coat of paint, maybe some new towels and an accessory or two.  It made a huge difference in my bathroom and now I am not in a hurry to make further changes.

Hope you enjoyed this before-and-after!

Maria


Filed Under: Bathroom, Decorate, Uncategorized · Tagged: Bathroom, before and after, remodel

Painting Laminate Cabinets

July 10, 2014 · by Maria · 2 Comments

Painting Laminate Cabinets


I have been updating my bathroom and I have already shared how I organize my sink area, how I organize under the sink, and lastly, the shower area.  Well, the first thing I did was paint the walls, which I will go into detail later this week. Once I painted the walls, I realized that I loved the color but it clashed with my maple colored cabinets.  I had never considered painting laminate cabinets because I assumed that the paint would peel right off.  So I did a little research and I found out that you can in fact paint laminate cabinets.

I thought that I would try it out in my bathroom since it was just a few cabinets and if the project flopped, I would remove the doors and tell my husband that open shelving was the hottest thing in bathroom trends.  But he is smart, and that would not have worked, so it was a good thing that my little project did work!

Painting Laminate Cabinets

Some people suggested sanding the cabinets before painting.  I didn’t do that but I did give them a good cleaning the day before to make sure that the paint would adhere.  Then I purchased a small quart of Zinsser water-based primer and a small little tin of white paint.  I found them both at Target.  I also purchased a small paint kit at Sherwin Williams.

Master Bath 16


After a coat of primer, this is what it looked like.

Painting Laminate Cabinets


After two coats of paint, this is what it looked like.  I was starting to get scared because it was still streaky and not covering the color completely.  Thankfully, the third coat did the trick!

Painting Laminate Cabinets


This was the after.  Also, behind is a sneak peek of the paint change.  The top portion of the wall was still unpainted.  Here you can see the small bathroom/linen closet that is next to my sink, which was already white.  I love how fresh everything looks after painting the cabinets.

Master Bathroom 13


Then, I painted my husbands cabinet on the other side of the bathroom.  Honestly, I wouldn’t be brave enough to do this by myself to a whole kitchen and also I don’t know how durable this will be.  I use my kitchen cabinets way more than my bathroom cabinets.  I will keep you updated on how well these do.  For now, they are doing great and no sign of peeling.

I will share the full bathroom before and after in a few days.

Do you have laminate cabinets that you would like to paint?  It is certainly cheaper than replacing them.

Until then,

Maria

Filed Under: Bathroom, Bathrooms, Decorate, Uncategorized · Tagged: Bathroom, laminate cabinets, painting

Making Simple Wreaths

July 7, 2014 · by Maria · 2 Comments

Making Simple Wreaths

As you already know, we are in the middle of a bathroom organization series.  Last week we organized the shower area, shared ideas on organizing a small sink, organized UNDER the bathroom sink and later this week, I share my bathroom makeover.  But first, I noticed something in my home that needed attention.  My wreaths!  Don’t you love how welcoming wreaths look in the entrance of a home?   But aren’t you always surprised at how expensive they are?  If you have double doors (like me) its double the cost!  I switch them out throughout the year to vary the look and this obviously extends their life, as they are not exposed to the elements year round.  However, after a couple of years, the one pictured below, had seen better days.  It had lost leaves and color.  I am not very crafty, but I knew that I could use the existing frame to make a simple wreath.

Making Simple Wreaths

The wreath frames were still strong and I wasn’t about to throw them away;  I brought them inside the house and took off all the old foliage.

Making Simple Wreaths

I found a stem on clearance at Target for $4.98  Score!

Making Simple Wreaths


I took the stem apart separated the blooms in half to make sure my wreaths had an even number of blooms.

Making Simple Wreaths

I thought I would have to use a hot glue gun but since the stems fit into the crevices so tight, I didn’t need it.  Also, since I didn’t have a lot of blooms, I went for the side bangs look.  Hehe.  Only one side of the wreath got flowers.

Making Simple Wreaths


As a little finishing touch, I added a burlap bow.

Making Simple Wreaths

Its a good idea to keep the frames of the wreaths so that you can re-use them.  Maybe your leaves are intact but you just want a little change.  I was able to do these two wreaths for under $7. Not too bad.

Making Simple Wreaths

It takes very little to make the entrance of your home say…WELCOME.

(I just noticed that my key mat is backwards.  OCD nightmare, right there. 🙂 )

Hope you have a great week!

Maria


Filed Under: Decorate, Uncategorized ·

Organizing Under the Bathroom Sink

July 1, 2014 · by Maria · 12 Comments

Organizing under the bathroom sink

A couple of days ago, I shared how I maximize the vanity/sink area that I have in my corner of the bathroom.  If you missed it, you can read about it HERE.

Today,  we are organizing under the bathroom sink.  This area can become a black hole, if you let it.  It’s awkward (with the plumbing) and its deep and baskets don’t always fit nicely.  Since I have so many products under my sink, I chose to organize them with turntables.  I used four, two large and two small.  I placed them in a way where they fit and still turn.

Organizing Under the Bathroom Sink

Each turntable has a purpose.  One is for foot spa stuff, the other for bath gels, the other for hair products and one for bath salts and oils. You can purchase the small turntables in my Amazon store HERE and the large turntables HERE.  But you can also find these in most home stores.  They are an inexpensive way to add a lot of functionality and organization around the house.  If I used a basket, I wouldn’t be able to access the products in the very back.  Now, I just turn the table until I see what I want.

On the cabinet wall, I have an organizer that I use to store these thingumajigs.  Ahem.  I also keep my Clarisonic Cleanser in there.  You can find that metal organizer HERE but again, these organizers are in most home stores (I have even spotted them at Marshalls).

Organizing Under the Bathroom Sink

On the other side, I have another organizer but I can’t link that one since its kind of old.  I don’t even remember where I bought it.  I keep a little makeup bag on the top shelf and miscellaneous items in the bottom shelf.

Organizing Under the Bathroom Sink


Do you have a system for organizing under the bathroom sink?  Isn’t that plumbing annoying to work around?

Happy Organizing my friends!  I have a bathroom makeover coming up next so stay tuned!

Maria


Filed Under: Bathrooms, Top Navigation · Tagged: Bathroom, bathroom organization, bathroom sink, Organization

Organizing Small Bathroom Sinks

June 28, 2014 · by Maria · 49 Comments

Organizing Small Bathroom Sinks


Last week we organized the shower area, and this week we tackle the bathroom sink or vanity area.  More specifically, organizing small bathroom sinks, such as the one in my master bathroom.  My husband has the same size sink on the opposite side of the bathroom and it works for him because all he stores is a toothbrush, a bottle of mouthwash and a razor…men…

However, my sink area has been challenging.  Where was I supposed to store all my makeup, cleansers and moisturizer??  A girl can simplify but she can’t part with all her products!

I would have loved a small cabinet, but the area was too narrow and I would’ve bumped it every time I leaned over to rinse my face.   A bloody nose would not mirror one of those graceful moments in facial care commercials.  By the way, who actually makes all those faces while applying product on their face?  I am sure that I make faces, but not pleasant ones.

But I digress.  So I added small shelves along the side and it gave me a ton of storage!

Organizing Small Bathroom Sinks

A closer look at the shelves.

Update to post:  Many of you have asked me where I purchased these shelves.  I think that I found them at Target years ago, but I no longer see them at the store.  I have just added a similar set to my Amazon store and you can find them HERE  Otherwise, you may want to check Homegoods or Marshalls.

Organizing Small Bathroom Sinks

The shelves are small but hold a ton.  I also like the open shelving (in this case) because these are items that I use daily.  Here are all my makeup brushes.

Organizing Small Bathroom Sinks


The third shelf holds items that I don’t use everyday but I do use often, and a little plant to prettify the wall.

Organizing Small Bathroom Sinks

Bathroom sinks can get cluttered in no time if there is no system in place.  When you don’t have a lot of counter space, sometimes the best solution is vertical storage.  Use your walls when the counters won’t do.

Organizing Small Bathroom Sinks

Do you have a narrow sink like me, or a large area to spread out your makeup and products?

Later this week, we will organize under the sink and I will share my master bathroom update, so stay tuned!

Maria  

Filed Under: Bathrooms, Top Navigation · Tagged: Bathroom, bathroom organization, Organization, sink organization

Organizing the Shower Area

June 24, 2014 · by Maria · 4 Comments

Even the shower area needs a little bit of attention and organization.

Organizing the Shower Area

I used to have one of those metal shower racks in the corner FULL of products.  Then next to it, I would place the ones that were too large to fit.  With the shower rack I realized that if given the chance, I would turn the bathroom into a Hoarders episode.  Yes, me, the one with the organizing blog.

Of course, I had my excuses.  I couldn’t just stick to one shampoo because my hair needed variety and couldn’t commit.  Then I had 2 shower gels, because apparently my skin also liked options.  Then I had 2 shaving creams because my husband likes gel-based and I like cream-based….and on and on…

Eventually, the shower caddy started to oxidize and it was the perfect opportunity to throw it out and come up with a different plan.

I found this acrylic makeup organizer that I was no longer using for makeup, and it was P.E.R.F.E.C.T.   Because it was small, and small meant that I had to streamline.

Organizing the Shower Area

I only purchase pump-style shampoo and conditioner bottles so that I don’t have to remove them from their spot.

The front of the organizer was considerably more narrow than the back but it was perfect for body wash and face wash.

I like to give the shower a quick clean while I am in there (you don’t want to use toxic stuff ever, much less in an enclosed space) so on the side, I placed a cleaner.  I also keep a pumice stone for my feet in the shower.  I store it upright so it doesn’t get all yucky.    I also keep a bar of soap for my husband.

Organizing the Shower Area

Which brings me to a funny story.  Funny for you.  Scary for me.

A while back I noticed that my shower pouf was looking kinda rough and my husband’s was perfect, almost unused.  So I called my husband in the bathroom and I asked him, “which shower pouf do you use?”.  He pointed at….MINE!  Panic!  I love that man.  I have kids with him, I share everything, but my shower pouf???  Nooooooo!

He knows me and all my crazy boundaries, so after a minute (30 minutes in my mind) he laughed and said “I’m just kidding!  I have been using the bar soap for a while and I don’t touch those things!”

We are still not talking.   So I laughed and hugged him.  Here is a picture of the suspicious pouf.

Organizing the Shower Area

Back to the rest of the shower area.  On the wall, I have my razor that has been there for over 5 years!  I have changed the razor but the housing is the same.  I also have a Command Hook to hold a grout brush because you all know that when you are taking a shower, you notice all the yuckies.

Organizing the Shower Area

So take a second look at your shower area and get rid of excess products.  It is so much easier to clean with less “stuff” occupying space.

What else do you keep in the shower?  Do you share cups but never bath poufs?  Am I a bad wife for almost fainting?  Don’t answer.

Maria


Filed Under: Bathrooms, Top Navigation · Tagged: Bathroom, Organization, Shower, Shower Organization

Gift Wrap Station

June 19, 2014 · by Maria · 2 Comments

Remember how last week I said that I had a big announcement?

Well, I can finally share with you something that I am very excited about.  Recently, I was asked to be a contributor at one of my favorite blogs, A Bowl Full of Lemons.  I am so grateful and excited, and I couldn’t wait to share the news with you.

Today is my first contributor post, and I share the details of my Gift Wrap Station.  Here is a sneak peek…

Gift Wrap Station

So hop on over to A Bowl Full of Lemons to get the details and see all the pictures.  I look forward to reading your comments and suggestions!

Feeling Grateful,

Maria


Filed Under: Top Navigation, Uncategorized · Tagged: Garage Organization, Gift Wrap, Organization

Taming the Clutter – Baking Supplies

June 14, 2014 · by Maria · Leave a Comment

BAKING Organization

I am starting a new series, called “Taming the Clutter”.  I am challenging myself to de-clutter even the previously de-cluttered spaces.  Any system that is no longer working for me around the house, is getting a facelift.

This week, I wanted to tackle the baking center.  I previously posted about my baking station HERE and for the most part, it still works for me.  Except, this little turntable with all the condiments.

It looks so cute and perfect, until you use it, or pull something from the back of the cabinet.  Then all the little bottles topple over.

I decided that these containers, though cute as a button, had to go!  I needed a small set of containers that were stackable which would prevent the bottle avalanche.

Baking Organization


I didn’t have to buy any containers because I had these Tupperware containers in the back of a cabinet, just sitting there being perfect and lonely.  They are about 12 years old so I don’t know that they are still available.  Any small stackable container will do.

BAKING Organization


I took out all my smaller baking items and discarded the expired items.

Then I took out this bad boy.  My organizing companion that never expires.  My label maker.

BAKING Organization


I made a label for the bottom of the container with the new expiration date.  I used my labeler since it was out, but any sticker that you can write the expiration date on, will suffice.

BAKING Organization


Now fill ‘er up.

BAKING Organization


No more dealing with bottles tumbling down every time I reached for something from the back of the cabinet.  I left some of the items in the turntable since it is now easily accessible.

BAKING Organization


To celebrate this new baking station, lets bake a cake.

Pile on the frosting.  We’re celebrating here!

Baking Organization

This is the first of the “taming the clutter” series, and I will share another easy project next week to simplify your day.

Do you have a baking station in your kitchen?

See you in few days with another project, and an exciting announcement!

Maria 


Filed Under: Kitchen, Top Navigation · Tagged: Baking, Car Organization, Kitchen

Office Makeover – Before and After

June 8, 2014 · by Maria · 14 Comments

You all know that I love a good “before and after” and I know that you do too!   (Before I start sharing the pictures with you, I want to apologize in advance for the before pictures.  The angles are horrible.  I took them with my smartphone’s camera, before I even decided to share them on the blog.  Also, you will notice some strategically placed squares that hide private info.)

Office Organization

A couple of weeks ago, my friend asked me to help her fix up her office space at work.  Her husband owns an automobile business and she was helping her husband with the office work…except, the office didn’t work.  The men thought that the office was perfect.  They thought that it didn’t need a thing changed.  Why mess with perfection? The thing is that perfection looked like this…

Office remodel

and this…

Office Organization

These men were so dedicated to the sales, maintenance and growth of the business, that the back office space was just not top priority.  The store front was beautiful and we needed to make the back office match. With the help of IKEA, a screwdriver, and lots of good conversation, my friend and I embarked on a mission.  To prove the men wrong To make the office beautiful.  To create a space that was welcoming and practical. We started by painting the walls with a color called “Cloudy Day” by Sherwin Williams.  We painted the moldings white.  We also purchased white IKEA furniture that would be easy to clean and to customize. Here is the “after” picture of the wall pictured above. Office organization

We chose open cubicles in the bookshelf for binders and we installed drawers in other cubicles for office supplies.  The idea was to leave out the practical and pretty and put away the practical and unsightly. We purchased new filing cabinets, a desk, and the lamp from IKEA.  I found the clock at Target. Office Organization

Of course, we had to add a little “pretty”, while keeping in mind that the office had to remain somewhat masculine.  There went all my washi tape dreams… We decorated with modern, inexpensive IKEA plants, like this one. Office Organization

And this one that I found at Target.  It was kind of short for the cubicle, so I lifted it with a car part.  I am not even sure what it is, but I loved the end result. Office Organization

I love decorating with practical items, such as these little IKEA buckets that hold all the pens and pencils. Office Organization

So one more time…We went from this,

Office remodel

To this,

Office Organization

The men at the office LOVED it and even asked for their own coffee station on top of the new cabinet.  No one misses the dark furniture and my friend is a happy camper. With a little bit of paint, some new furniture pieces and a lot of focus, any space can be transformed.  It’s important to feel comfortable where you work.  Maybe you can’t transform your whole office, but you can transform an area.  Anything to help you laugh while you work.  Actually, don’t laugh, just smile, abrupt laughter could scare co-workers. I hope you enjoyed the pictures and please share with me what is your favorite thing about your workspace.  Is it wall color, your desk, accessories, or your comfy chair?

Until next time,

Maria

Filed Under: Decorate, Office, Office, Top Navigation · Tagged: Decorating, ikea, office, Organization

Adding Wheels to Baskets

June 2, 2014 · by Maria · 3 Comments

I keep a basket in the hallway that leads to the boy’s bedrooms.  I use it to place small toys and items that I find around the house after the boys have gone to bed.  I don’t want to wake them up (especially my toddler…yikes) so I place the misplaced toys in this basket at night and in the morning, I place them back in their designated home.

End of story.  Perfect system, right?

Good system, yes.  Perfect, not so much.

I love woven baskets because they add warmth and texture to any space.  What I don’t like is how they are not easy to clean and they are a magnet for dust bunnies.

Adding Wheels to a Basket

I decided that the best solution was to add wheels to the basket, so that sweeping and vacuuming was easier and more effective.  I found some adhesive wheels on Amazon because screwing in wheels was not an option.

You can find these HERE in my Amazon store, but I am sure that any hardware store near you will also have them or similar ones.

Adding Wheels to a Basket


I followed the instructions on the package and adhered the wheels to my basket.  I also added a bit of glue to secure them further, considering the weave of the basket.  These wheels are intended for flat surfaces so I compensated with the addition of glue.

Adding Wheels to a Basket


Here it is with all four wheels.

Adding Wheels to a Basket

And here it is back in its place waiting for Elmo, Barney, or my favorite…tiny legos.

It’s hard to tell the difference (and that was the idea) but it is so much easier now to clean under the basket, and the wheels keep the basket cleaner.

Adding Wheels to a Basket


When I start spray painting, nothing in my home is safe.  I think it will be the same with wheels, no basket will be safe.

It’s worth mentioning that these wheels don’t swivel and I don’t know how much weight they can bear, but they are perfect for a simple project like this.  I think they may also work with under-bed storage since dust bunnies are another reason that I don’t keep anything under my bed.  I also have wheels on the baskets that I keep on my closets floors.  It is a simple solution that makes cleaning easier, and I am a fan of easy.

Can you think of anything that you can add these wheels to in your home?  Do you have the same problem with baskets and dust bunnies?  If so, I hope this will help!

Until next time,

Maria


Filed Under: Decorate, Other, Top Navigation, Uncategorized · Tagged: Adhesive Wheels, Baskets, Organization, Rolling baskets, Toy Box

Creating a Smoothie Station

May 26, 2014 · by Maria · 8 Comments

Smoothies have become so popular in the last couple of years.  It makes sense because we are all becoming more conscious of the ingredients that we consume and we want to avoid sugar-laden carbonated drinks.  We are also very busy and smoothies are portable, quick to make, and pack a lot of nutrition.

I think the healthiest smoothie that you can drink, is the one that you make yourself.  Why?  How many of you (like me) have gone into a smoothie chain, assuming you were getting a healthy drink, only to realize that they were using strawberries dunked in sugar syrup, or adding sugar and ice so that they could use less fruit.  Nope, I won’t pay 5.00 for that!  I prefer to spend the money buying quality ingredients and making my smoothies at home.

SMOOTHIE Organization

After buying all these awesome ingredients, I needed an equally awesome way to store them.

The cabinet where I kept all my smoothie supplies, was usually my “messy” cabinet.  It was not an absolute disaster, but it wasn’t practical either.  All the little packages of cocoa, flax-seed, chia seed, needed a new home.

Here is what the space used to look like.

Smoothie Organization

Packages everywhere.  Some of them were not even resealable.  I needed containers.

Smoothie Organization

I found these OXO containers at Target and I purchased them in two different sizes to accommodate the different products.  If you want to purchase them online, you can find them HERE, in my amazon store.

You may remember that they are the same containers that I used to create my Coffee Station.  You can read about that HERE.

Smoothie Organization

I also decided that I wanted to move the shelves around, to better fit the new containers.  I removed the cabinet door so that the shelves would slide out.

I also went ahead and gave the cabinet a good cleaning.

Smoothie Organization

I placed the shelves back after measuring the height that I needed.

Smoothie Station

I then emptied all the packages into the new containers and added labels.

Everything went back in the cabinet.

SMOOTHIE organization

Notice how narrow I made the shelf holding the mugs.   The coffee cabinet is right next to this one and I keep my mugs in here.  I like everything to match, except coffee mugs.  I like collecting different ones.

SMOOTHIE Station

In the very top, I placed the larger cans and containers.  Since I lowered that shelf, I can now reach up and grab whatever I need.  Before I did this, I could never reach the top shelf.

Smoothie Organization

I finished the project by hanging a clipboard to the cabinet.  I found this clipboard in the dollar section at Target.  I plan to keep smoothie recipes here.

SMOOTHIE Organization

Here is the finished product!

Smoothie Organization

It really is a pleasure to open up this cabinet now, considering how it looked before.

Please share with me if you make smoothies at home and what are your favorite types.  This week, I will share on Facebook a couple of my favorite smoothie recipes so stay tuned!

Shaking it up! (my corniness has no limits)

Maria

Filed Under: Kitchen, Other, Top Navigation, Uncategorized · Tagged: Kitchen Organization, Organization, Smoothie, Smoothie Station

Organizing The “No Junk” Drawer

May 19, 2014 · by Maria · Leave a Comment

This week, let’s take 10 minutes to tackle the junk drawer.  Instead of just tidying up what is already in there, lets resolve to make it a NO JUNK drawer or at the very least, less junk.

Lets face it, a drawer with the prestigious name, “The Junk Drawer” is the most likely to receive the least amount of love.  This is also the reason that its one of the most cringe-worthy areas in the kitchen.

I have always tried to keep the items in this drawer to a minimum, but lately I have simplified it further.

Here is what my “no junk” drawer looks like now.

Junk Drawer Organization


I have already shared with you that I don’t have the most spacious kitchen, and I didn’t want to dedicate a whole drawer for miscellaneous items.  The way I look at it is, if I dedicate a whole drawer for this, I will find a way to fill it up.  I gave myself half a drawer to work with and it made me rethink what I would keep in this space.

Half of the drawer is taken up by a steak knife block.  It fits perfectly in the drawer, it doesn’t shift and keeps the baskets next to it, in place.

Every junk drawer will look different and I encourage you to only keep items that you frequently use.  In my case, I keep scissors, writing tools, tape, memo pads and chip clips.  (By the way, I used to have like 10 chip clips in there and we rarely buy chips.  I also have a ton of workout gear and…well…back to the drawer).

Junk Drawer Organization

I also keep a little plastic container to collect Box Tops for my son’s school.  Otherwise, I know I would just throw them in the drawer and they would get lost since they are so small.

Junk Drawer Organization

So what are the steps to creating a “no junk” drawer that works for you?

1. Empty the contents of the drawer onto a nearby surface.

2.  Categorize items into Keep / Discard / Relocate  (later, you can relocate items that don’t belong in this drawer).

3.  Clean the drawer.  If you will use clear containers, you may decide to place a pretty liner on the drawer after cleaning.

4.  Containerize this space according to the items you are keeping.  I chose not to use a drawer divider made for junk drawers because it would take up the whole drawer and I would feel compelled to fill the spaces, even if I didn’t need them.  Instead, I chose clear containers with a colorful non-skid backing that I found at Target.  They had different sizes and you can customize your space.

Taking 10-15 minutes to do this small task will not only make your drawer pretty, it will also make it easier to find and put away items.  This will keep your drawer organized for a long time (or until your husband loses his keys and turns every drawer upside-down.  This may or may not depict an actual event that may or may not have occurred in my life.)

What else do you keep in the junk drawer?

Until next time!

Maria


Filed Under: Kitchen, Top Navigation, Uncategorized · Tagged: Blog, Box Tops, Decluttering, Junk Drawer, Kitchen, Organization

Cleaning Wood Cutting Boards

May 5, 2014 · by Maria · 9 Comments


I love my wooden cutting boards.  I have a couple that I use regularly, but this is my favorite and most-used board.  I place it next to my sink for easy cleanup.  I have used it almost daily for the past 15 years.

Cleaning CUTTING BOARDS

I use this specific board to cut up fruits and vegetables.  I use plastic boards for raw meat.  I like that I can throw them in the dishwasher once I am done and I don’t have to worry about cross-contamination with my fruits and veggies.

However, plastic boards will only last a few years before they start looking warped or discolored.  Wooden cutting boards can last many years without warping or cracking, if given the right treatment.

Everyday, I simply wipe down my board with soapy water (don’t soak it because this will cause warping) and I dry it.  That’s it.

After about a month of daily use, it starts looking a little dull.  Like hair that needs conditioning, not just shampooing.

If you want to clean and condition your board, you will need:

  1. Coarse Salt

  2. Half a lemon

  3. Cutting Board Oil You can buy it here or in the store but it must be food-safe for cutting boards.  Regular cooking oil will not do as it will go rancid.

CUTTING BOARD Cleaning

So about once a month, I will thoroughly clean it with the following method:

Before starting, make sure that you wipe it down with a wet towel.

  1.  Apply coarse salt all over the board.

Cleaning Cutting Boards

  1.  Using a lemon half and some elbow grease (from an eerily pale hand), rub the surface.  Try to squeeze the lemon while you do this.

Cleaning Cutting Board

  1.  Give the board a rinse.

Cutting Board Cleaning

  1.  Apply the oil all over the board.  I put a generous amount because I know that within a couple of hours, my board will soak up all this oil.

Cleaning Cutting Boards

  1.  Allow to soak in the oil.  I leave mine overnight.  There seems to be too much on this board, but within hours, it’s all soaked up.

Cleaning Cutting Boards

  1.  Remove the excess in the morning.  I rarely have to do this since my board always soaks up the mineral oil.

Cutting Boards

You do not have to do this cleaning process to your boards every month, if you are not using them as often.  You may get away with every 3-6 months.  It all depends on usage.

Also, don’t cut up a lemon just for this.  Do this cleaning process when you are already using a lemon for cooking.  It can even be partially juiced before cleaning the board.  It still works beautifully.

Enjoy your boards, they seem to get even more beautiful with age if cared for.

Let me know if you prefer wooden or plastic boards and why.


Filed Under: Clean, Kitchen · Tagged: cleaning kitchen, cleaning wood cutting boards, cutting boards

Pantry Makeover

April 28, 2014 · by Maria · 1 Comment

 
Earlier this week, I posted on my cabinet pantry.  You can read about it HERE.

This week, let’s concentrate on making over our pantries, regardless of whether they are in a closet or within cabinets.

If you do have a closet pantry, you can also read HERE about how I organized my friends pantry last year.  It is pictured below.

Kitchen Organization

1. The first step to organizing the pantry is to get everything out of the pantry.  Yes, everything.  This will allow you to think fresh about new ways of storing your items.

2.  Secondly, create 4 piles.  One pile for expired (trash) items, another pile for unopened items that can be donated (like the 4 cans of cranberry sauce that you buy as a backup just in case your recipe for the fresh one fails), a pile of daily used items, and lastly, a pile of rarely used items.

3.  Clean your shelves and allow them to dry before placing items back inside.

4.  Look for baskets or containers around the house that you can use to unite like-items.  Below, I have a picture of one of my bins that holds asian condiments.

5.  Finally, re-stock your pantry.

PANTRY Organization

A pretty label never hurts.  If you decide to containerize items by type, add a label.

PANTRY Organization

Turntables are great because everything is viewable with a simple turn.  There are different sizes, so be sure to take measurements before purchasing.

In the picture below, I have a large one towards the back and a smaller one right in front.  This way I still have space to place the boys’ cereal beside the turntable.

Pantry Organization

Stackable bins are great to put towards the back of deep cabinet with large items such as canning jars.  I purchased these at Target.

Canning can take up a lot of room and you don’t do it everyday so it doesn’t need to be center stage.

PANTRY CANNING

Once you place them in the back of the cabinet, you can label the front of the cabinet so that you don’t forget that you have 20 cute mason jars waiting for fresh salsa!

PANTRY Organization

You can now place items that are used more frequently towards the front.

OXO Containers are my favorite for dry storage.  The containers holding the green snacks are from a brand called Sistema.


Pantry Organization

As you are re-stocking your pantry, create zones whenever possible.  Maybe you can have a baking zone, a breakfast zone, and a snack zone.

I have my baking station right on top of my refrigerator.  You can read about it HERE.

Baking Organization

I hope these ideas are helpful and can help you custom-organize your pantry to fit your space and lifestyle.

And don’t worry about keeping extra cans of cranberry sauce.  Fresh cranberry sauce always turns out and sometimes people don’t even touch it!  😉

Happy organizing!

Maria


Filed Under: Kitchen, Top Navigation · Tagged: Kitchen, Kitchen Organization, Pantry, Pantry Organization

Cabinet Pantry Organization

April 21, 2014 · by Maria · 8 Comments

I don’t have a pantry per-se.  I have a set of deep cabinets that flank my refrigerator.  I use these kitchen cabinets as a pantry.

Perhaps you have a similar setup or are fortunate enough to have a large closet pantry or a walk-in pantry (swoon!).   Either way, we all need to maximize the space we have so that we can see what we have and need at-a-glance.

_MG_3891PANTRYBLOGCOVER2

Deep cabinets are awesome.  They also present the challenge that things get lost towards the back of the cabinet.  Basically, the good part is that a lot of stuff fits, the bad part is that a lot of stuff fits.

The pull-out shelf unit pictured below is awesome for deep cabinets!  I purchased it about nine years ago at Home Depot and it was so worth the money!

I store most of my cans and pasta in this rack and I love that it pulls out to reveal everything that is towards the back.

Pantry Organization

HERE is a similar (nicer, more expensive) version but you can probably find something similar to mine in a hardware store.  It is very sturdy and holds so much weight!

This is what it looks like when I pull it out of the cabinet.

PANTRY Organization

The very top is perfect for pasta and flat cans of tuna.

PANTRYOrganization

In the other side of the cabinet are the snacks.

My husband added a few narrow shelves to hold smaller items.

PANTRY Organization

One of those shelves holds this garment divider that I use as a snack divider.

We like KIND bars.  🙂

PANTRY Organization

Underneath, are the boys’ snacks.  These are the two bottom shelves and therefore the most accessible for them.

I also have a basket full of asian condiments.

Pantry Organization

Above the snacks, is another pull-out drawer (used to hold chips) that now holds my toddlers plates and lots of beans.

We like BEANS and KIND bars.

PANTRY Organization

Above the pull-out drawer is another narrow shelf that holds the kids’ pasta and sometimes a loaf of bread.

I could be making lobster thermidor for dinner and they would prefer one of these colorful boxes.  Go figure…

PANTRY Organization

Above the pasta, are three lazy suzans.  I am not tall and without the turntables, the top shelf is otherwise inaccessible to me.

The one towards the front has random condiments, and behind it is another turntable that holds vinegars.

In the slot next to the oils, I place the kids cereal dispenser (pictured below).

Pantry Organization

The very top shelf is full of oils.  The lazy suzan holds everyday oils, such as coconut and olive oils.

In the back are extra bottles of vegetable oil.  I rarely deep fry, but when I do, I use a whole bottle!

PANTRY Organization

That’s my cabinet pantry!  Do you also have this kind of pantry?  How do you maximize your space?

In a couple of days I will post a step-by-step pantry makeover that will benefit any pantry style!

Until then,

I will be making beans and eating chocolate-covered peanut bars (because I don’t actually know how to make lobster thermidor)!

Maria 

Filed Under: Kitchen, Uncategorized · Tagged: Kitchen, Pantry Organization

Organizing Grains

April 9, 2014 · by Maria · 3 Comments

I shared this blog entry last year but decided to share it once more since it pertains to our kitchen series and it is a good tip for storing grains:

The rice that I purchase comes in these cute little plastic containers. I love the look. The problem is that I buy different kinds of rice, so I stack the containers and they end up falling out of the pantry. I keep the rice in the highest cabinet in my kitchen and I need the items up there to be sturdy so that I can grab them with no problem. I am 5’3″ on a really perfect and sunny day.

As a solution to my problem, I decided to move the rice into these “Lock-and-Lock” containers that I had purchased years ago and was no longer using. I purchased these on QVC but I couldn’t find the set to link here. Instead, I found similar containers (that even had a pour spout ) on Amazon and you can find them HERE.  Also, HERE is a link for the smaller ones.  I use smaller ones for the items that I don’t buy in bulk.

Of course, any set that is stackable will work.

Rice Storage

I can make white rice without a recipe but brown rice for example has a different recipe to follow. Have you noticed that based on the brand of brown rice they will give you different cooking times? I usually use the same brand and I printed these small labels (that I made on Microsoft Word) and typed the suggested recipe. I placed it on the outside of the container using double stick tape. If you have the patience you can laminate the label before sticking it on the container and that will make it water-resistant. I love and admire patient people. I really do.

Rice Organization

I did the same for quinoa. I could do a whole post on how much I love quinoa.

Rice Organization

I used the rest of the matching containers to put arborio rice, cracker meal and polenta. As you can see on the very side of the cabinet there is a label that says “oatmeal”. I did that to remind myself that there is a large container of oatmeal behind the rice. Only do this for items that don’t get used weekly. They can be stored in the very back of these deep cabinets and the label will remind you that it’s there. Otherwise, you will buy an item that you already have and you end up with enough granola to feed the church!

Rice Organization

That’s it! Another quick, easy project to make your life easier!

In a couple of days we will finish tacking the rest of the kitchen!

Happy Organizing!

Maria

Filed Under: Kitchen, Top Navigation, Uncategorized · Tagged: Kitchen, Kitchen Organization, Pantry Organization

Organizing Plates and Platters

April 1, 2014 · by Maria · 2 Comments

Organizing Plates and Platters

I have shared with all of you how much I (we) enjoy cooking and entertaining family and friends.  I also love plating and food presentation, so over the years I have accumulated quite a few dishes.

It is always a challenge figuring out how to store so many dishes in a relatively small kitchen.  I don’t have many cabinets and I use most of them for pantry use (we do not have a stand alone pantry closet). I keep some dishes in the dining room hutch, but the majority reside in the kitchen cabinets.

Here is how I store and organize my dishes.

Organizing Plates

I have also collected quite a few glasses over the years.  I keep most of them in the dining room hutch.

Below are the ones we use daily.  The goblets are inexpensive and sturdy; they are Libbey brand and you can find them HERE.  I have also seen them at Marshalls and Homegoods.  The smaller tumblers are not as sturdy but they are inexpensive and I love the size.  They are from CB2 and you can find them HERE.

All the other white plates are from different stores that I have collected over years.

Organizing Plates


A pet peeve of mine is stacked plates. It’s not a big deal if they are plates that you seldom use, but your everyday plates should be easily accessible. You shouldn’t have to lift salad plates to get the dinner plates on a daily basis.

I have cabinet dividers and risers in almost every cabinet to maximize the space and to make my dishes easily accessible.

Organizing Plates

The metal divider/shelf below is from Target.  You can find some white ones “here”.  Walmart and Homegoods also have a good selection of cabinet organizers.

Organizing Plates

I do have some colorful dishes but 90% of them are white. I think that food looks better on white plates. I also love that I don’t have to worry about them matching. Plates that I bought last week match the ones that I purchased 15 years ago.

I love cool plates like these concave ones.  By sliding the shelf against the cabinet, I made space for these narrow plates.

Organizing Plates

Most of my drawers hold serving platters.  These are too big to fit in my cabinet.  They are perfect in the drawer.

Organizing Plates and Platters

In this drawer I keep the bowls that we use most often.

Organizing Plates and Platters

Organizing is an art!  This is a standard size drawer and I was able to fit quite a few serving dishes by playing around with placement.

I love opening a drawer where everything has it’s place and is not shifting all over the place.  Because all these plates fit in here so tight, there is no room to budge.  As Martha would say – “That’s a good thing.”

Organizing Plates and Platters

The bottom drawer is the deepest.  In here I keep all the clear baking dishes.

Organizing Plates and Platters

As you can see, I rarely buy dish “sets”. I prefer to buy them separately so that I get exactly what I want. I may love a plate but dislike the coffee cups that come with them in the set.

I want to leave you with some good tips for building your plate and platter collection:

  • Get rid of plates and cups that you no longer like or use.  We sometimes keep things in our cabinets that we don’t even like, instead of making space for something we truly enjoy.
  • If you only want or have one set of plates, make them accessible by placing them on a removable shelf riser.  This will double your space!
  • If you buy plates separately like me, it is best to buy 9 if you need 8. That way if one breaks, you still have a full set.  If two break…well…try not to break two!
  • Take your time buying dishes.  It is fun to collect things that you love over time, instead of buying things that are on sale to fill up a cabinet.

I hope you enjoyed these ideas because I really enjoyed sharing them with you!

Tell me –  do you collect plates too or is one set more than enough?

Always Organizing,

Maria


Filed Under: Kitchen, Top Navigation · Tagged: Kitchen, Kitchen and Dining, Kitchen Organization, Organization

Gadget Drawer Organization

March 20, 2014 · by Maria · 7 Comments

The gadget drawer can either be a pleasure to open or a pleasure to close.  Mine used to be the latter.

I was never really happy with my gadget drawer(s) before.  I would put the items into baskets within the drawer but the organization never lasted.  The items would shift around in the drawer and I was back to square one.

I found these organizers about a year ago and they are called DrawerDecor.  I only bought one at a time because they were not inexpensive and I wanted to make sure they were worth the investment.

They are so worth it, I loved them instantly!

It is basically a repositionable basemat which you can cut-to-size, so that it perfectly fits your drawer.   The mat includes dividers that are also repositionable; you can adjust both the mat and the dividers to fit your gadgets or utensils.  If you ever need to change the positioning, you simply lift the matt or the dividers and use them over and over.  Genius.

They have them in an assortment of colors and since I am such a crazy gal…I chose…drumroll…NATURAL.

I totally meant to choose red or something more fun but let’s face it, my idea of fun involves rocking chairs.    Natural was the color for me.

Organizing Gadgets

I had more gadgets than I had dividers, but the cool thing is that since the mats are non-skid, I was able to place large items (like my kitchen timer) and they didn’t shift.

After I fell in love with this organizer, I ordered another set for my other gadget drawer.  However, I used the repositionable dividers that came with it, for the drawer pictured above and simply used the mat to hold larger items.

I placed all my timers and miscellaneous bowls and brushes in this drawer and they don’t shift at all.  I have had these organizers in place for over a year and they work great for me.

Organizing Gadgets

Of course, there are other ways to organize your drawer that don’t involve buying these mats.  This is just what worked for me.  I wonder if any other silicone mat will have a similar effect.  You wouldn’t have the dividers but it may hold the larger items.  Also, acrylic dividers that come in different shapes are a good option.

So lets get to work.

1.  The first step in organizing your gadget drawer is to take out all the utensils and gadgets.  This is very important because once the items are out of the drawer, you will be pickier with what you allow back in.

2.  Get rid of doubles.  Unless we are talking about timers.  In that case you need 14.  I am kidding, but I do collect them and around the holidays I actually use quite a few of them, at once.

3.  Lastly, get rid of gadgets that you don’t ever use.  Sometimes we have the best of intentions when we buy something and it just ends up taking up space.  I usually give items away so that I don’t feel guilty about not keeping them.

You will be left with your favorite tools — the ones that make cooking more fun.  Your drawer will now be a pleasure to open!

You can find the organizers that I mentioned in my amazon store HERE
.  I only recommend products that I love and have made my life easier or prettier.  This one checks off both boxes.

How do you organize your gadgets?  A crock, in the drawers like me?

Filed Under: Kitchen, Top Navigation · Tagged: Gadgets, Kitchen, Kitchen Organization, Utensils

  • « Previous Page
  • 1
  • …
  • 3
  • 4
  • 5
  • 6
  • 7
  • Next Page »

Welcome! I'm Maria, the blogger behind Graceful Order. I hope to share with you helpful ideas about organizing, cleaning and entertaining. I am passionate about living a healthy, balanced life with my husband and two boys. A life where I am in charge of my home and not the other way around. A life with a little bit of order, and a whole lot of grace!

  • Email
  • Facebook
  • Instagram
  • Pinterest
  • Twitter

Tips for Organizing Laundry Closets

Popular Posts from 2014

Posts of 2014

Blog Archives

Search by Month

Copyright © 2025 | Disclaimer

Copyright © 2025 · Innovative Child Theme on Genesis Framework · WordPress · Log in