Graceful Order

Organizing and Decorating the home.

  • Home
  • Organize
    • Kitchen
    • Laundry
    • Living Room
    • Bedrooms
    • Bathrooms
    • Closets
    • Office
    • Garage
    • Other
  • Decorate
    • Fall
    • Winter
    • Dining Room
    • Bedroom
    • Bathroom
    • Office
  • Clean
    • Kitchen
    • Bathrooms
  • Entertain
    • Christmas
    • Thanksgiving
    • Recipes
    • Reflect

Design Corner – Tray Chic

March 8, 2014 · by Maria · 3 Comments

I am starting a new section of the blog, titled: Decorate.

I am not a professional designer, but in my head, I totally am.  In that part of my head, I am also a skilled ballerina, so I don’t know if that tarnishes my credibility as a designer somewhat.

I love design books and design blogs, and I am constantly moving things around in my own home, until they are “just right”. I figured I would share some of the things that inspire me to not only organize my home, but decorate it.

Every couple of weeks, I will give a new decor suggestion. They will be easy to implement and hopefully will inspire you to continue adding touches to your home, so that your home feels like you.  So that your home makes you feel how you want to feel.

This week I will share one of my favorite decorating ideas…using trays to decorate, cradle, and anchor miscellaneous items.

Traditionally, trays are used for serving food items, coffee and tea.  I keep my nicer, sturdier trays for this purpose.

Decorating with trays

But I also use them all over the house.

Starting with the coffee table in our living room.

This is actually a cake platter from Ballard Designs, that I inverted to use as a tray.  It is perfect for this small table.

Decorating with trays

In the dining room, I have a gray, narrow ottoman (Target clearance…yay!) that is nice on its own, but needed some jazzing up.

Decorating with trays

This gold croco-embossed tray was perfect to anchor the plant that sits on the ottoman.

When you have a soft surface, such as an ottoman, adding a hard element, such as a tray or a stack of books can add structure and interest to an otherwise boring piece of furniture.

I also love the gray and gold contrast.

Decorating with trays

In the family room I have an enormous tray that I found at ZGallerie (also clearance).  It is also croco-embossed.

I should have named this post “The Clearance Crocodile”.  I see a running theme…

Trays are great for tables with miscellaneous items that may not go together.  Once they are on a tray, they look organized and somehow tied together.

This is a great idea if you collect perfumes or figurines.  If they are on a tray, they will look more like a cohesive collection, and more visually appealing.

Decorating with Trays

Lastly, on the kitchen table we have a tray that corrals our vitamins, napkins and ceramic trivets.  When I need to clear the table, I simply lift the tray, instead of all the items one-by-one.

Decorating with Trays

Trays can do more than carry a tea service, they can add beauty and function to a space.

So I encourage you to dust off the trays that you have tucked away in the garage, or in the very back of the china cabinet.

If you already use trays, please share with me how.  I love to hear from you!

I hope you enjoyed this new section of the blog!

In a few days, we will return to the Kitchen Organizing Series but for now, I hope that you enjoy your weekend, your family, your home.

– Maria

Filed Under: Decorate, Other · Tagged: Ballard Designs, Decorating, Trays

The Painted Smile

February 25, 2014 · by Maria · 9 Comments

I love the color green and had painted the boys bathroom a celery green about 7 years ago.  The paint held up well, but I was getting tired of the color and it started to look dull.  After years of cleaning the walls from little marks here and there, it was time to make a change.

Kid's Bathroom

I went into Sherwin Williams and took a whole bunch of their paint samples.  I brought them home and placed them side-by-side.  I then chose what I thought was the perfect shade of blue for my kids’ little bathroom.  I chose an appropriately named color, it’s called Watery.

Kid's Bathroom

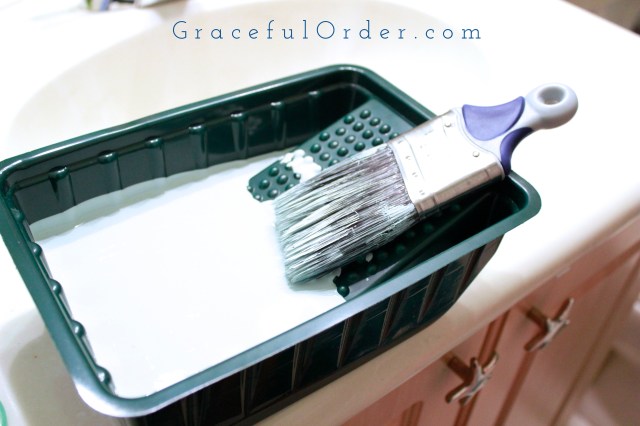
I also purchased some rollers, a tray and a paintbrush for edging.  I was excited to start!

As soon as I got home, I realized that I purchased the rollers thinking that we already had the roller frame (or poll) in our garage.  I couldn’t find it.

I was so anxious to start, that I decided to paint the bathroom with a paintbrush.  It seemed like an excellent idea at the time.  I would take advantage of my toddler’s nap time, and I would paint a room.  With only a small paintbrush.  Genius.  Interrupted.

Boy's Bathroom

I start painting the first wall and my arm starts to hurt.  I start losing steam ON THE FIRST WALL.  This isn’t good.  The small bathroom starts looking like Versailles from my vantage point.

Kid's Bathroom

I start convincing myself that the WHOLE bathroom didn’t actually need painting. I convince myself that only one wall should be painted.  I convince myself that the contrast between the blue and green is actually better than re-painting the whole bathroom. I convince myself that broccoli actually tastes better than cake.

But deep inside, I know the truth.  Cake tastes better than broccoli .  I must finish the project that I began.

Also, my husband was out-of-town and groveling for help, like with my Master Closet Remodel, wasn’t an option.  You can read about that “adventure” HERE.

Boy's Bathroom

So I kept going and positioned and re-positioned our ladder “cirque du soleil style” until I finished.  My paintbrush and I were done.  We did good.  We were rock stars.

I love the new color and I want to share some pictures with you.  What do you think?

Boys Bathroom

I did end up leaving a small nook at the very top, in the old green shade.  I added some blue pots to bring in some blue from the walls.  Not sure if I love the green nook yet.  Maybe I should go ahead and paint that too.  I have to wait and see.  Its a small area that I could paint it really fast, even with a paintbrush.

I hung up the towels and the shelves.  (The photograph does not accurately show the color. There is no natural light in this bathroom, making good photos a challenge.)

Kid's Bathroom

I purchased the towels from Frontgate and I love the quality.  They are holding up well and were a perfect match to the new color.

Kid's Bathroom

The shelf and a more accurate picture of the color.

Boy's Bathroom

Since my husband was out-of-town, he had no idea that I was doing this.

As soon as he got home, I proudly told him that I had painted the kids’ bathroom…using only a paintbrush.  No roller.

He smiled.

But I knew this smile.  I have given this smile before (Usually to my toddler, when he rushes in to tell me that he has “decorated” my bedroom.  I smile and excitedly say “YOU DID?!” and inside, I immediately start crying).

Boy's Bathroom

There is no joy in that smile.  Only fear.  My husband was afraid.

You see, according to him, he loves my decorating, but my DIY projects…

He says they either culminate in total success or…fear.  I think I have a pretty good batting ratio.  His opinion has no basis.  None that I would admit to.

Regardless, I was hopeful that he would love it as much as I did.  It would make the fact that I didn’t feel my right arm, almost worthwhile.

And…He loved it!  The smile was no longer forced.  He really liked it and so did the boys.

Even this boy.

By the way, that smile gets me every time.  Even when he uses toilet paper as streamers in my room.

Kid's Bathroom

Of course, I found the paint roller pole the next day.  God has a sense of humor.  I am sure of it.

– Maria

Filed Under: Bathroom, Bathrooms, Decorate, Top Navigation, Uncategorized · Tagged: Decorating bathrooms, Frontgate, Kids bathroom, Paint, Sherwin WIlliams

Baking Station Organization

February 20, 2014 · by Maria · 4 Comments

We are back in the kitchen!  This week we will focus on creating or organizing a baking station.

Designate an area in your kitchen to hold all of your baking supplies.  It is so much more fun to bake when everything is within reach!

You may remember that last year, I organized my baking drawer.  You can find that post HERE.

Baking Organization

Today, I want to show you more of my baking station.  I can’t keep everything in that one drawer, so I keep all of my dry baking supplies in the cabinet above the refrigerator.

Although I can reach this cabinet, it isn’t easy for me to do so.  Therefore, it is the perfect spot for large, clear containers, that allow me to see their contents from where I stand.

Here is a picture of the cabinet.  This cabinet is not always used to its fullest potential in some kitchens, but it is a great space and probably one of your widest cabinets.  Let’s put it to work!

Baking Organization

The containers that hold the flour and sugar are from a brand called Lock & Lock.  The ones that rest above them, are disposable Ziploc containers that I use to put away cookie cutters and baking chocolate.    Right next to them, is a bin full of more cookie cutters.

Baking Organization

On the other side, I have Tupperware brand containers that hold items such as, coconut, powdered sugar, sprinkles and brown sugar.

Baking Organization

My baking drawer, which I shared with you last year, holds smaller items that I use for cake and cupcake decorating.

Baking Organization

And measuring cups and spoons.  I have multiple sets of those, considering most recipes call for dry and wet ingredients (and because I like collecting them).

Baking Organization

I like these containers because the lid stays open and I can easily fit up to a 1 Cup measuring cup inside.  I also use the top of the opening to level the cup.  Love that!

I purchased them about 5 years ago on QVC but you can still find them HERE.

Baking Organization

Lastly, in the cabinet right below the baking cabinet, next to the refrigerator, I have a small turntable full of baking spices.

Towards the back, I keep tea that is not used on a daily basis.  They are also on a turntable.

Baking Organization

Since I cannot keep all my baking supplies in one drawer, or cabinet, I do keep them all in the same area of the kitchen.  Everything is within hands reach.

Baking Organization

Above the baking spices is a ceramic box, full of my favorite teas.

Tea Station

Lastly, when you are done, wake up a little kid on a saturday morning and get them to help you in the kitchen, before they even have time to comb their hair.

Baking Organization

Everyone looks better with a little flour in their hair.  But that’s just my opinion.

Until Next Time,

Maria 

Filed Under: Kitchen, Top Navigation · Tagged: Baking, Kitchen, Organization

Organizing Spices

February 13, 2014 · by Maria · 1 Comment

A new week of kitchen organization is here!

This week, we peek inside the kitchen cabinets and reveal the spices.  I think most of us have 30 spice jars and only regularly use about 5 of them.  It’s ok.  No one wants to drive to the grocery store just to pick up “old bay seasoning” for a special recipe.

The problem is having 3 jars of old bay seasoning because you keep buying it – since you can’t see the other 2 that you already purchased last year.  Unless, you have seafood boils on a weekly basis.  In that case, it’s ok.  It is also ok to invite me.  (I will organize your cabinets if you let me, as a trade-off).

I love the idea of having spices in the kitchen drawer, but I have such a limited amount of drawers in my kitchen, that I choose to keep my spices in my pantry cabinet.

My cabinets are really deep and narrow.  Initially, I purchased tiered spice shelves and placed them the traditional way.  That didn’t work since the cabinet was so narrow and I could only fit one set.  There were always spices behind the tier organizer that were not visible.  I tried placing the larger jars towards the back and labeling the very top of the lid since I could see the label and that helped.

Ultimately, I found the best way to organize my spices is by placing the tiers side-by-side against the cabinet wall.  I added a similar tiered divider to the amazon store and you can find it ” HERE “.  Of course, you can also find these almost anywhere else…Target, Walmart…

Organizing Spices

I try to buy the same brand of spices, not only because I like the brand, but it adds more of a uniform look.

I also organized the spices alphabetically.  It seems like a crazy thing to do at first and it will take you a little while the first time you do it, but it is worth it – I promise.

Finding spices is so much easier this way, especially when you lose a bit of the visibility of the spices towards the back of the cabinet.  On the other side of the tiers, I place larger, frequently used items like salt and pepper shakers.

I also left enough room for my hand to be able to reach back, without knocking things over.

Organizing Spices

On the wall of the cabinet, I placed an adhesive acrylic box for all the seasoning packets.  I usually only use a sprinkle or two, and then I’m wondering where to put the open packet.  This solves that problem.  I think I purchased it at Walmart.

Organizing Spices


I do recognize that this method will not work for everyone, but I wanted to share this space with all of you just in case you had a similar-sized cabinet.

We still have a couple of things to touch on before we are done with the kitchen – so until next time,

Spice up your organizing!  (I had to!),

Maria  

Filed Under: Kitchen, Top Navigation, Uncategorized · Tagged: cabinets, Kitchen, Organizing, spices

Organizing Pots and Pans

February 6, 2014 · by Maria · 4 Comments

Pots and pans…how many do you have?  How many do you need?

Organizing all your pots and pans

Well, I need a lot of them.  I cook almost everyday and I enjoy it.  I enjoy it even more when I have the right tools.

In this cabinet (albeit small) I have:

– 8 Skillets

– 4 Small Pots

– 2 Stock Pots

– 2 Medium Pots

– 1 Steamer Pot

That’s a total of 17 pots and pans!  Not including, 3 enamel dutch ovens (probably my favorite), that I store inside my oven.  One of the enamel pots sits on the stove at all times, since I use it often.  I also have cast iron pans which are my husband’s favorite, since they can go directly on the grill.

I am not a fan of purchasing full sets of pots and pans sold in a box, although it is a good way to figure out what you use most.  The box is usually a better value, but I end up giving away the pots that I don’t use…this negates the whole “better” value concept.  I prefer selecting quality pieces that I will use often and will last for many years.

This also means that I haven’t been able to buy all these pieces at once.  I purchase maybe one piece a year or my husband will give me one for my birthday or mother’s day.  I am one of those women that is REALLY excited to receive a stockpot as a gift.  Truly, it’s what I like.  Why should I ask for pearls when I really want something for the kitchen?

Not all of my cookware is expensive or that high of a quality.  I have yet to splurge on really good non-stick, so I have pans that do the job but won’t last for many years.  A good non-stick 12-14 inch pan is on my list though (honey, I know you don’t read all my posts, but I really hope you are reading this one!).  I get points for subtlety.

Back to how I organize the pans.  I get points for segues too.

I found a metal rack that could be used to store files or bakeware, and I placed it on its side.  It fit perfectly snug inside my cabinet, so each skillet rests safely in separate slots.

Organizing all your pots and pans

Next to the skillets, I have smaller sauce pots since the skillets take up a lot of room.  Behind the sauce pots, I have a large stockpot and a steamer pot.

Items that are rarely used are always towards the back.  The most used items get the best real estate.

Organizing all your pots and pans

In the top shelf, I place medium-sized pots.  I stack the ones that are alike.  Towards the back, I keep larger, less used deep skillets and pots.

Organizing all your pots and pans

This is the largest cabinet in my kitchen and that’s why I chose it for this purpose.  In some of the smaller corner cabinets, I keep specialty pots like pressure cookers, rice cookers and slow cookers.  I label the shelf to remind me of the item behind the front pot, since it’s not visible.

Organizing all your pots and pans

The labeled shelf…

Organizing all your pots and pans

I do suggest that before organizing all your pots, you take them out of your cabinets and make sure they deserve the space that they are taking up.  Obviously, I am not a minimalist when it comes to the kitchen, but I don’t keep things that I don’t use.

At this point, if I did get another non-stick skillet, I would have to get rid of a skillet.  Otherwise, this cabinet would turn into stainless steel mess.  It already does when I don’t put things back where they go.  And by “I”, I totally mean my husband.  Sorry Babe.

Do you enjoy cooking too?  Do you also get excited when kitchen catalogs arrive in the email?  Tell me that I’m not alone!

Filed Under: Kitchen, Top Navigation · Tagged: Kitchen, Kitchen and Dining, Kitchen Organization, Organization

  • « Previous Page
  • 1
  • …
  • 34
  • 35
  • 36
  • 37
  • 38
  • …
  • 44
  • Next Page »

Welcome! I'm Maria, the blogger behind Graceful Order. I hope to share with you helpful ideas about organizing, cleaning and entertaining. I am passionate about living a healthy, balanced life with my husband and two boys. A life where I am in charge of my home and not the other way around. A life with a little bit of order, and a whole lot of grace!

  • Email
  • Facebook
  • Instagram
  • Pinterest
  • Twitter

Tips for Organizing Laundry Closets

Popular Posts from 2014

Posts of 2014

Blog Archives

Search by Month

Copyright © 2025 | Disclaimer

Copyright © 2025 · Innovative Child Theme on Genesis Framework · WordPress · Log in